
Before You Start
Ensure you have:- A GitHub account with admin or owner permissions for the organization or repository you want to connect.
Creating a GitHub Connection
Install GitHub App
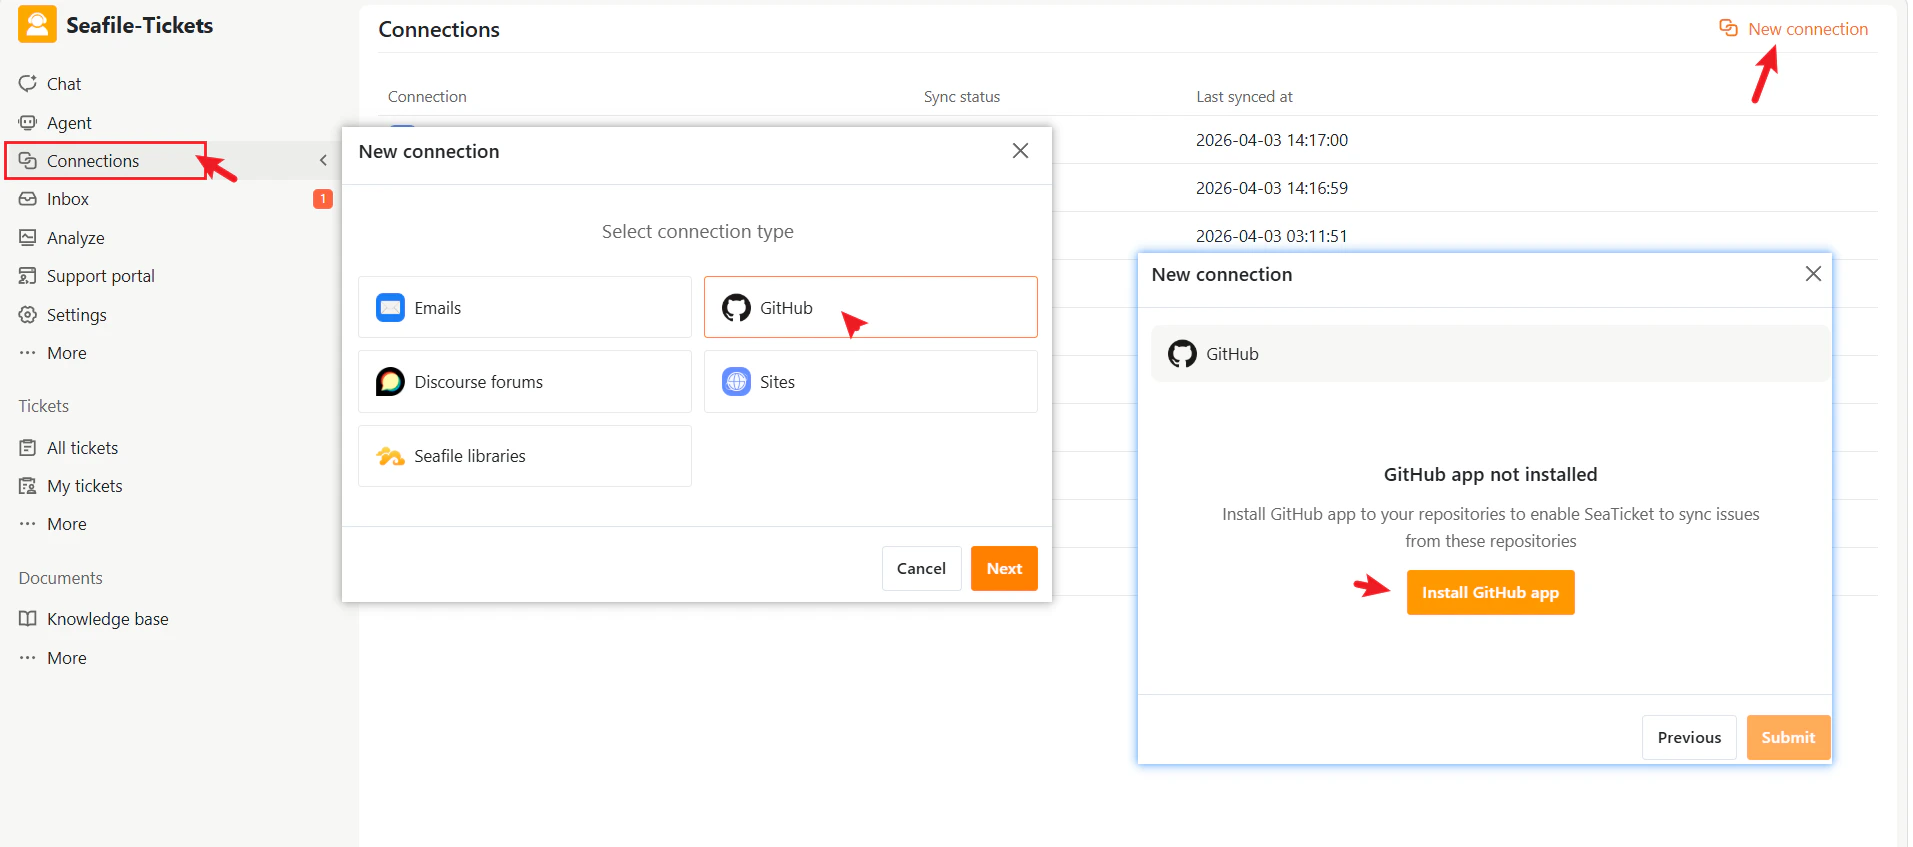
- Go to Connections in the left sidebar.
- Click + New Connection.
- Select GitHub as the connection type.
- Click Install GitHub App. You’ll be redirected to GitHub.
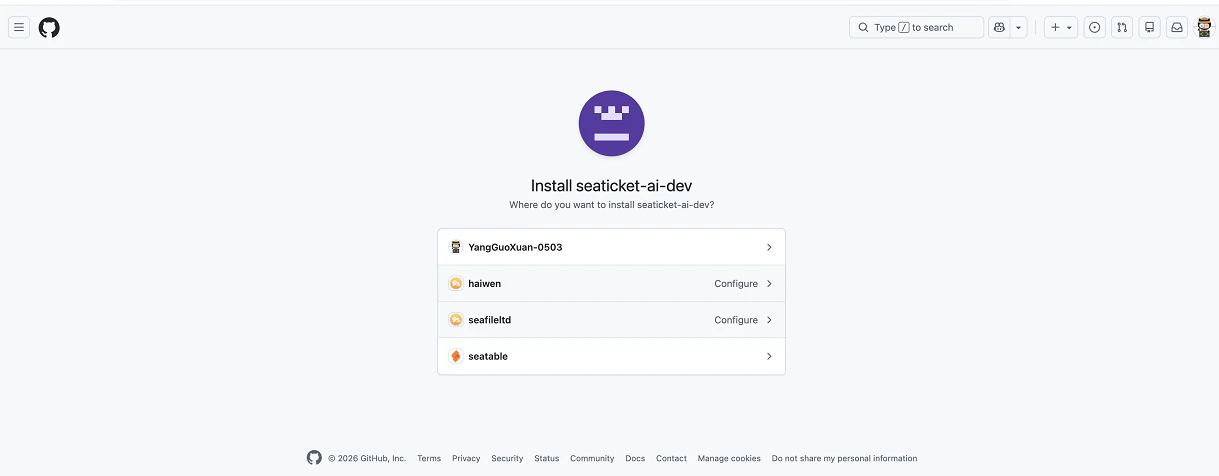
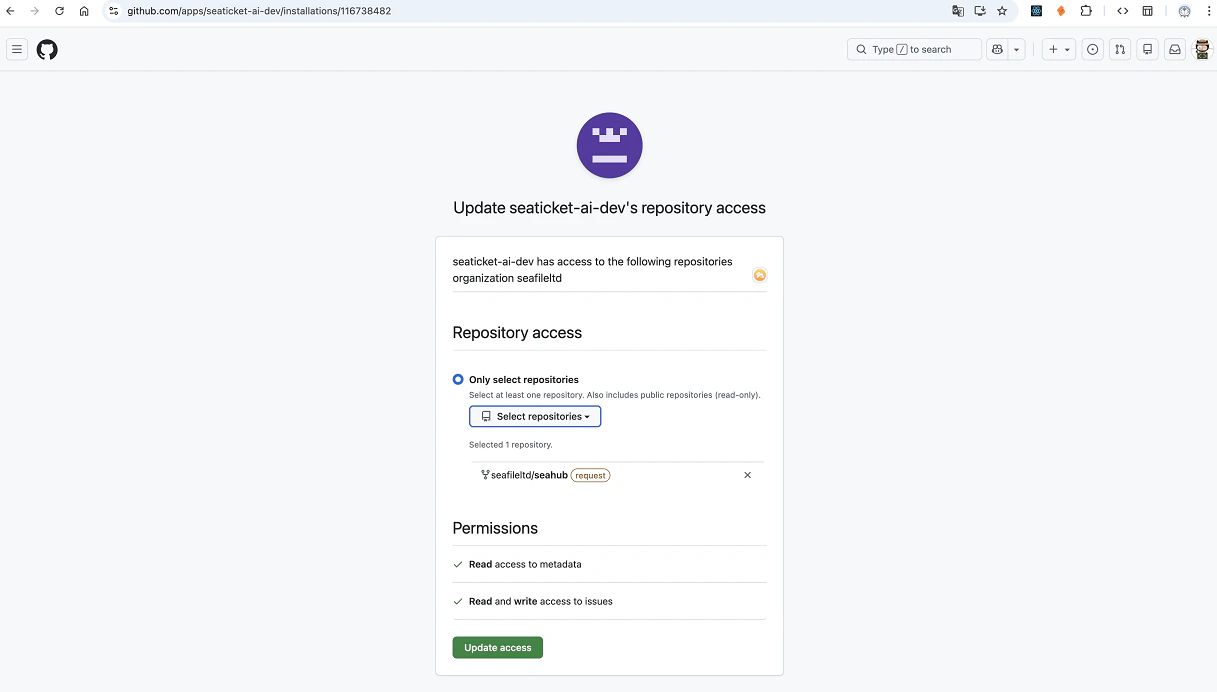
- On GitHub, select your installation target—choose the GitHub organization or personal account that hosts your repository.
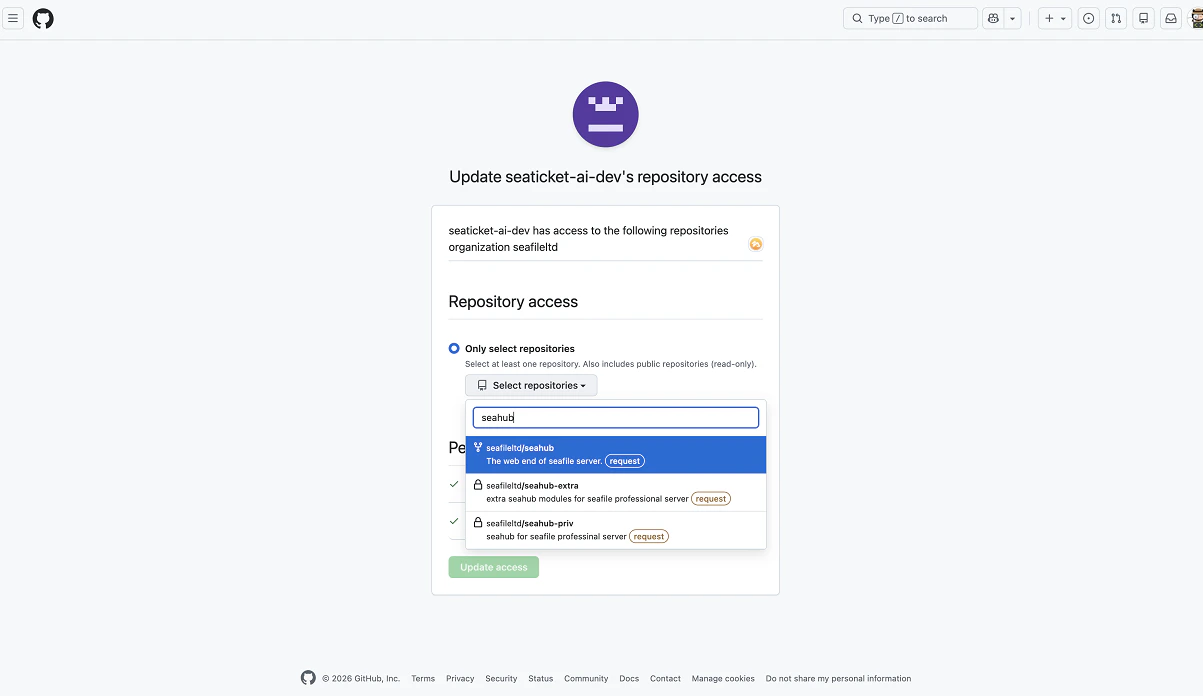
- Set repository access—select which repositories SeaTicket can access.
- Review the requested permissions:
- Read access to metadata – allows SeaTicket to view repository and issue details.
- Read and write access to issues – allows SeaTicket to sync issue status, comments, and labels.
- Click Update access or Install to finalize the authorization.
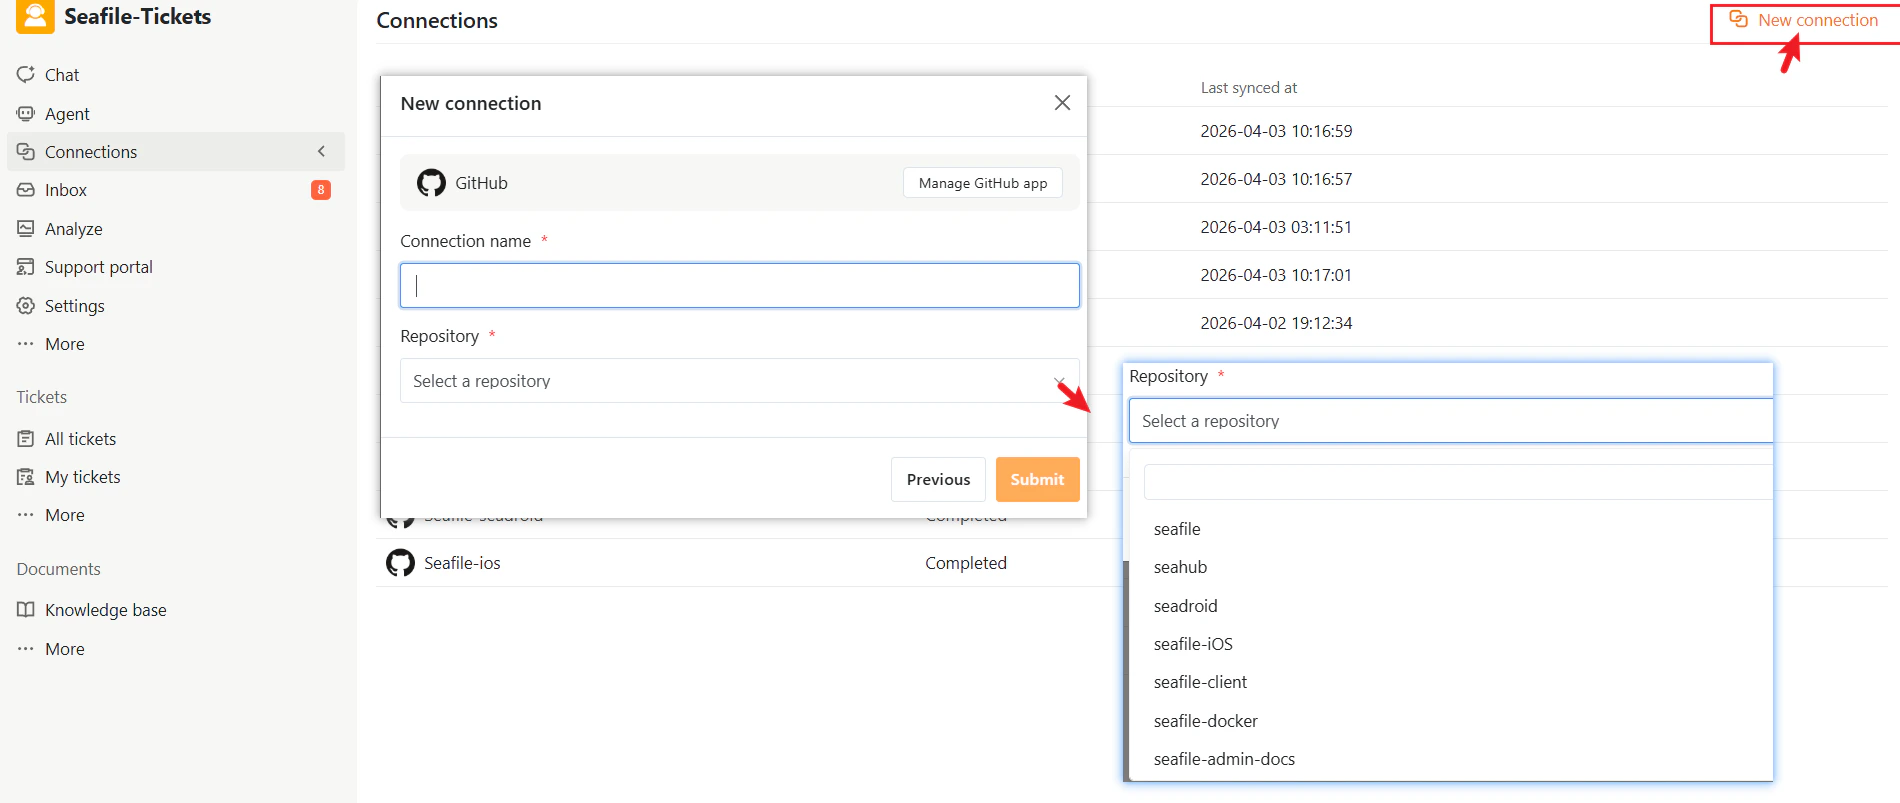
Confirm Connection
- After authorization, return to SeaTicket and give the connection a descriptive name.
- From the dropdown, select the repository you just authorized.
- Click Submit to complete the setup
After Connection
Once the connection is created:- SeaTicket automatically syncs GitHub Issues
- Issues are displayed in a list view
- Updates appear in SeaTicket in real time
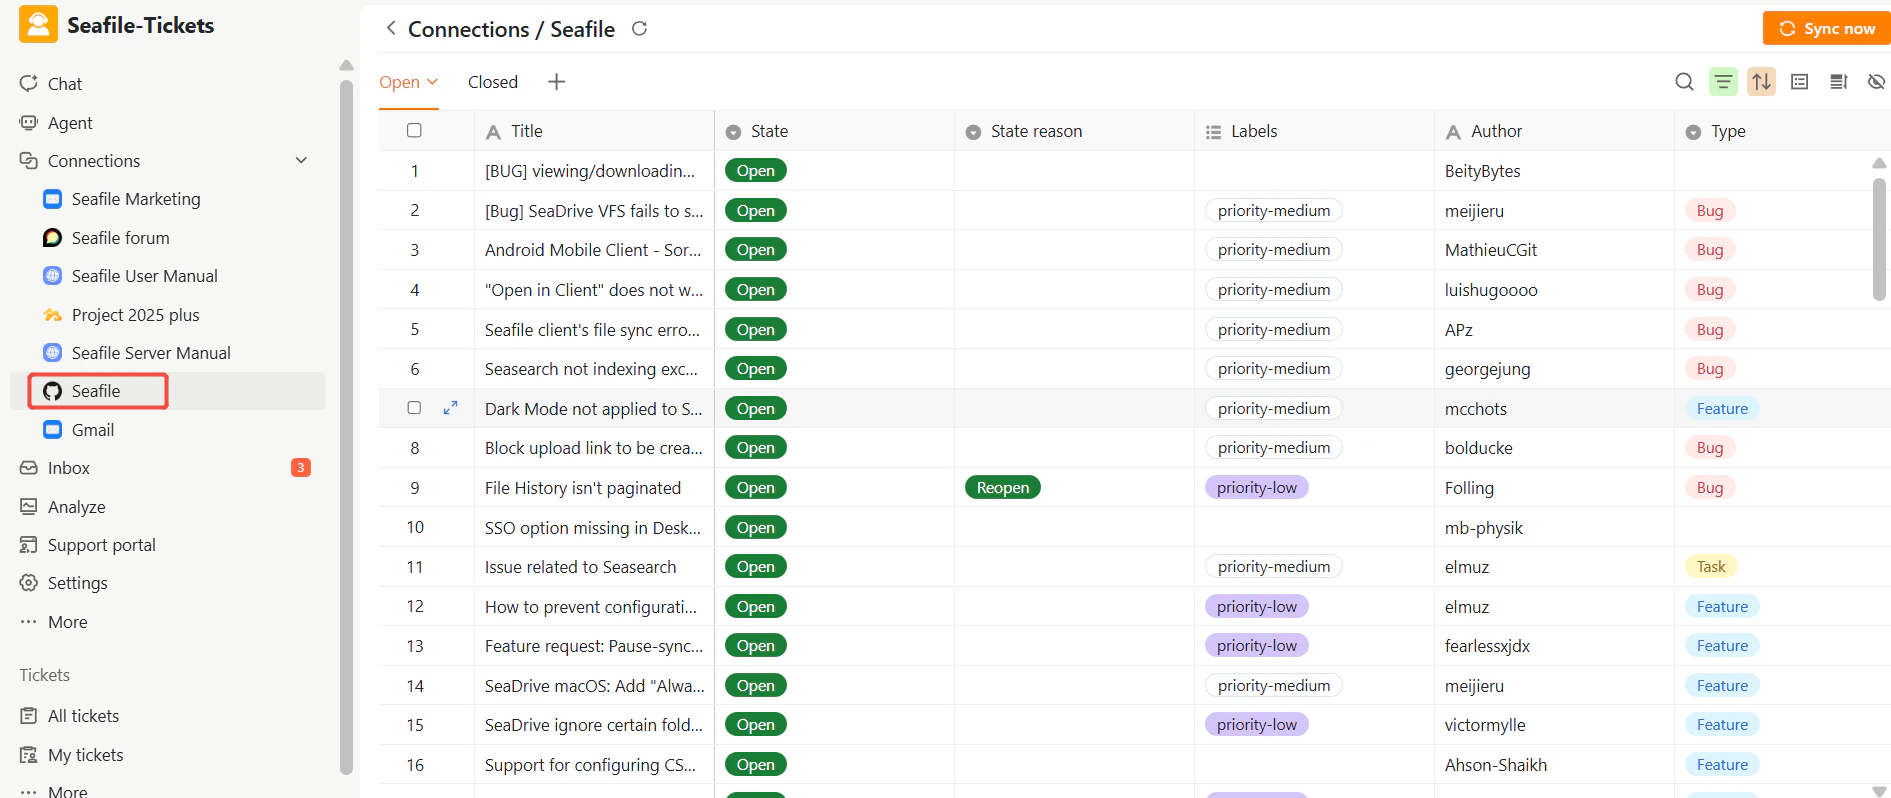
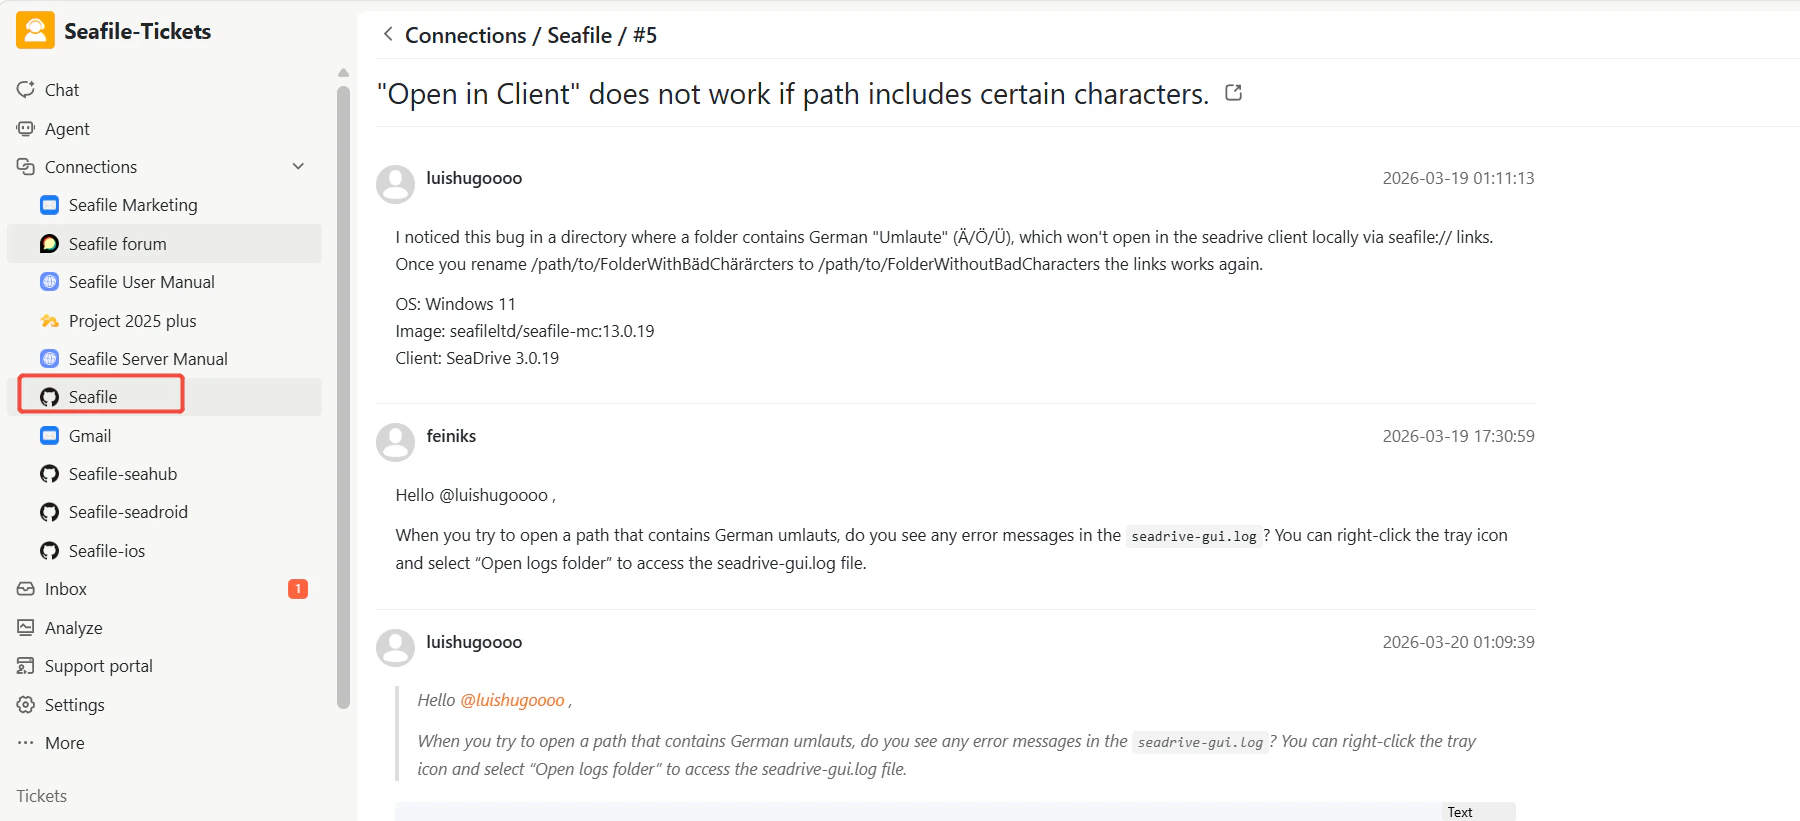
Synced Issues
For each issue, SeaTicket records:- Title
- State (open / closed)
- State reason
- Labels
- Author
- Created / Last modified / Closed time
- Total comments (including all discussions)
- AI summary
- AI processed time
Viewing Details
After data has been synced, click on an item’s title to view its full content. GitHub Issues: View issue details, comments, and updates