The Email connection allows you to connect external mailboxes and sync emails into SeaTicket.
This guide uses Gmail as an example.
Before You Start
Ensure you have the following:
- An app password if required by your provider (recommended for Gmail)
Creating an Email Connection
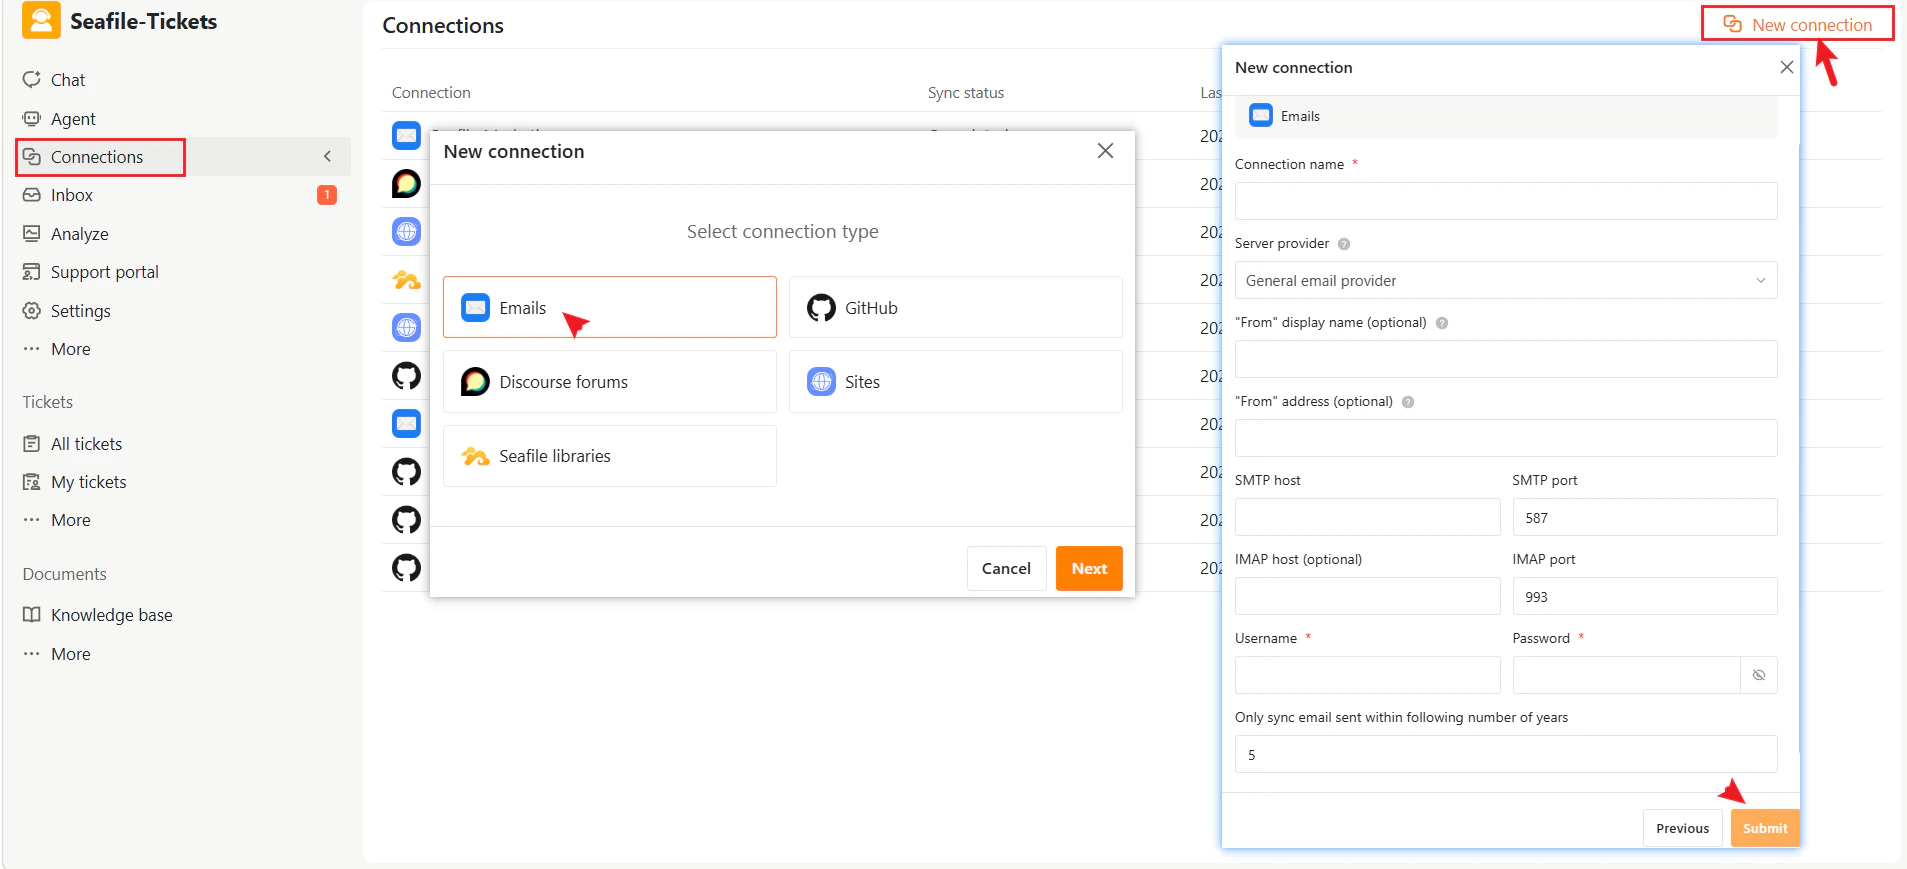
- Go to Connections in the left sidebar.
- Click + New Connection.
- Select Emails as the connection type.
- Click Next.
- Enter the required configuration details.
- Click Submit to complete the setup.
- Connection name
A name to identify this connection (for example, Gmail Support Inbox).
- Server provider
Select the appropriate authentication mode for your email provider.
- From display name (optional)
The sender name displayed in outgoing emails.
- From address (optional)
The email address used as the sender.
Server Settings
- SMTP host
Example: smtp.gmail.com
- IMAP host (optional)
Example: imap.gmail.com
Authentication
Sync Settings
- Only sync emails sent within the following number of years
Limits how far back SeaTicket retrieves historical emails.
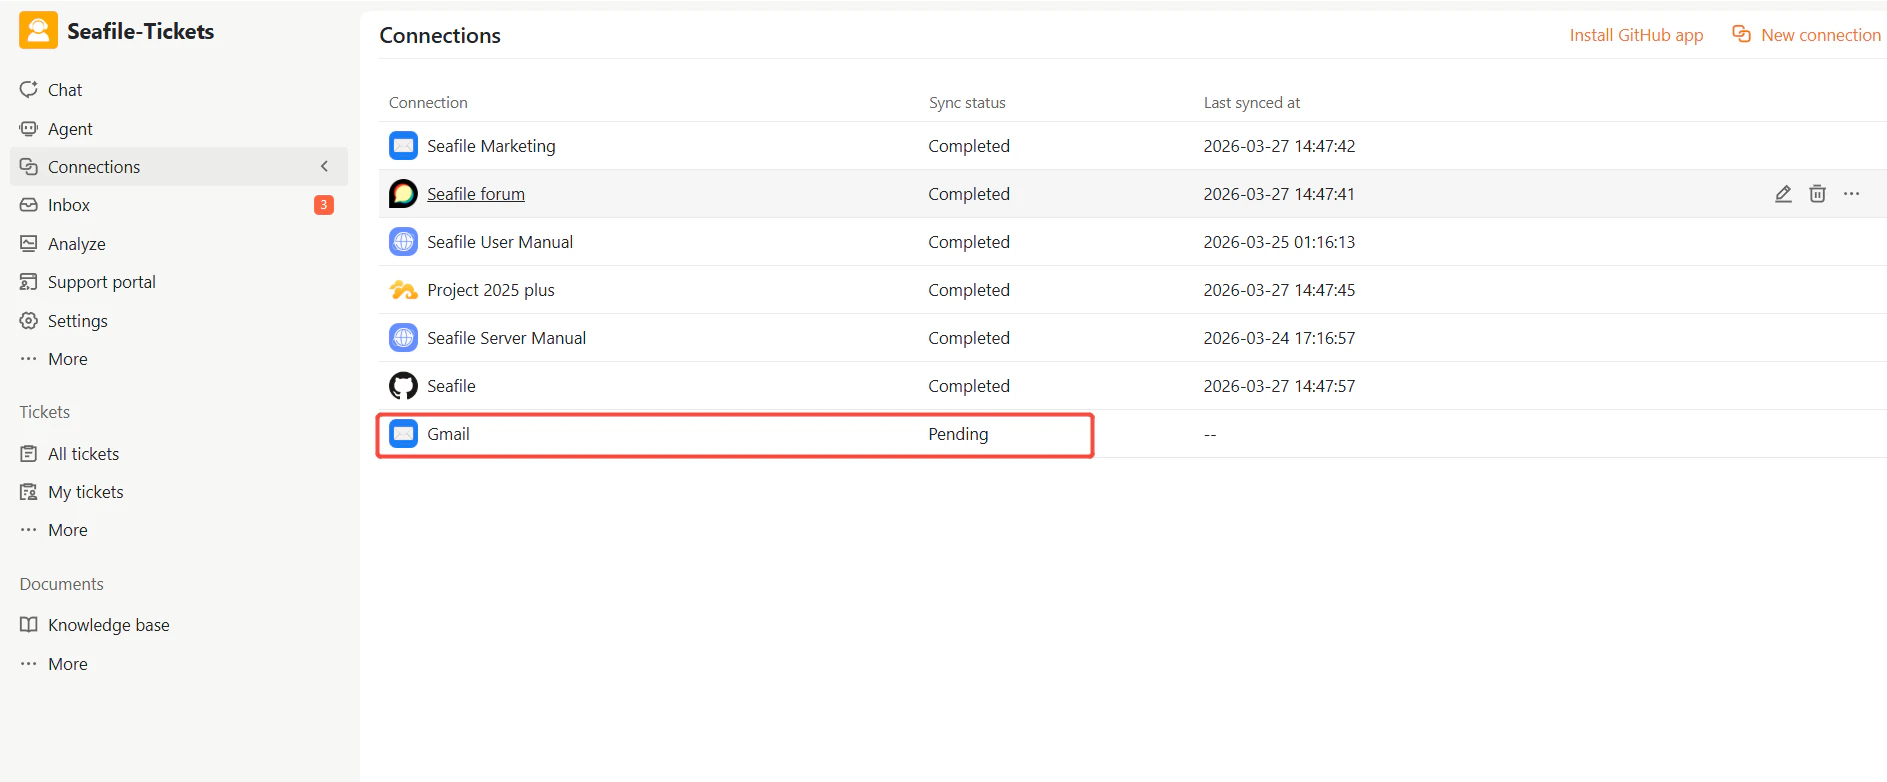
After Connection
Once the connection is created:
- SeaTicket starts syncing emails automatically
- Emails are displayed in a list view
- New emails continue to sync based on the connection settings
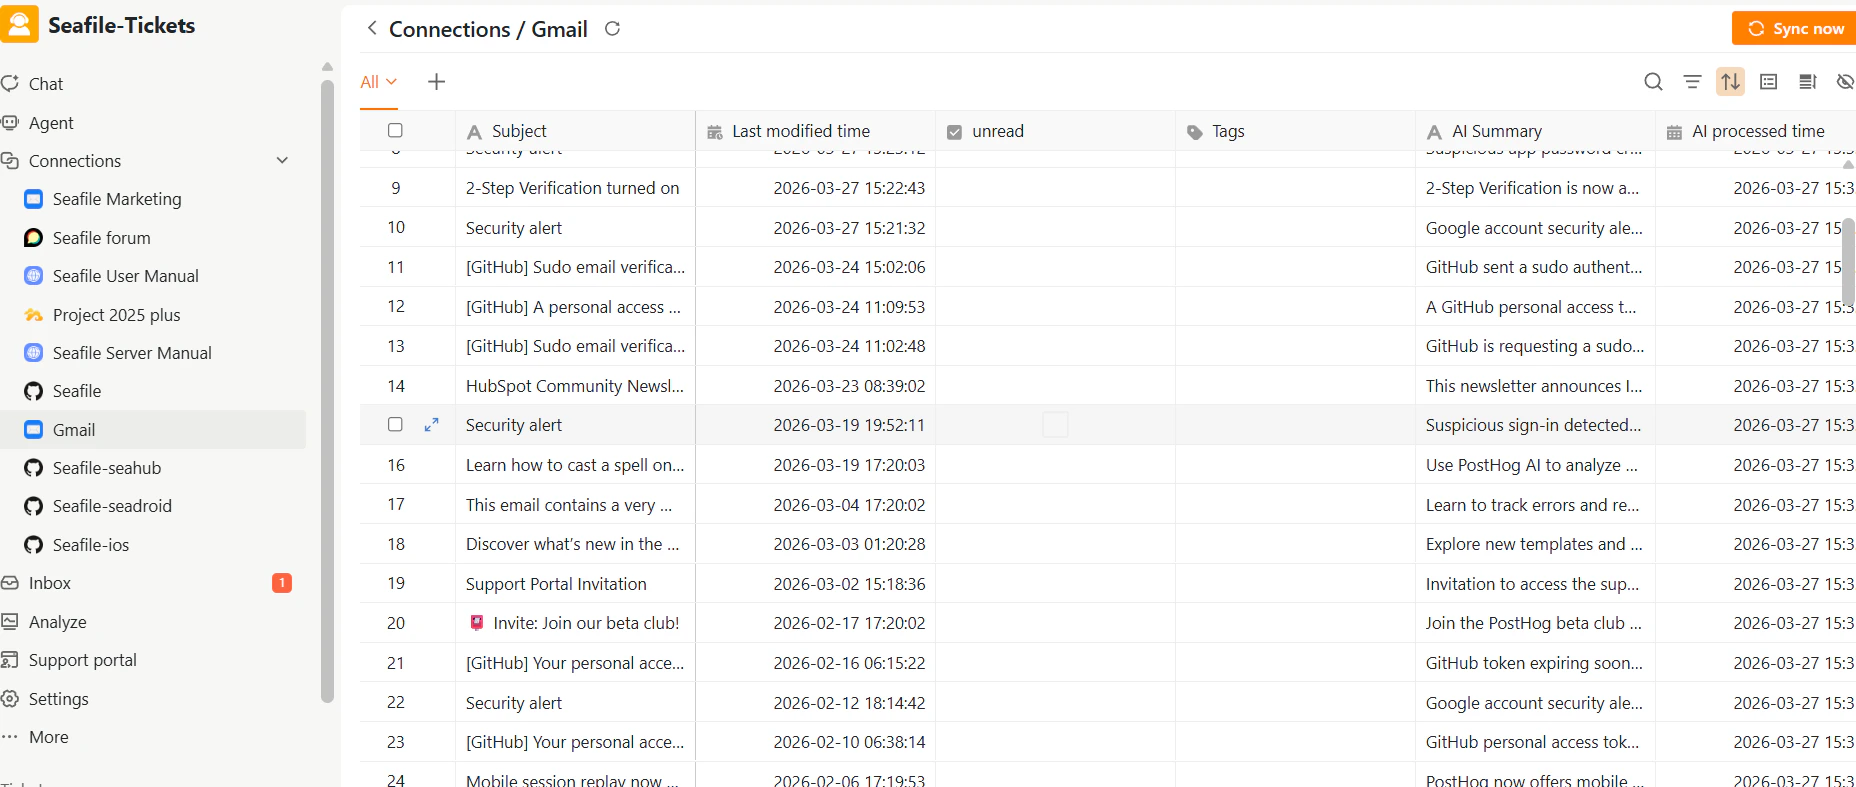
Synced Email Data
For each email, SeaTicket records:
- Subject
- Last modified time
- Unread status
AI-generated summaries are also available for each email:
- AI summary
- AI processed time
Emails are automatically synced every 1 hour.Initial synchronization may take time depending on mailbox sizeEnsure your email provider allows IMAP/SMTP accessIf synchronization fails, check authentication settings or server configuration
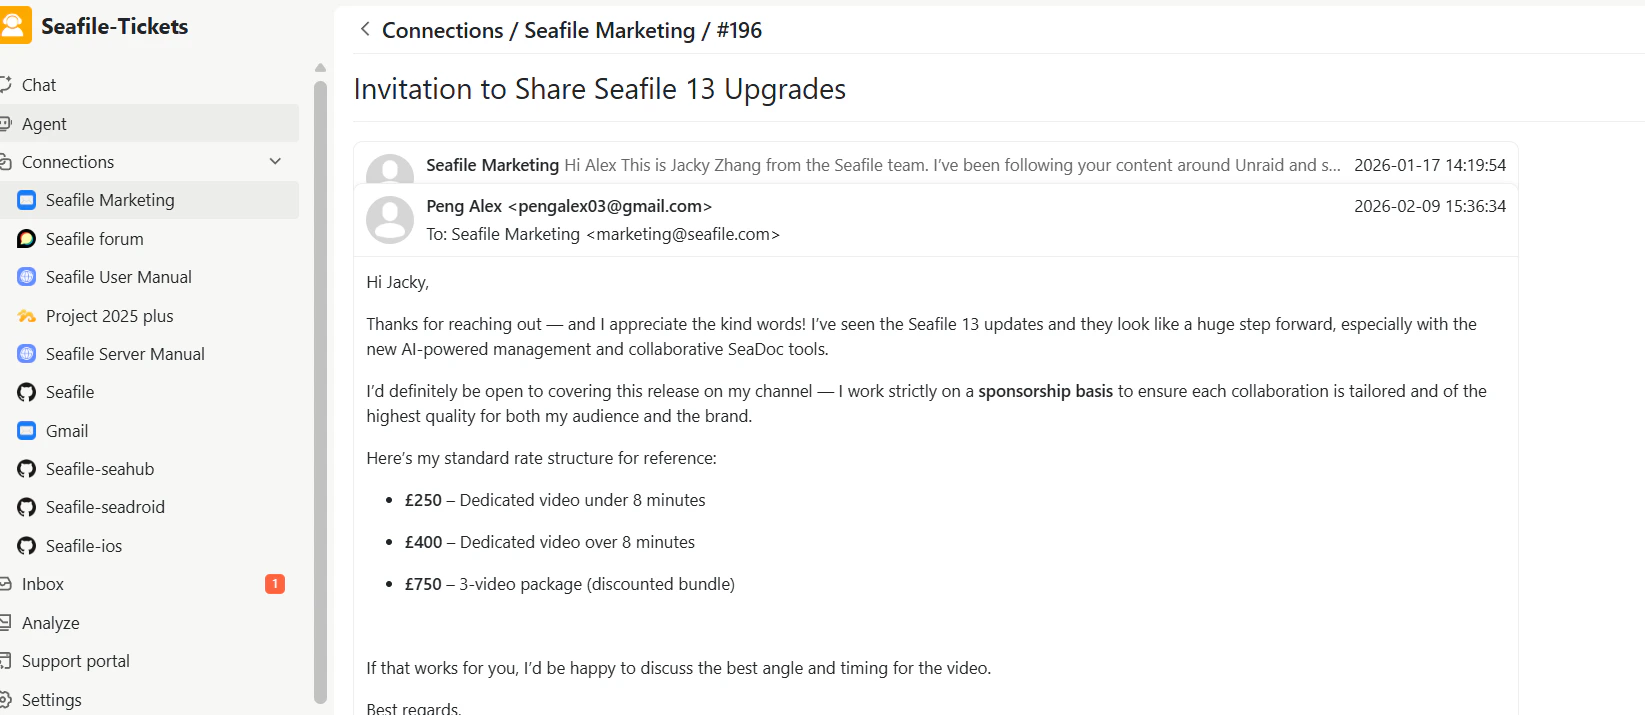
Viewing Details
After data has been synced, click on an item’s title to view its full content.
Emails: View the complete email thread, including all replies and conversation history.