
Creating a Ticket
From a Synced External Issue
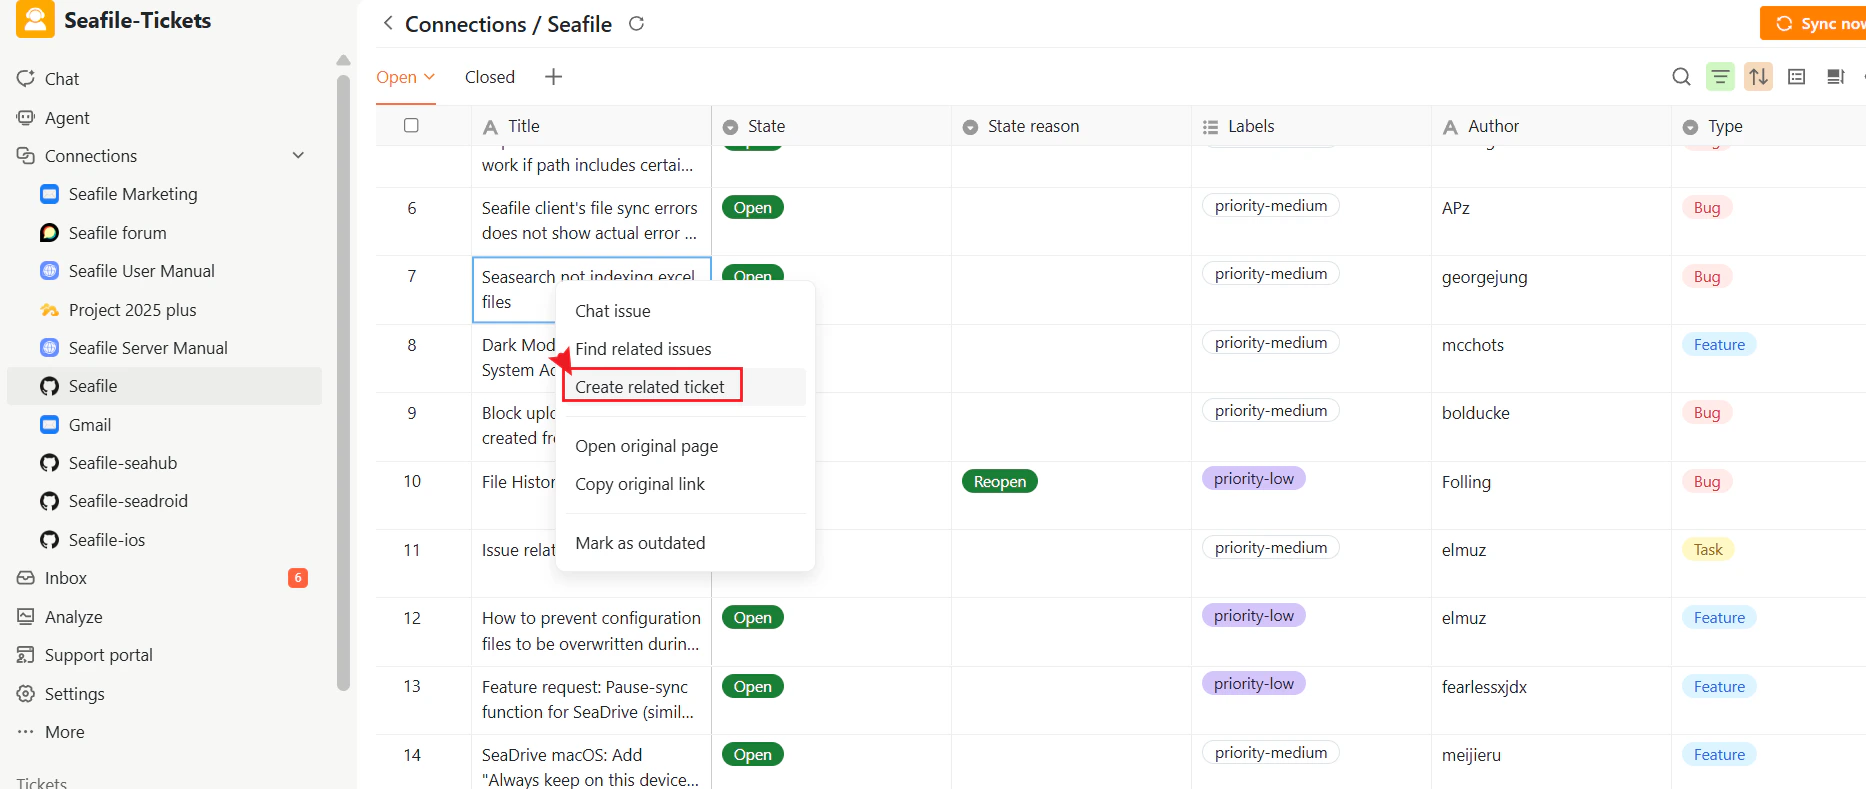
- Open the desired project and navigate to Connections in the left sidebar.
- Select a synced external issue from the connection panel.
- Click Create Related Ticket.
- In the popup window, review and complete the ticket title, description, and type.
- Click Submit.
Creating a Ticket Manually
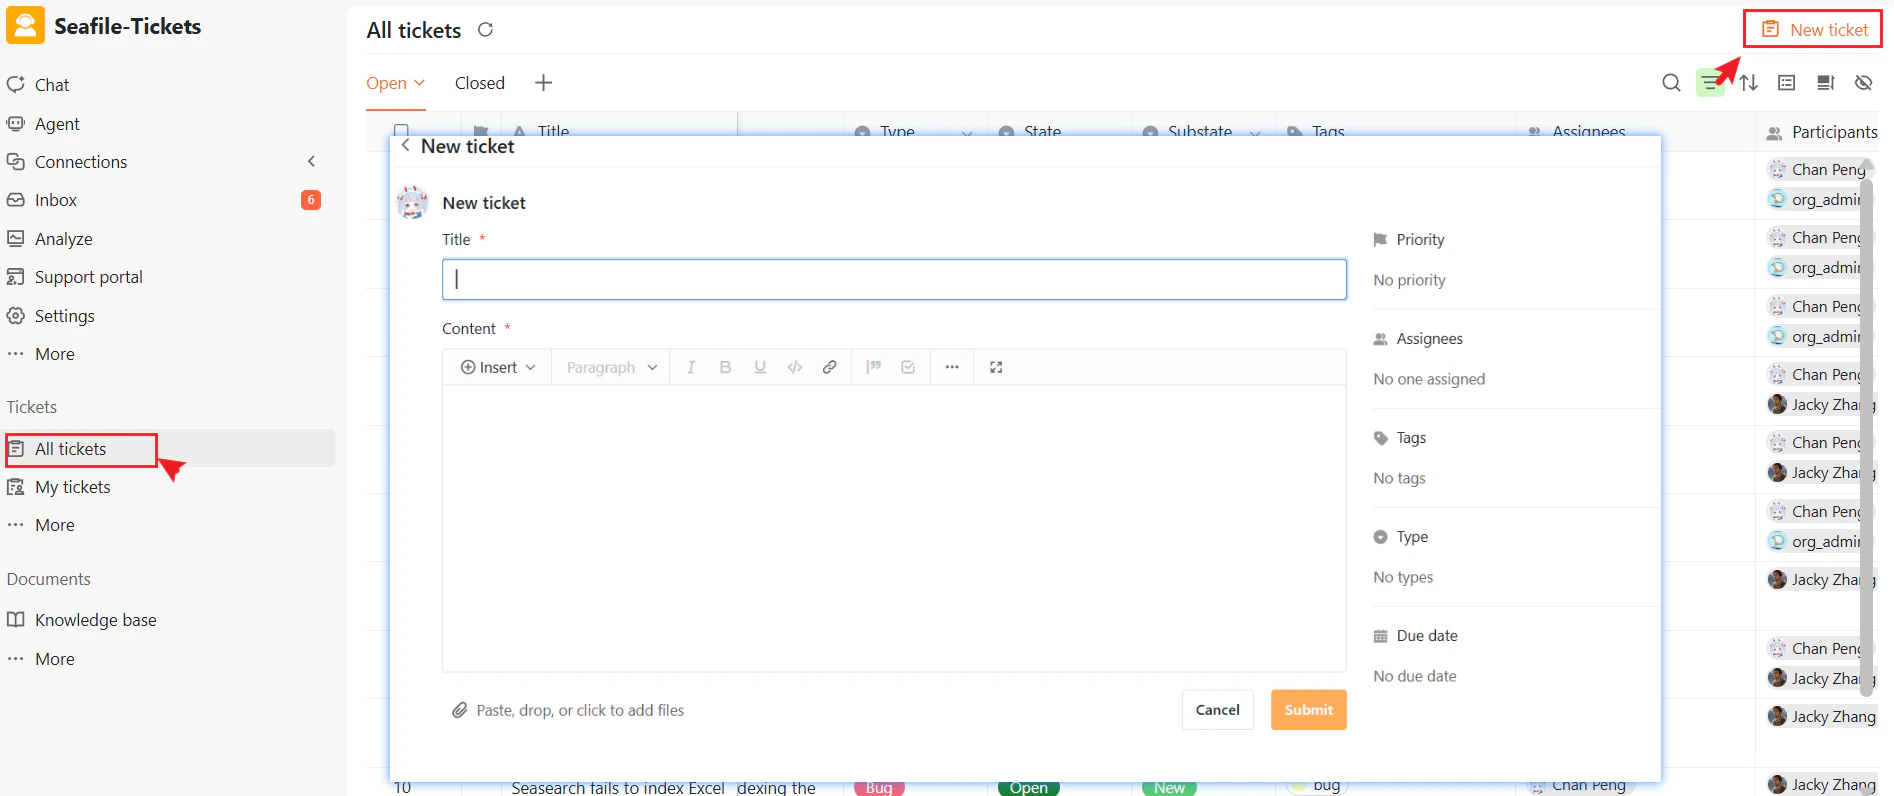
You can also create a ticket manually by following these steps:- Open the desired project and navigate to Tickets → All Tickets in the left sidebar.
- Click + New Ticket in the top-right corner.
- Fill in the required ticket details and add any attachments if needed.
- Click Submit.
Ticket Page Overview
On the New Ticket page, you can view and configure the main parts of a ticket.Title and Content
When a ticket is created from a synced external issue, its title and content are generated by AI based on the issue content and related discussions. The content includes a link to the original issue for full context. Both fields can be edited manually at any time. When a ticket is created manually, you fill in the title and content yourself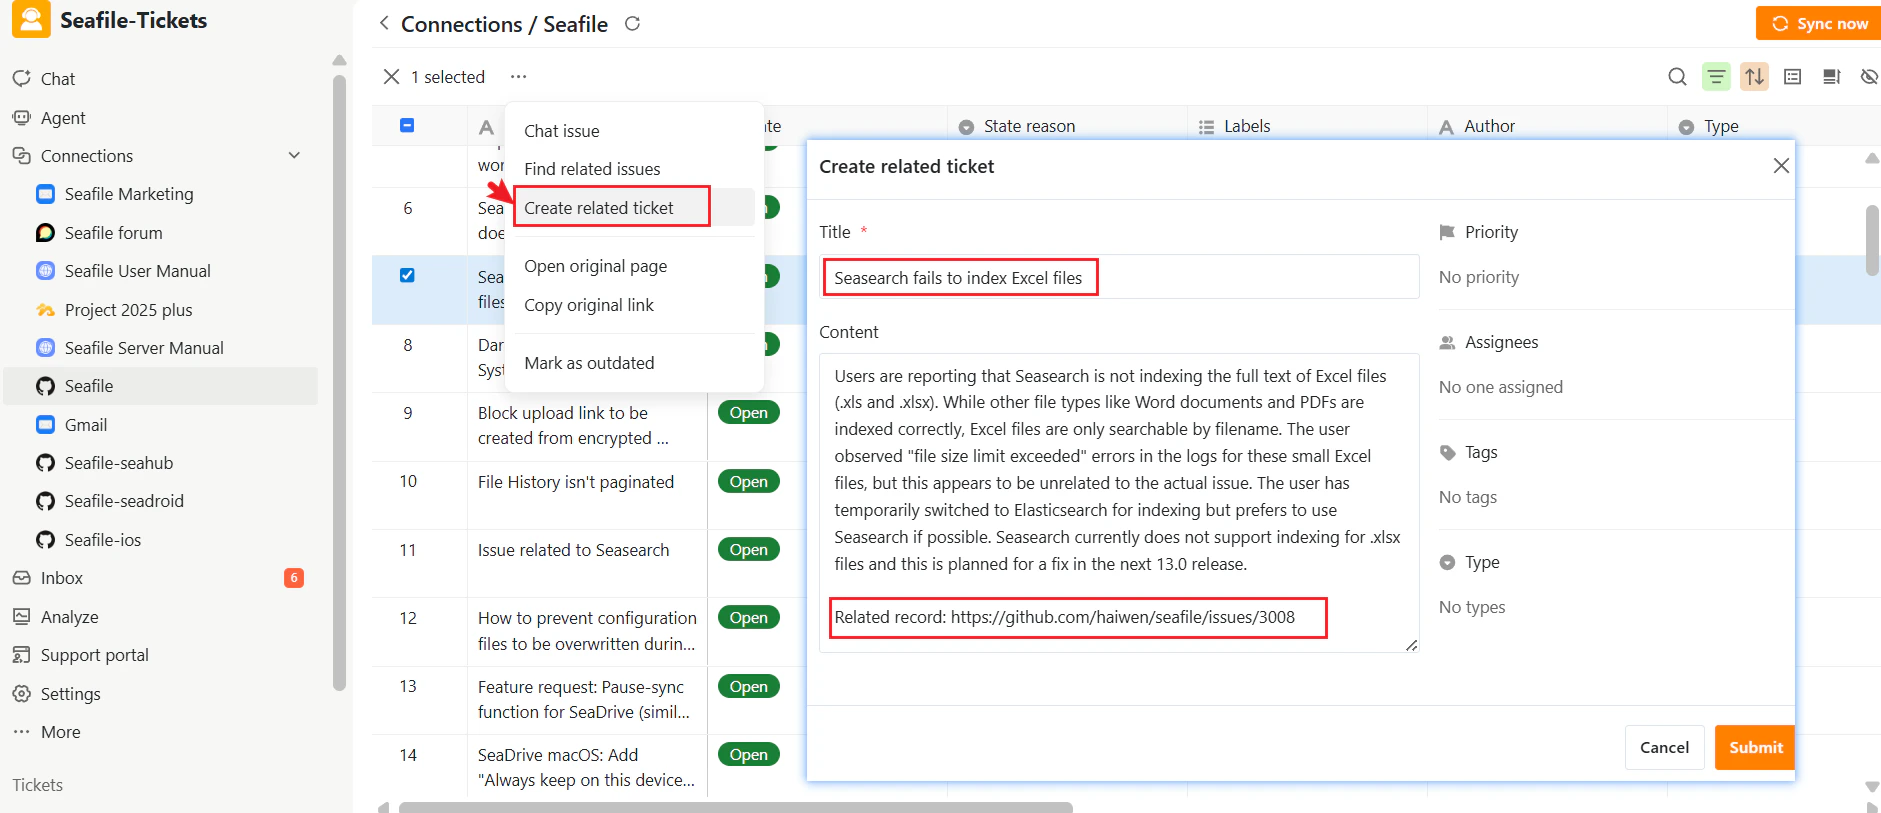
Ticket Properties Panel
The Ticket Properties panel appears on the right side of the ticket page and contains fields for managing the ticket: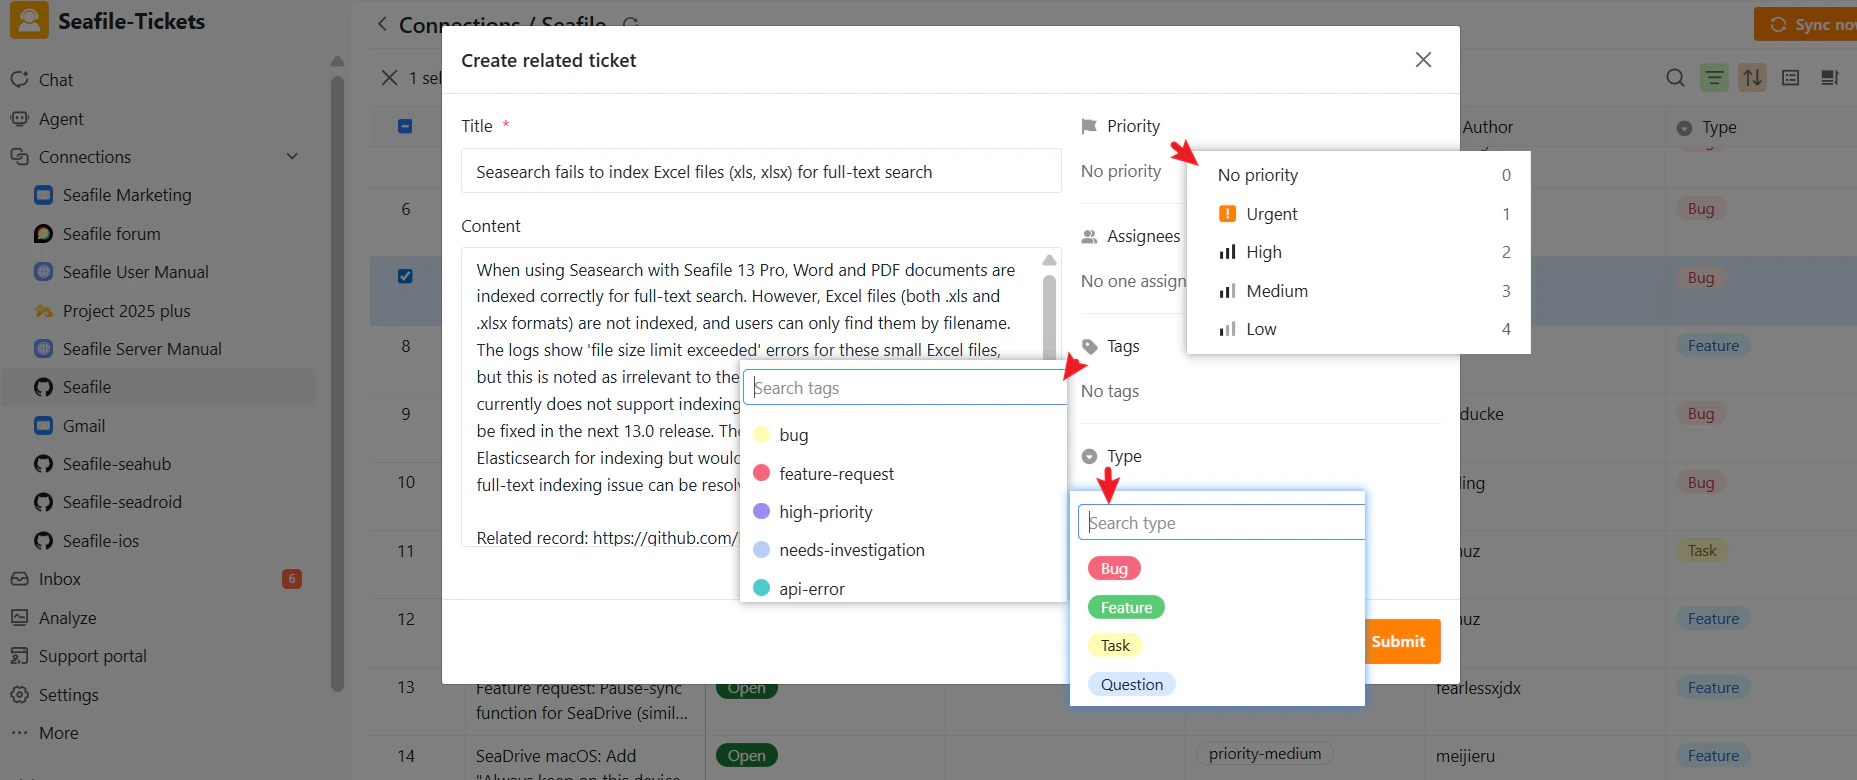
AI Summary and AI Processed Time
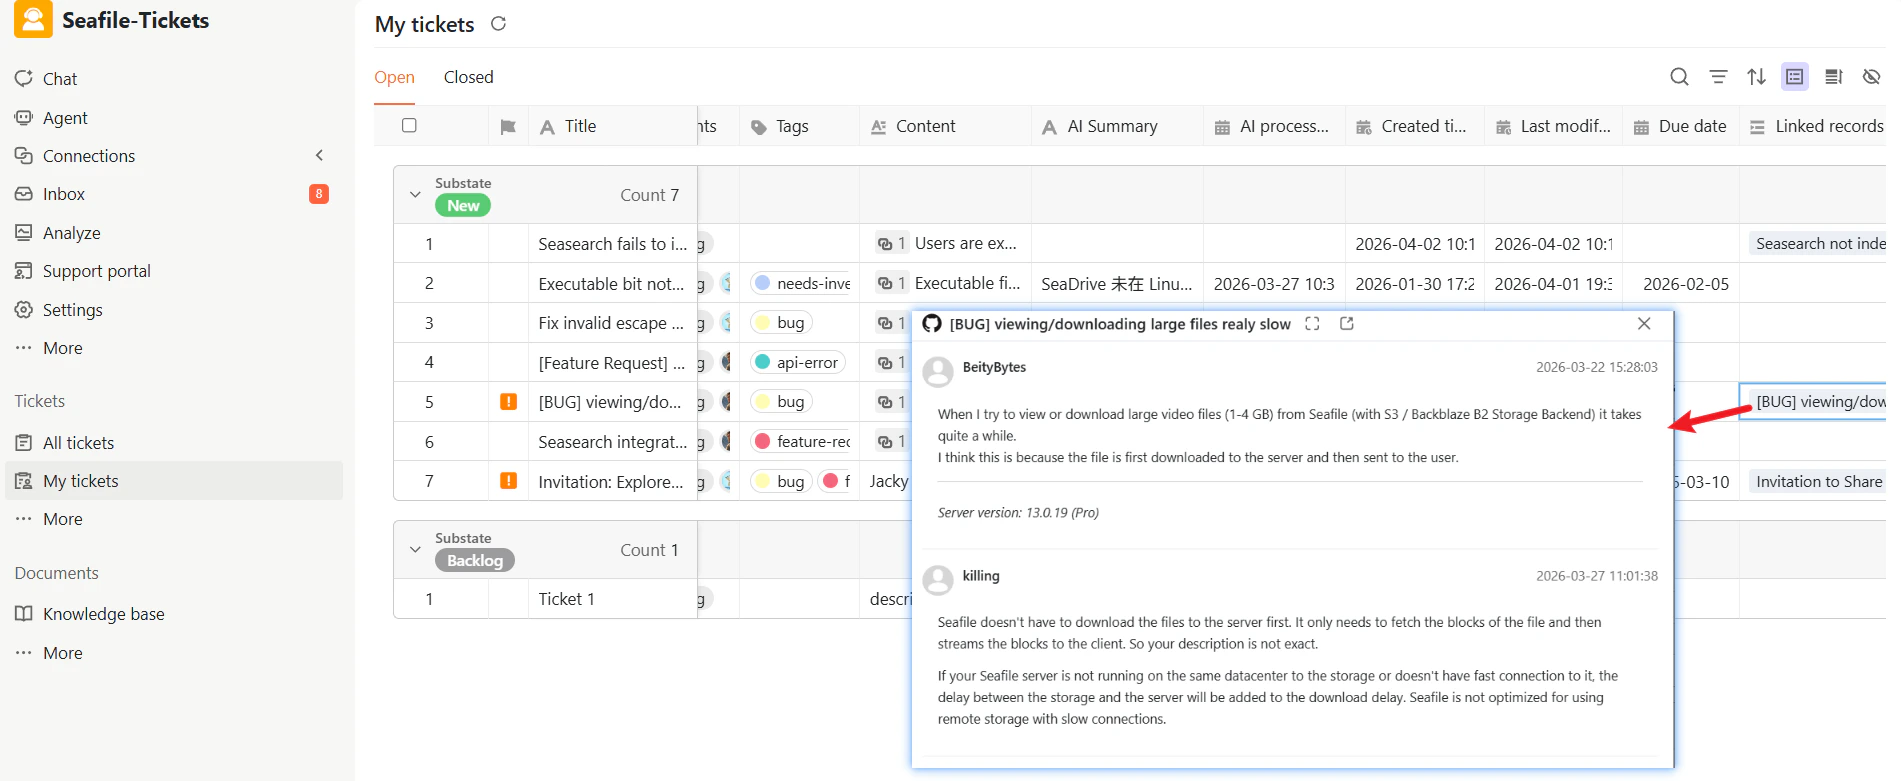
SeaTicket automatically generates a summary for each ticket — whether created manually or from an external issue — and records when the AI processing was completed. These fields are visible in the ticket list and help responders quickly understand a ticket without opening it. For more on AI capabilities, see the AI Assistance section.Viewing Tickets
Once submitted, the ticket appears in both the All Tickets and My Tickets lists with status Open and substate New.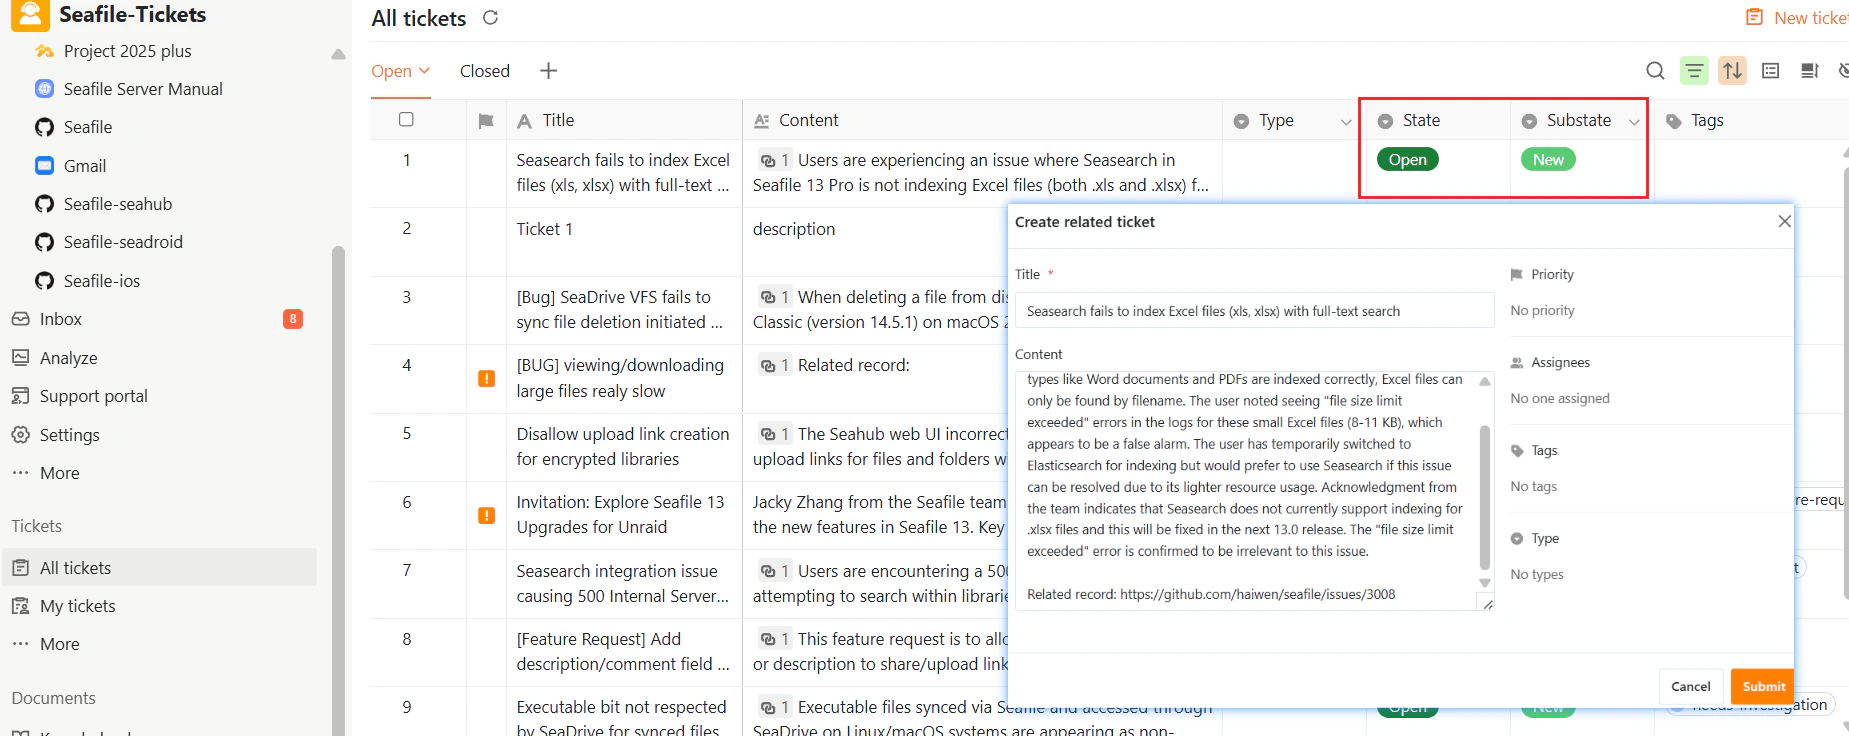
Ticket Lists
The ticket workspace is organized into two main lists for managing tickets: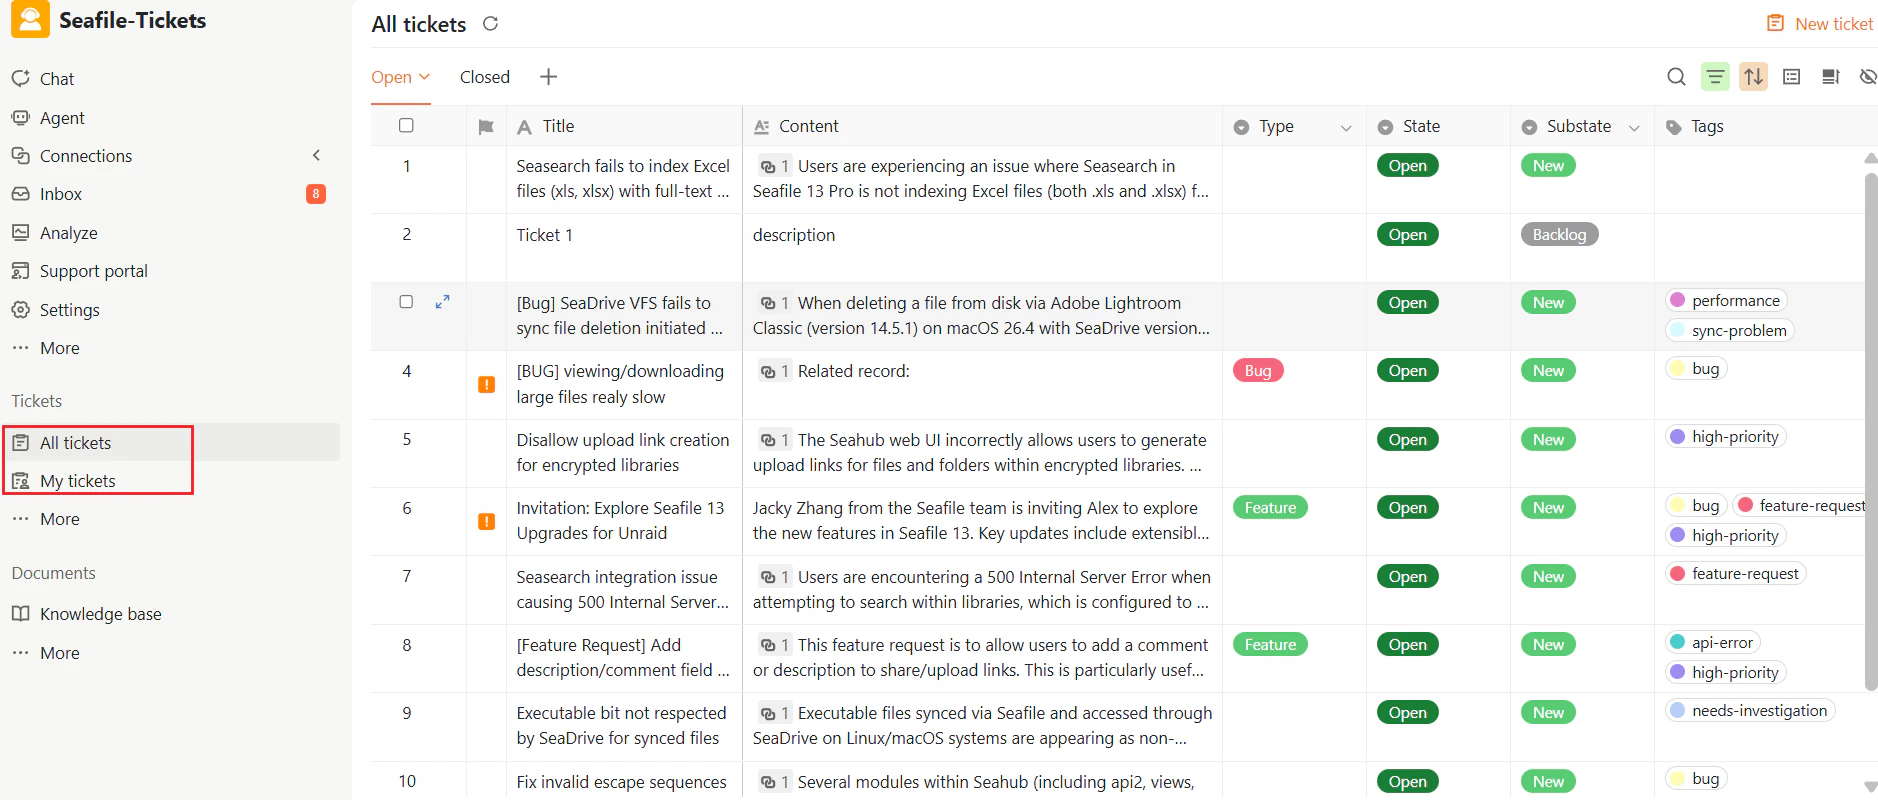
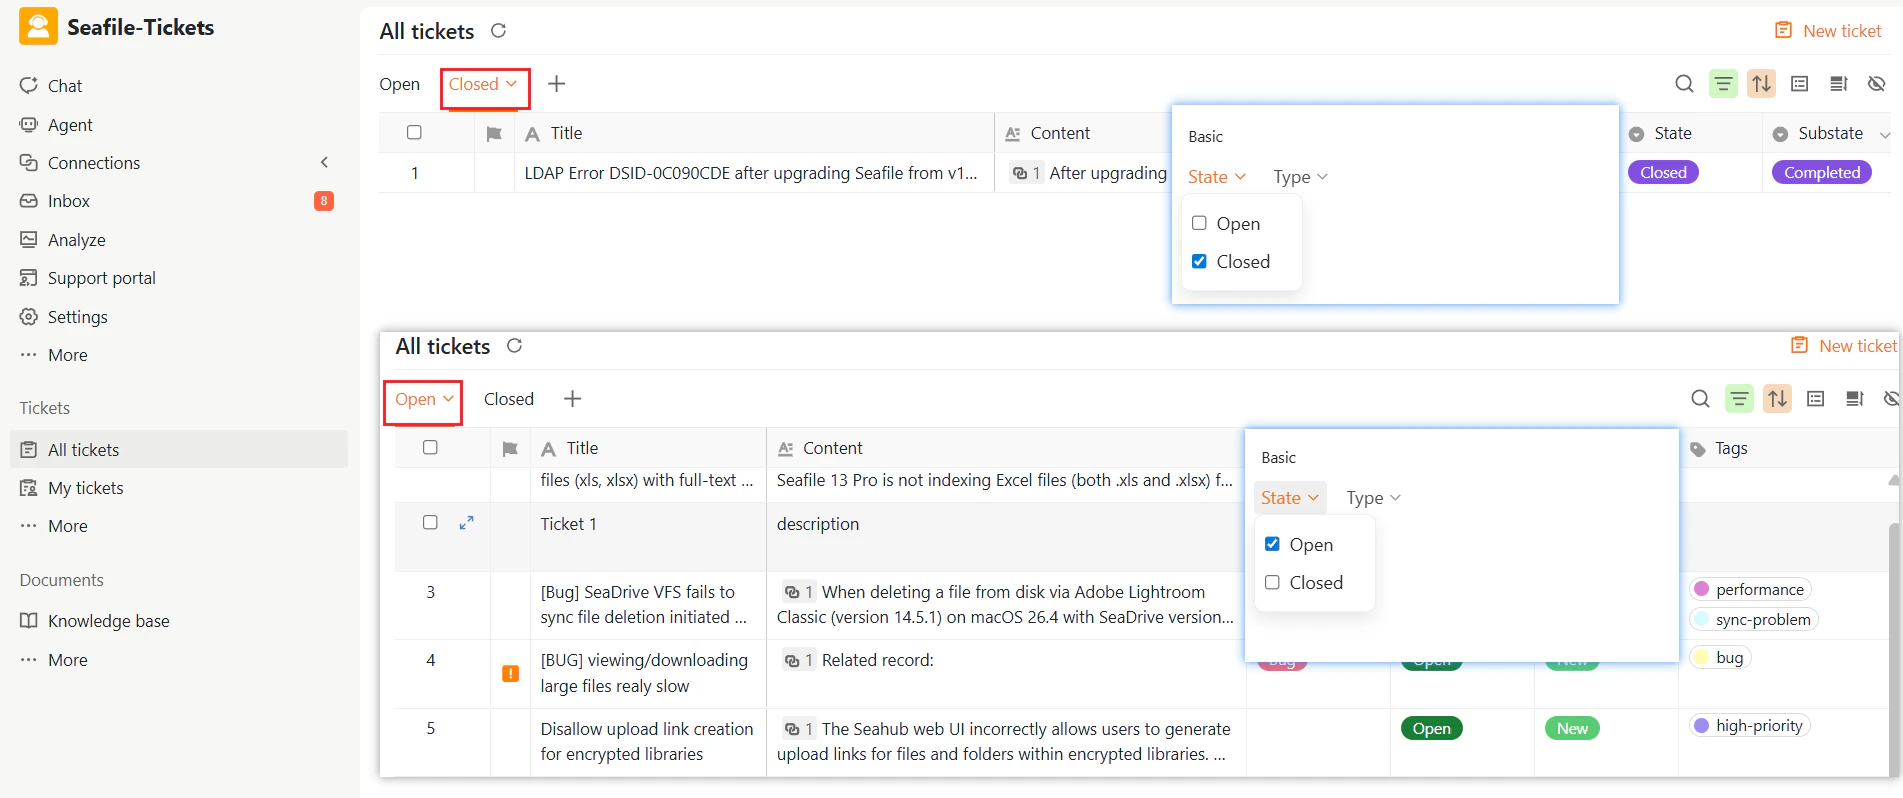
Ticket List Views
Within both lists, tickets are organized into two default views:- Open: Shows tickets that are not yet resolved.
- Closed: Shows tickets that have been completed or closed.
Ticket Fields
In the ticket list you can view key fields at a glance, including Priority, Assignees, Type, Tags, and:- Timestamps — Created time, last modified time, and closed time
- Due Date — A manually set deadline for the ticket
- Linked Records — For tickets created from external issues, this field links back to the original issue
- AI Summary and AI Processed Time — Auto-generated summary and the time AI processing was completed