

- Open — shows all active tickets
- Closed — shows all resolved tickets
Customizing a View
You can customize any view using the tools in the top-right corner of the ticket list.Filtering
Filtering lets you display only tickets that match specific conditions. Click the Filter icon in the top-right corner to open the filter panel.- Basic filters — Filter by State (Open / Closed) or Type (Bug, Feature, Task)
- Advanced filters — Build detailed conditions using attributes such as Tags or Substate, combined with AND / OR logic

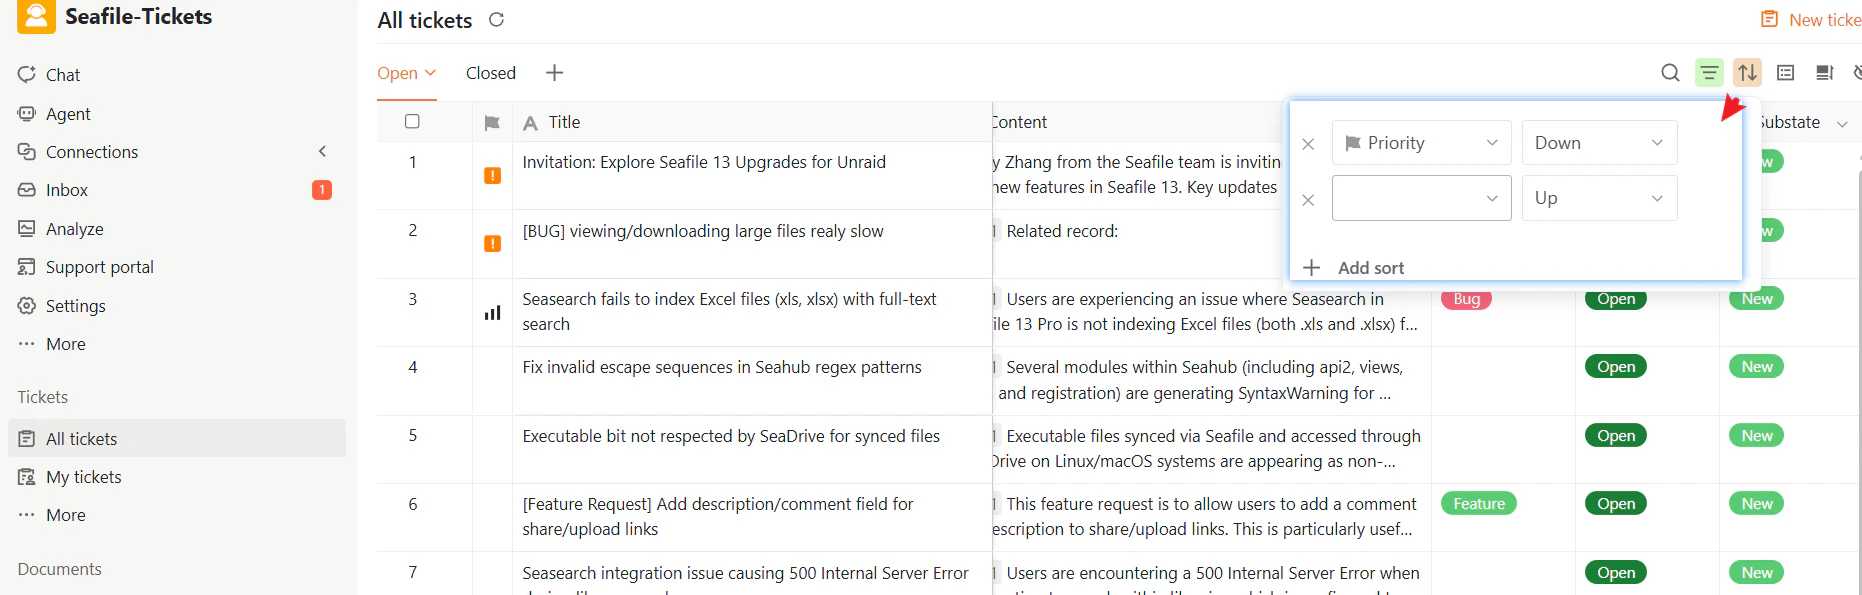
Sorting
Click the Sort icon in the top-right corner to control the order tickets appear in.- Sort by fields such as Created Time, Priority, or Due Date
- Choose ascending or descending order
- Add multiple sorting rules for layered sorting
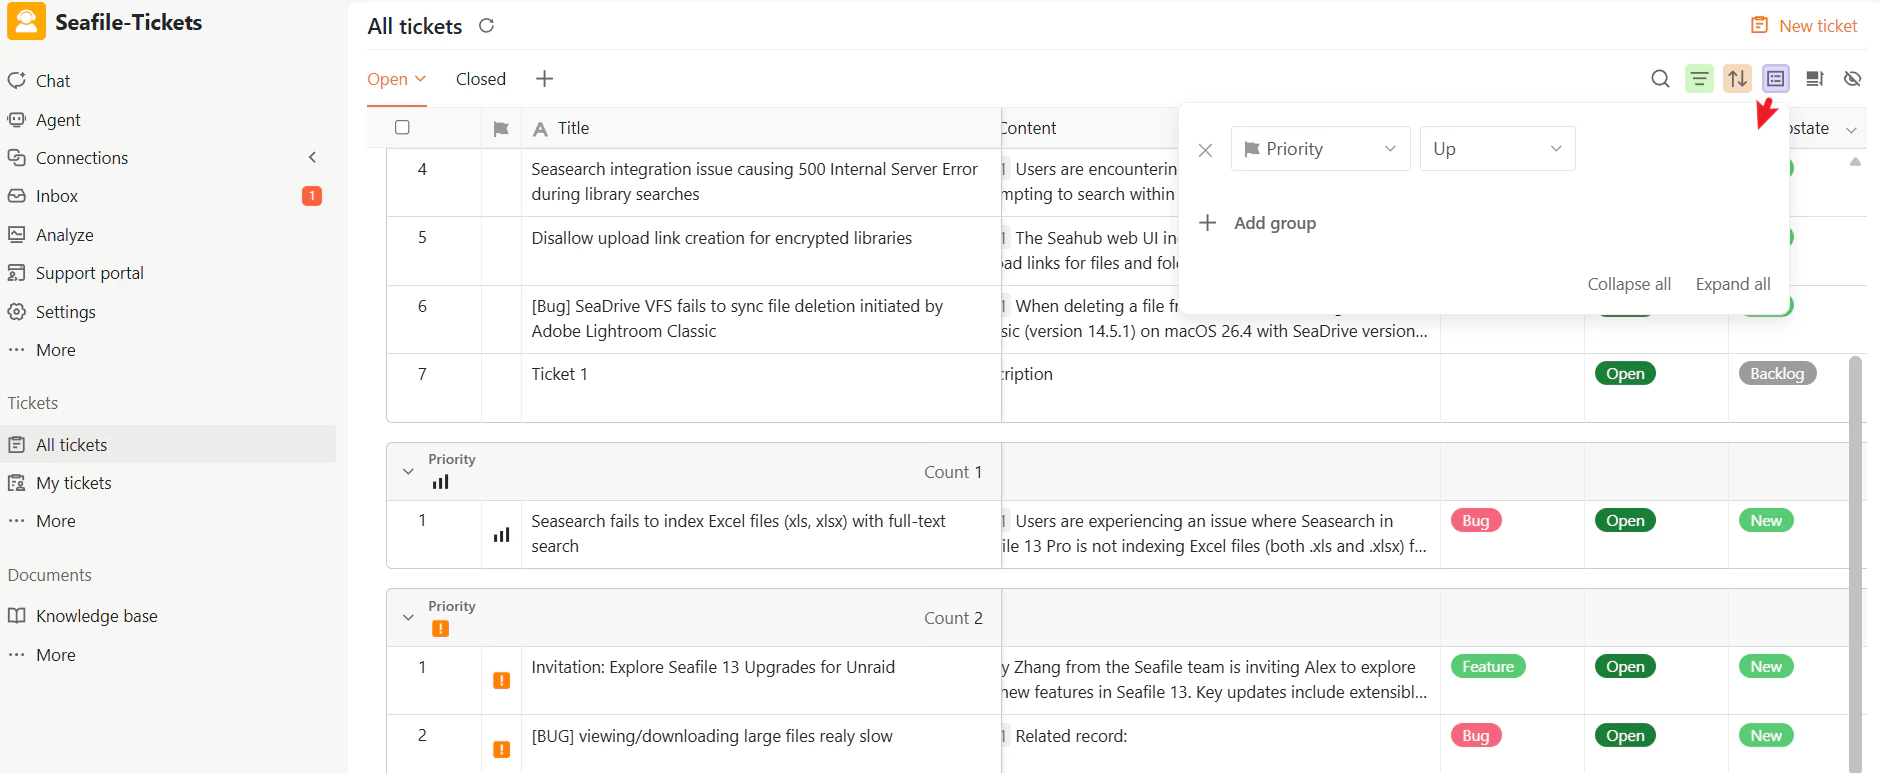
Grouping
Click the Group icon in the top-right corner to organize tickets into visual sections.- Group by fields such as Due Date, Priority, or Type
- Add multiple grouping rules
- Reorder or remove grouping rules
- Expand or collapse all groups at once
Column Visibility
Click the Hidden columns icon to show or hide attribute columns. This keeps the interface clean and focused on what matters.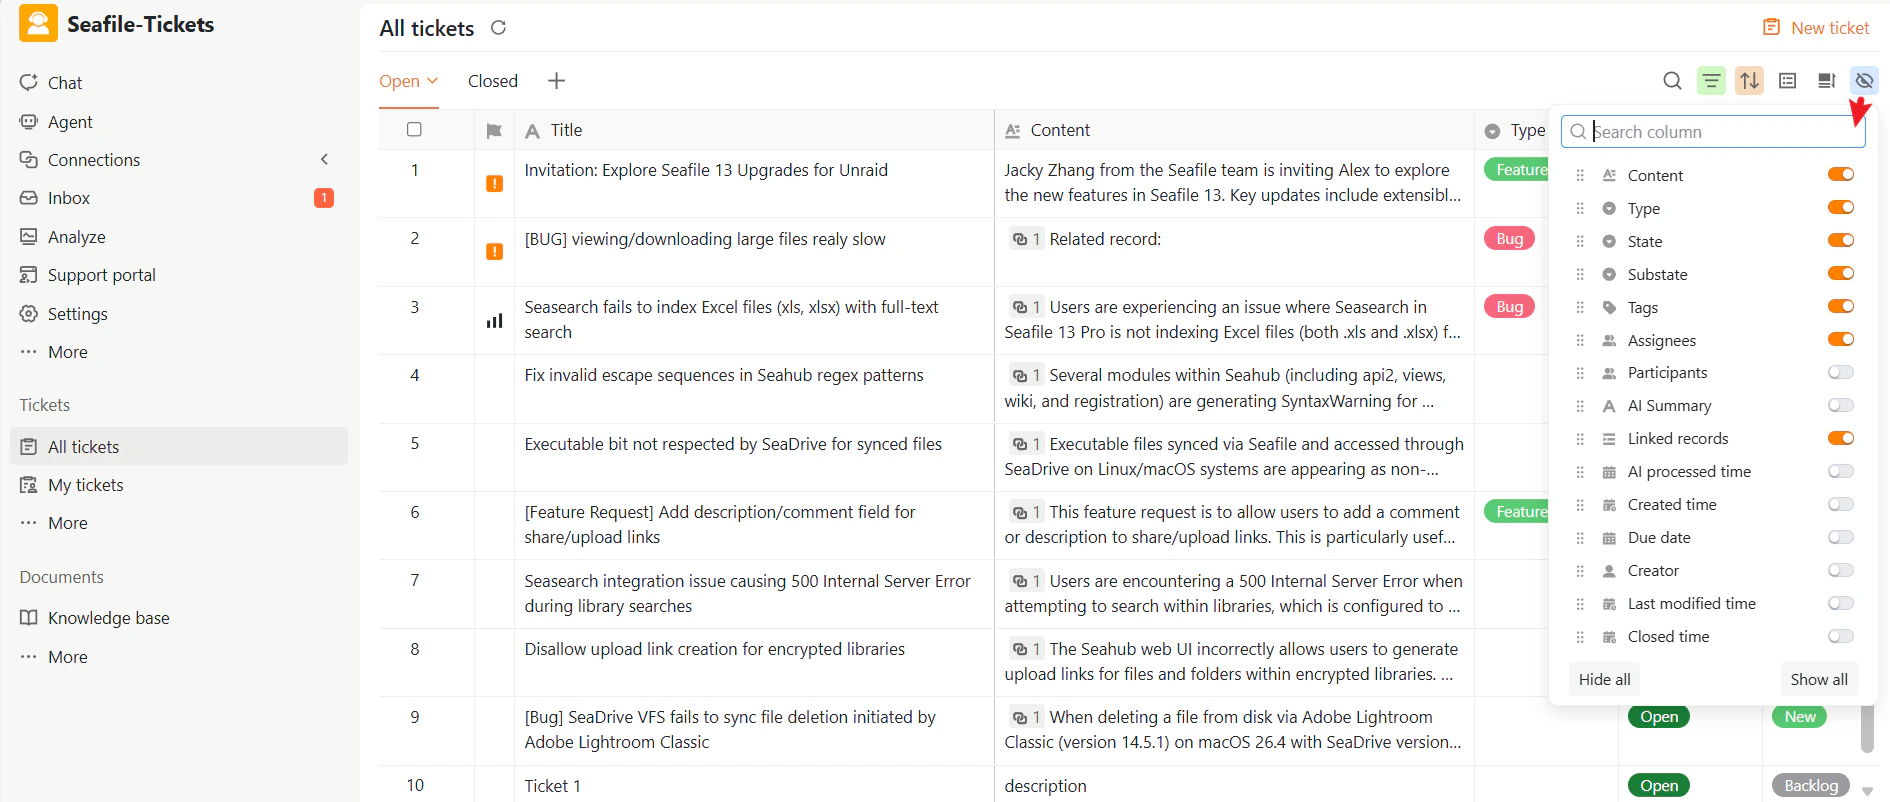
Row Height
Click the Row Height icon and choose Default, Double, Triple, or Quadruple to adjust how compact or expanded each row appears.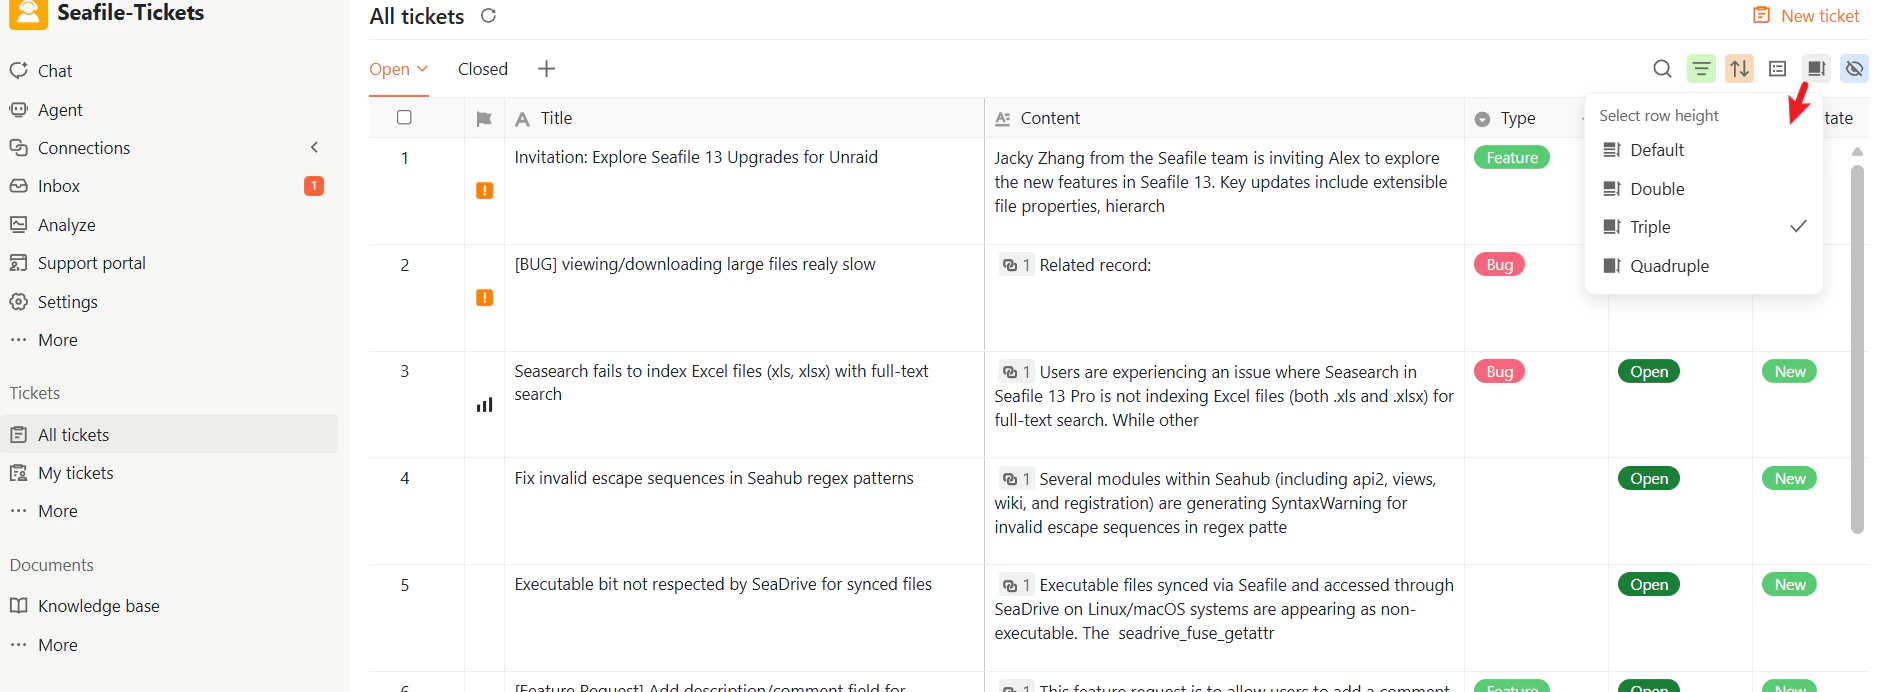
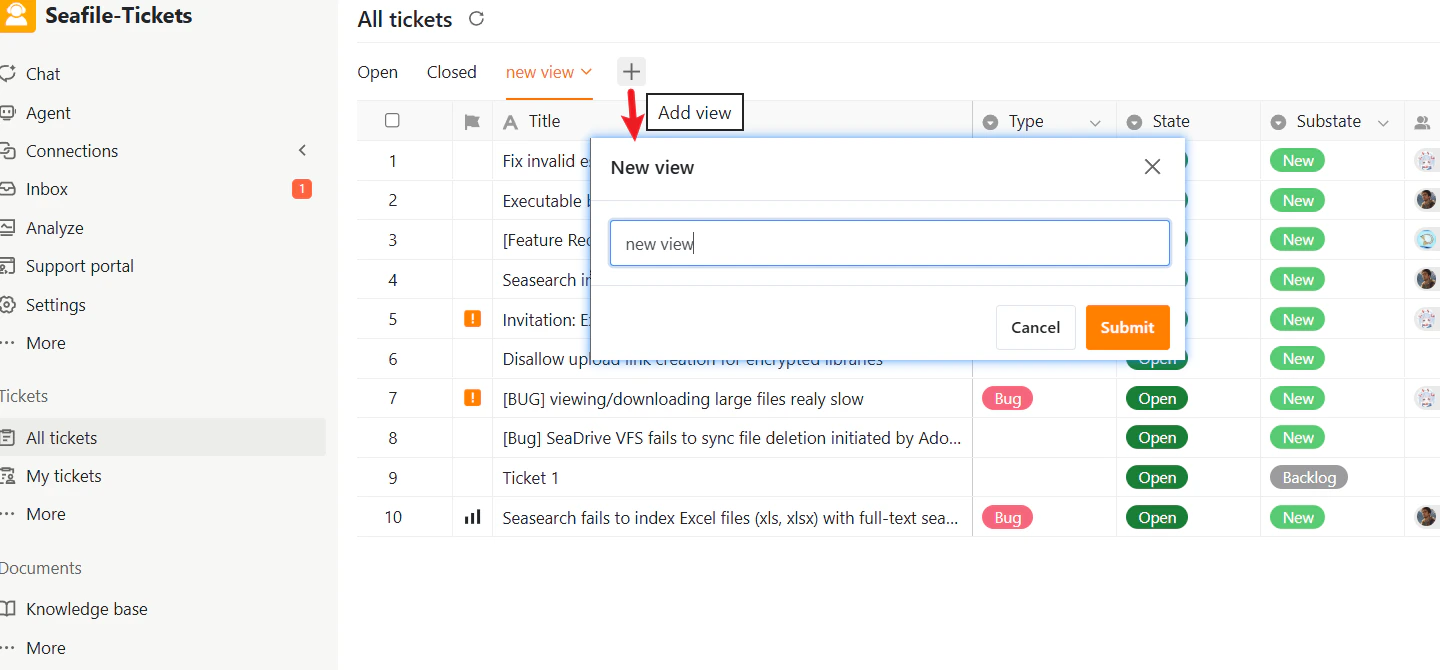
Creating Custom Views
Any team member can create additional custom views in All Tickets to organize tickets in ways that suit their workflow. To create a new view:- Go to All Tickets.
- Click the + tab.
- Enter a descriptive name in the dialog.
- Click Submit.
Manage Existing Views
To manage a view, click the ∨ icon next to the view name. You can rename, duplicate, or delete it.Note: The default Open and Closed views can be customized but cannot be deleted.
