
Accessing Connections
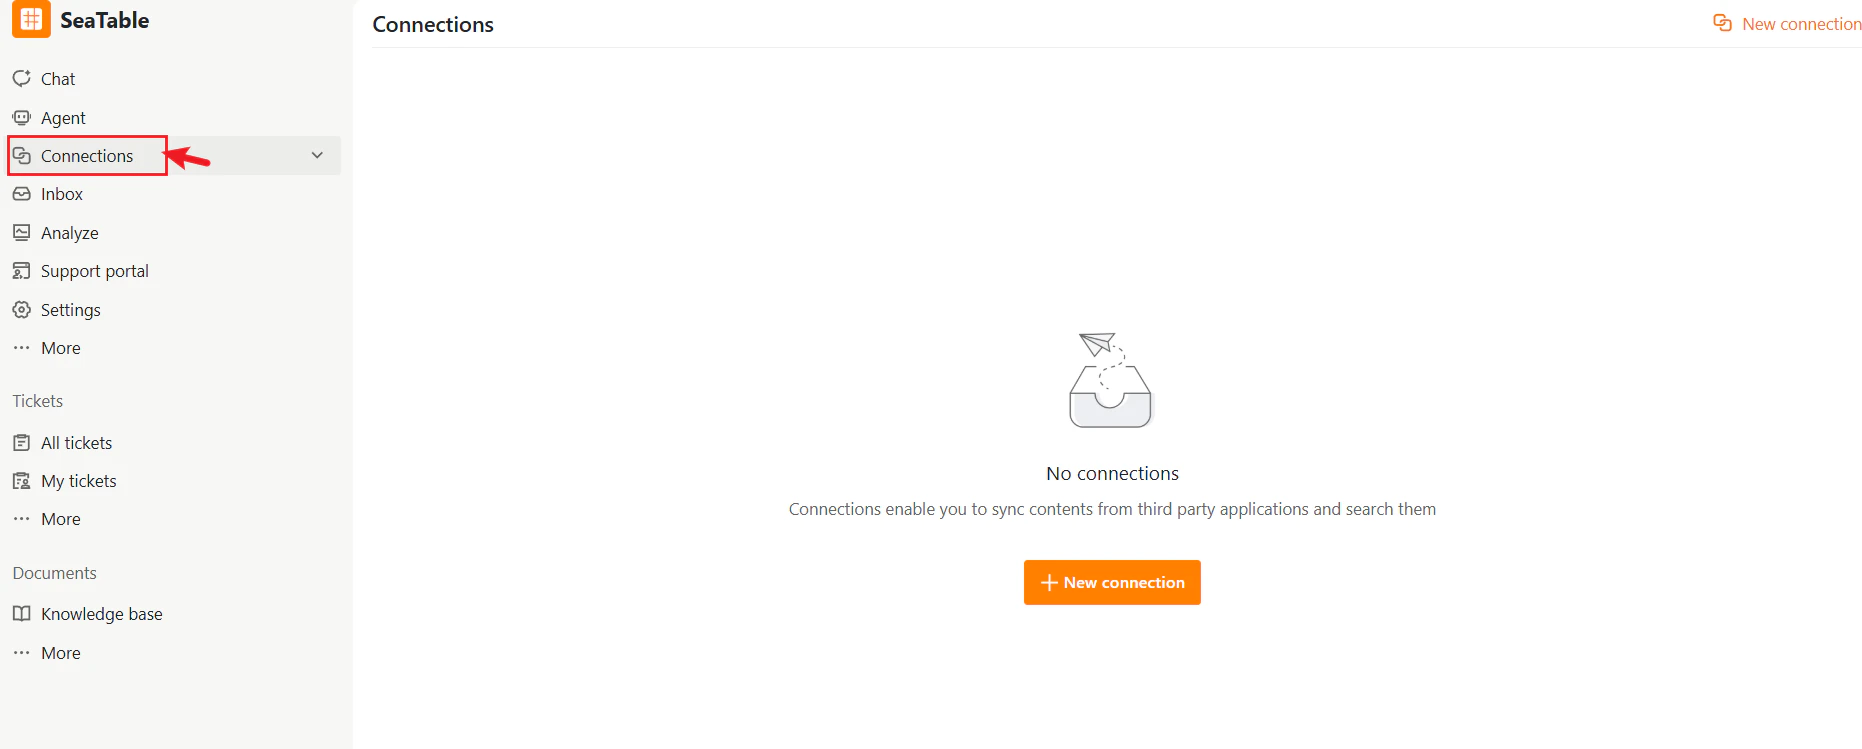
- Open the desired project in SeaTicket.
- Click Connections in the left sidebar.
Creating a New Connection
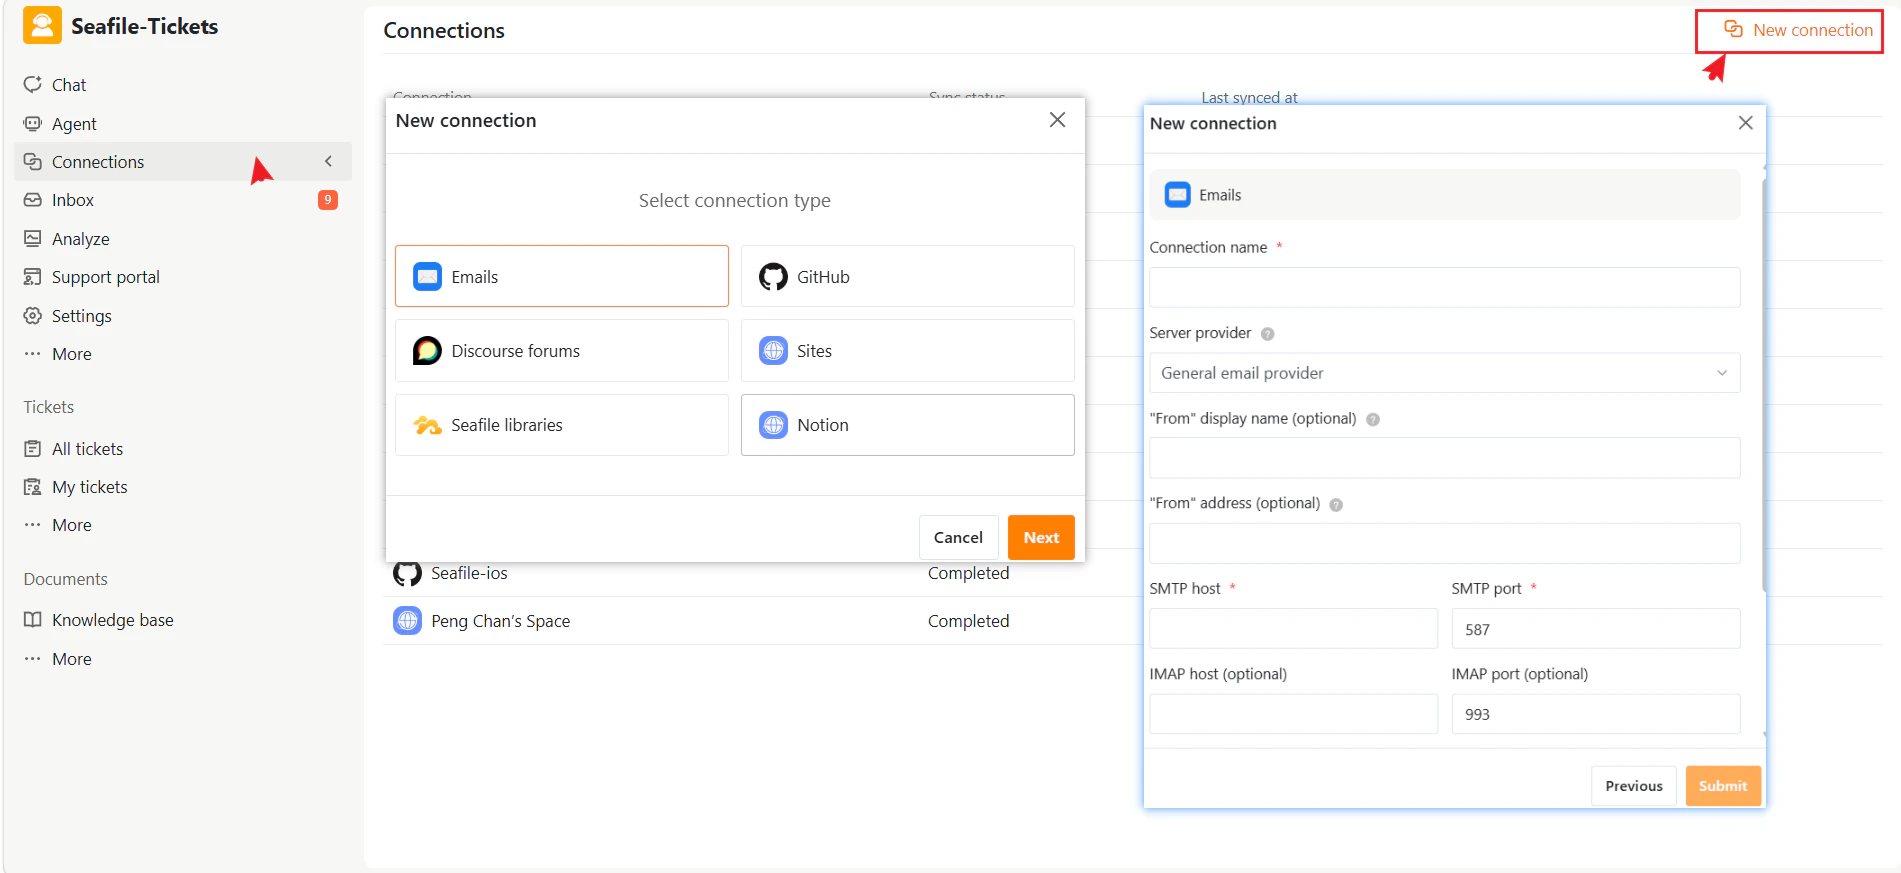
To add a new integration:- Click New connection in the top-right corner.
- Select a connection type from the dialog.
- Click Next.
- Enter the required configuration details.
- Click Confirm to complete the setup.
Supported Connection Types
SeaTicket supports multiple connection types:
Each connection type requires different configuration settings. Refer to the corresponding section for detailed instructions.
Sync Frequency
- GitHub, Email, Discourse Forums, and Seafile Libraries sync automatically every hour
- Notion syncs automatically once per day
- Sites connections sync every 3 days
Viewing and Managing Connections
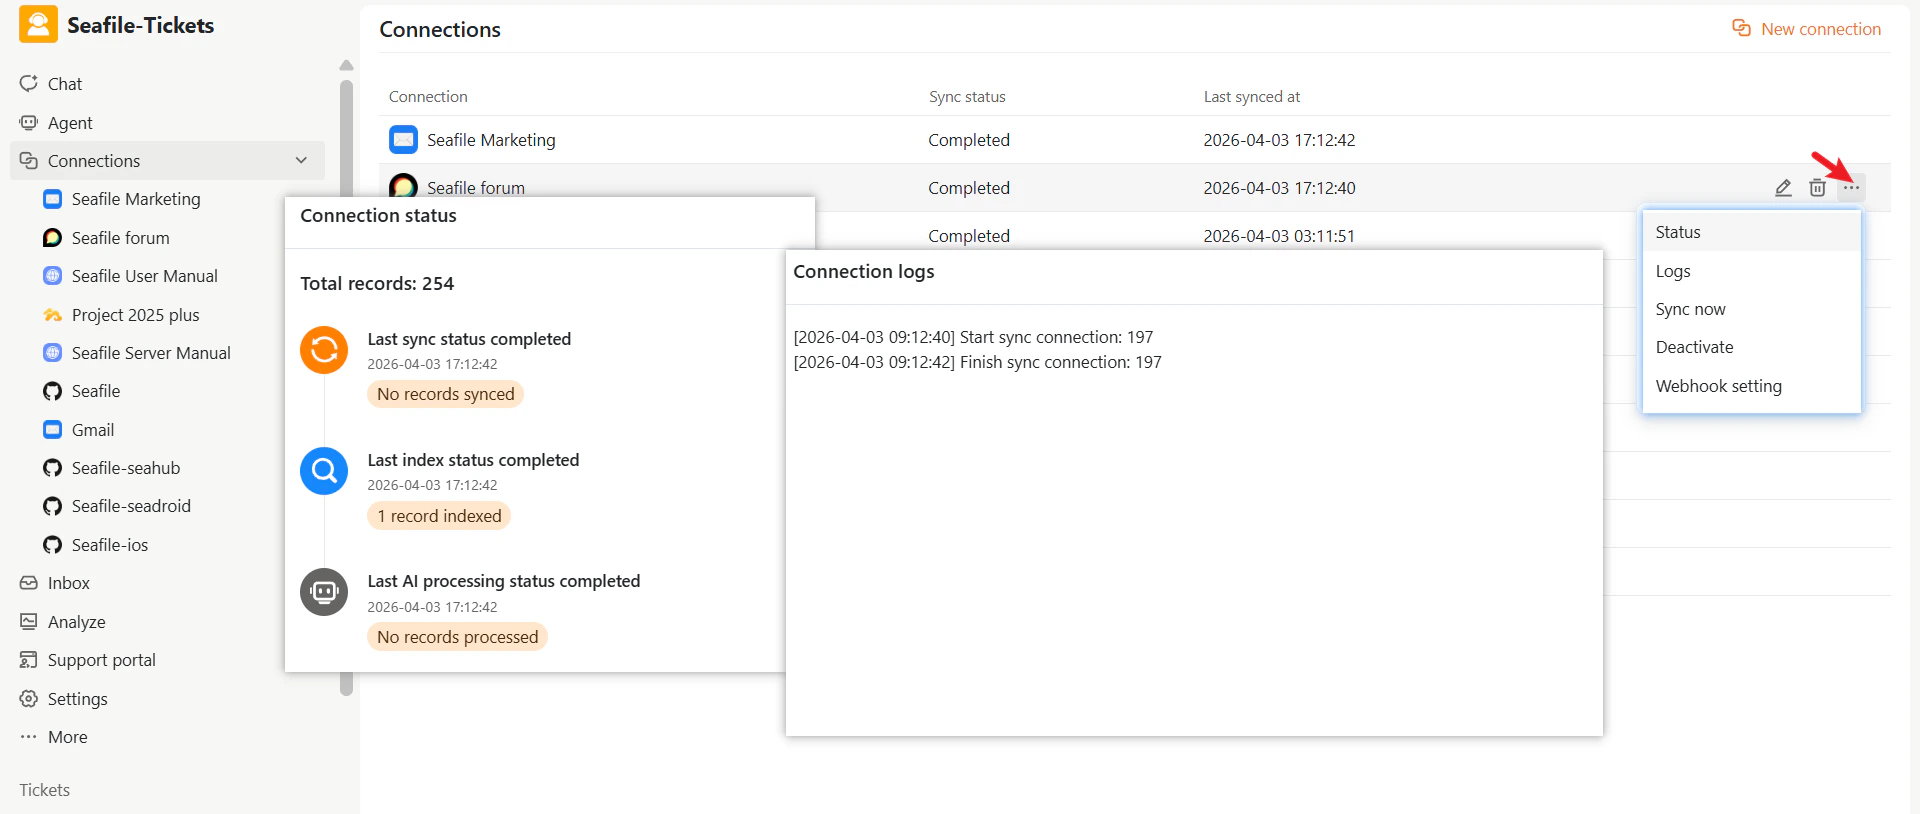
After creating connections, you can view and manage them on the Connections page. Each connection displays its current sync status and the last time it synced data. The following actions are available for each connection:.png?fit=max&auto=format&n=WcHiqSPczPbRTQJs&q=85&s=afd8cbfb1e5ede7c55a86eb0c11895cf)
.png?fit=max&auto=format&n=WcHiqSPczPbRTQJs&q=85&s=4dfac803b5dcf4e8371566c8197cee18)
Webhook Settings
For supported connection types, you can configure a webhook endpoint so that external systems notify SeaTicket of updates in real time, rather than waiting for a scheduled sync. To configure a webhook, open the connection settings and navigate to the Webhook tab..png?fit=max&auto=format&n=WcHiqSPczPbRTQJs&q=85&s=2c7d1265d6c2bd5b9133fbc2efa97fed)
If a Sync Fails
If a connection fails to sync, the sync status on the Connections page will reflect the error. You can click View sync details and logs to review what went wrong and use Sync now to manually retry once the issue is resolved.