
Team Admin
The Team Admin panel is accessible to team administrators. Clicking Team Admin opens the admin panel. The left sidebar shows six sections: Info, Settings, Statistics, Projects, Users, and Groups.Info
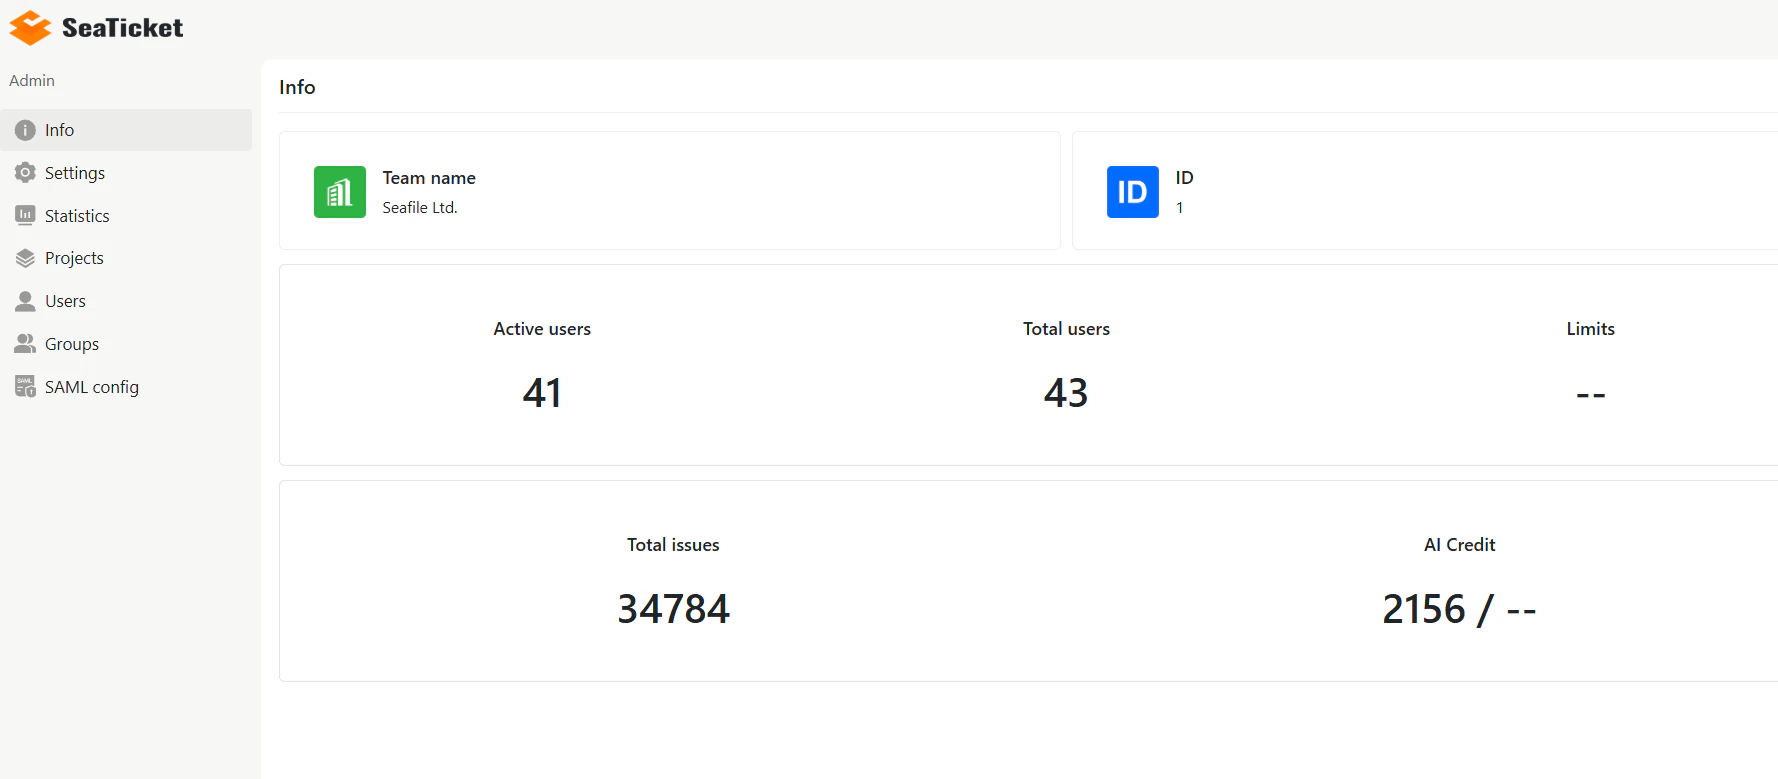
Info — Displays a high-level overview of your team:| Field | Description |
|---|---|
| Team name | Your team’s display name plan limits |
| ID | Unique team identifier |
| Active users | Number of users currently active |
| Total users | Total registered members |
| Total issues | All issues across projects |
| AI credit | Remaining AI credit balance |
Settings
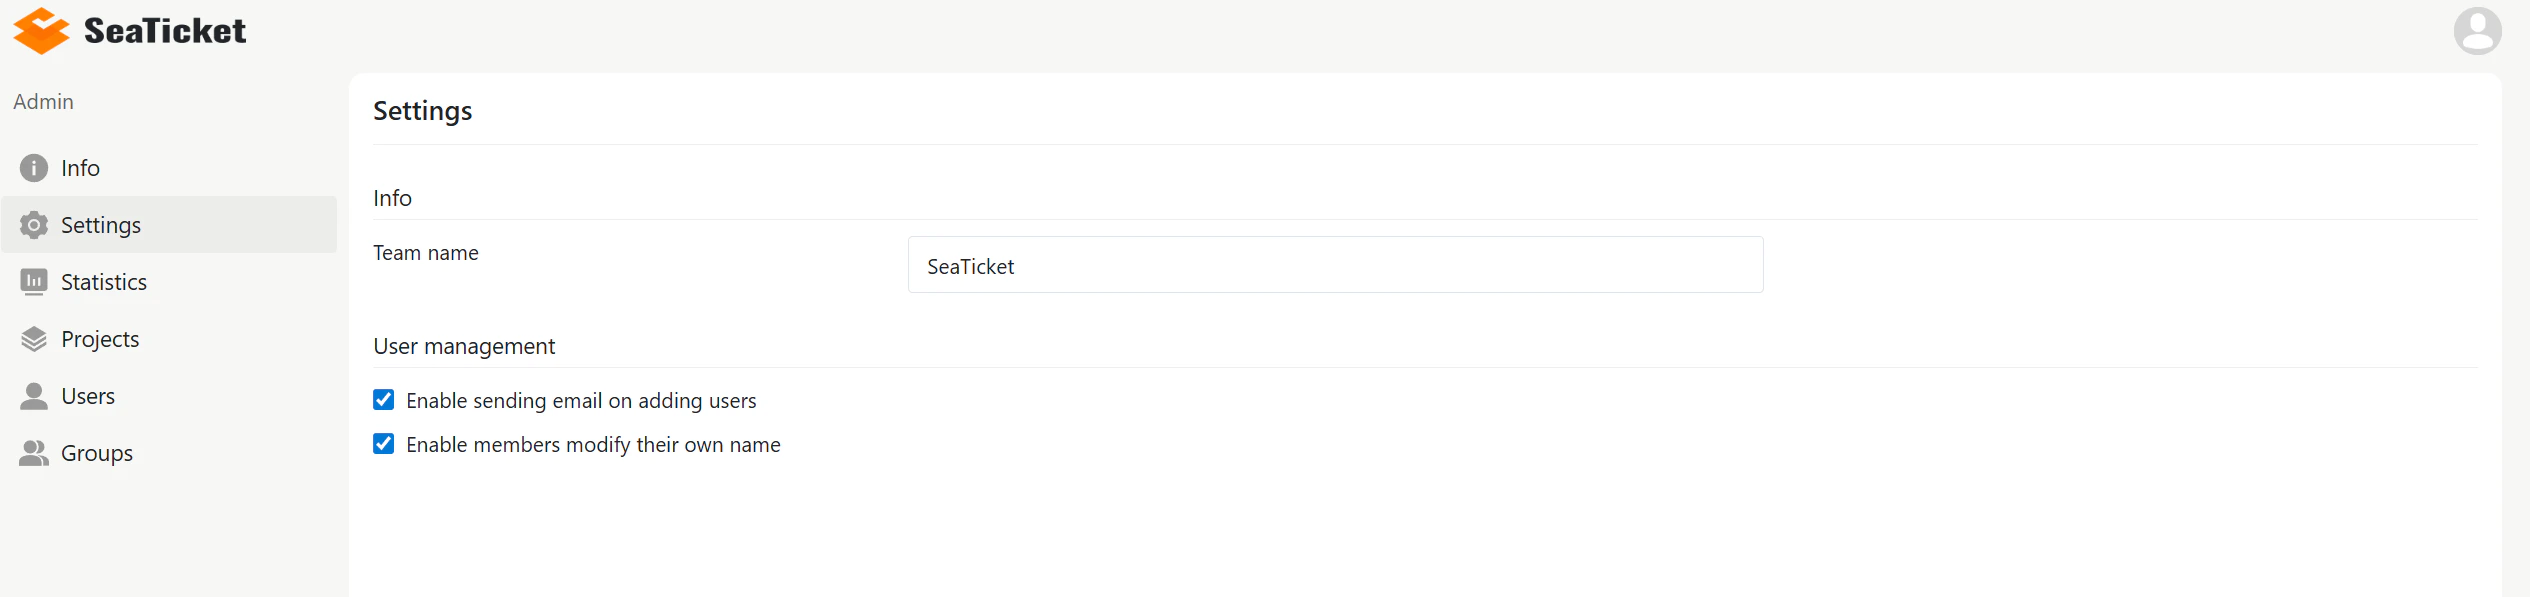
The Settings section lets you update your Team name and configure user management options:- Enable sending email on adding users — sends a welcome email when a new user is added.
- Enable members to modify their own name — allows members to edit their display name.
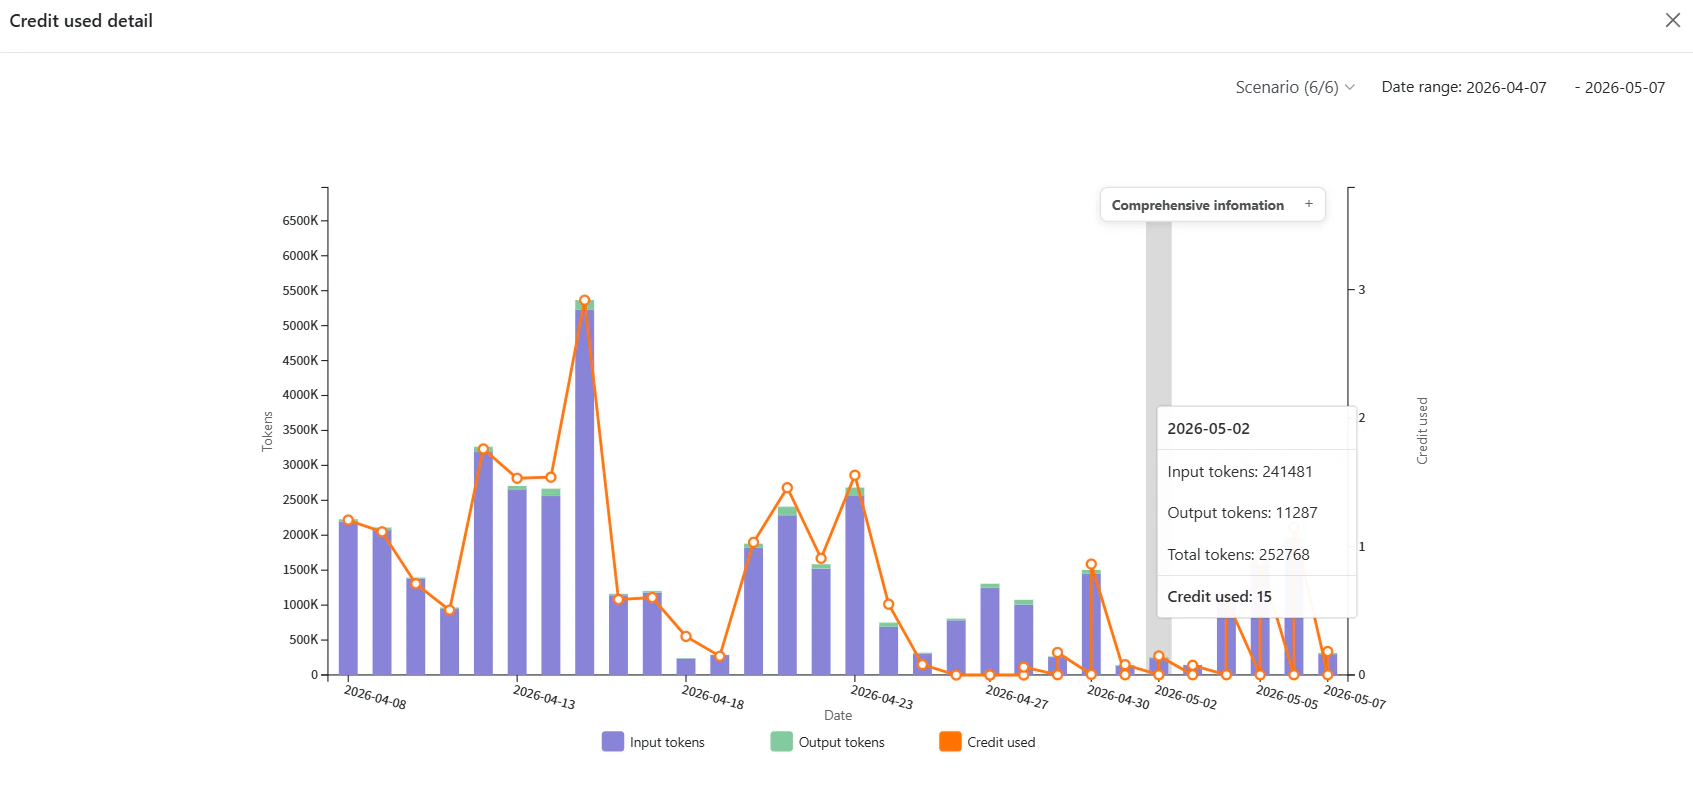
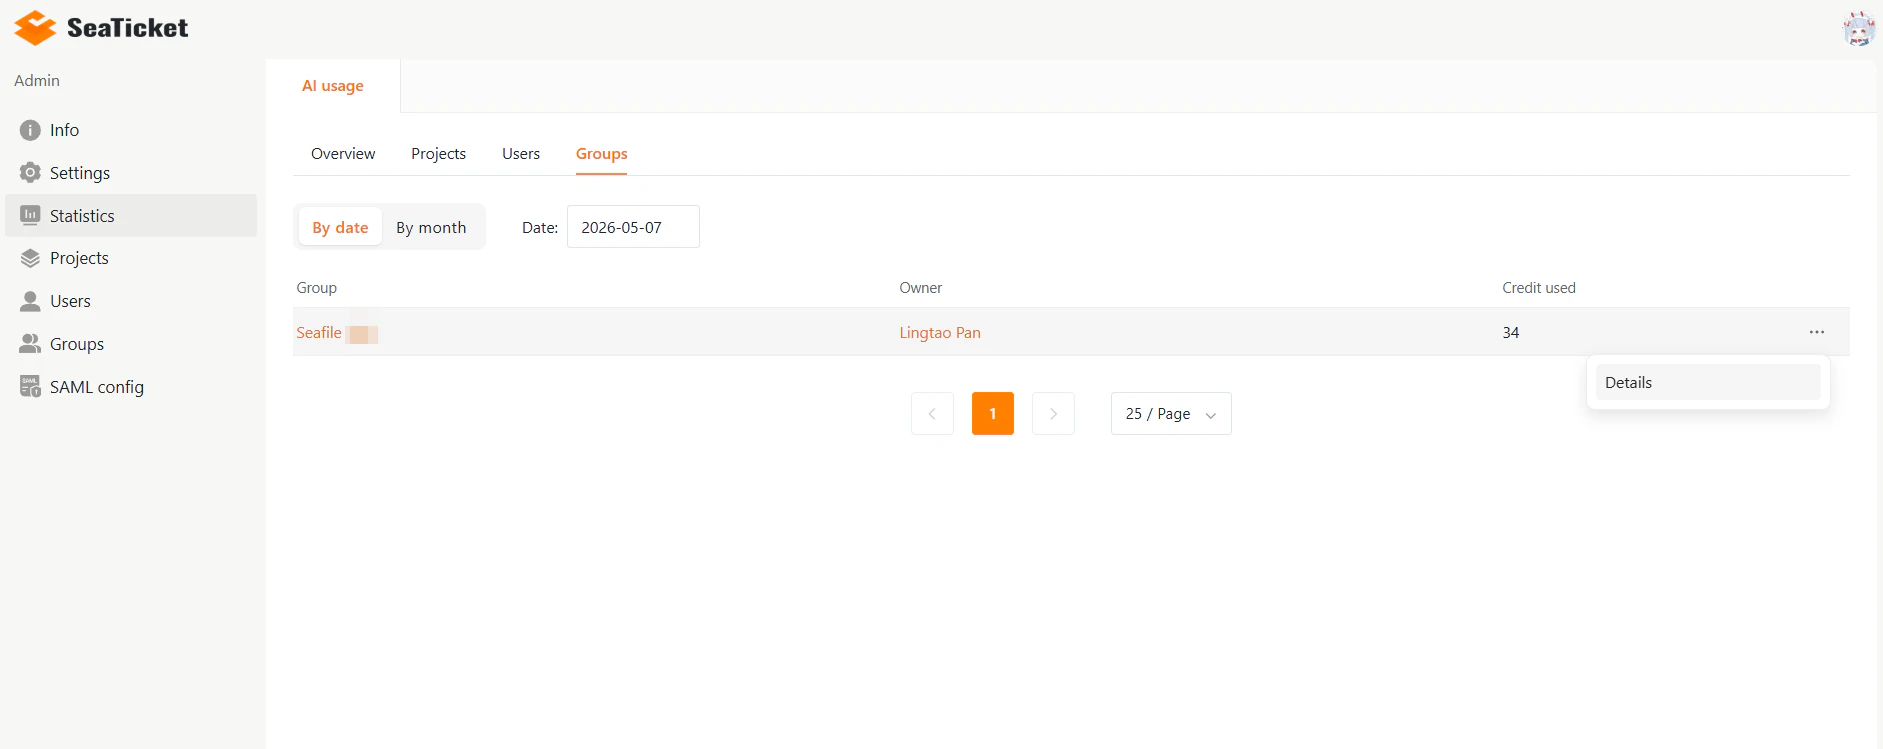
Statistics
The Statistics section shows AI usage data broken down across four tabs: Overview, Projects, Users, and Groups. Each tab supports filtering By date or By month. The Overview tab displays:- Total credit this month
- Last month total credit
- Month-on-month changes
- Credit proportion chart
- Monthly and daily credit consumption trends

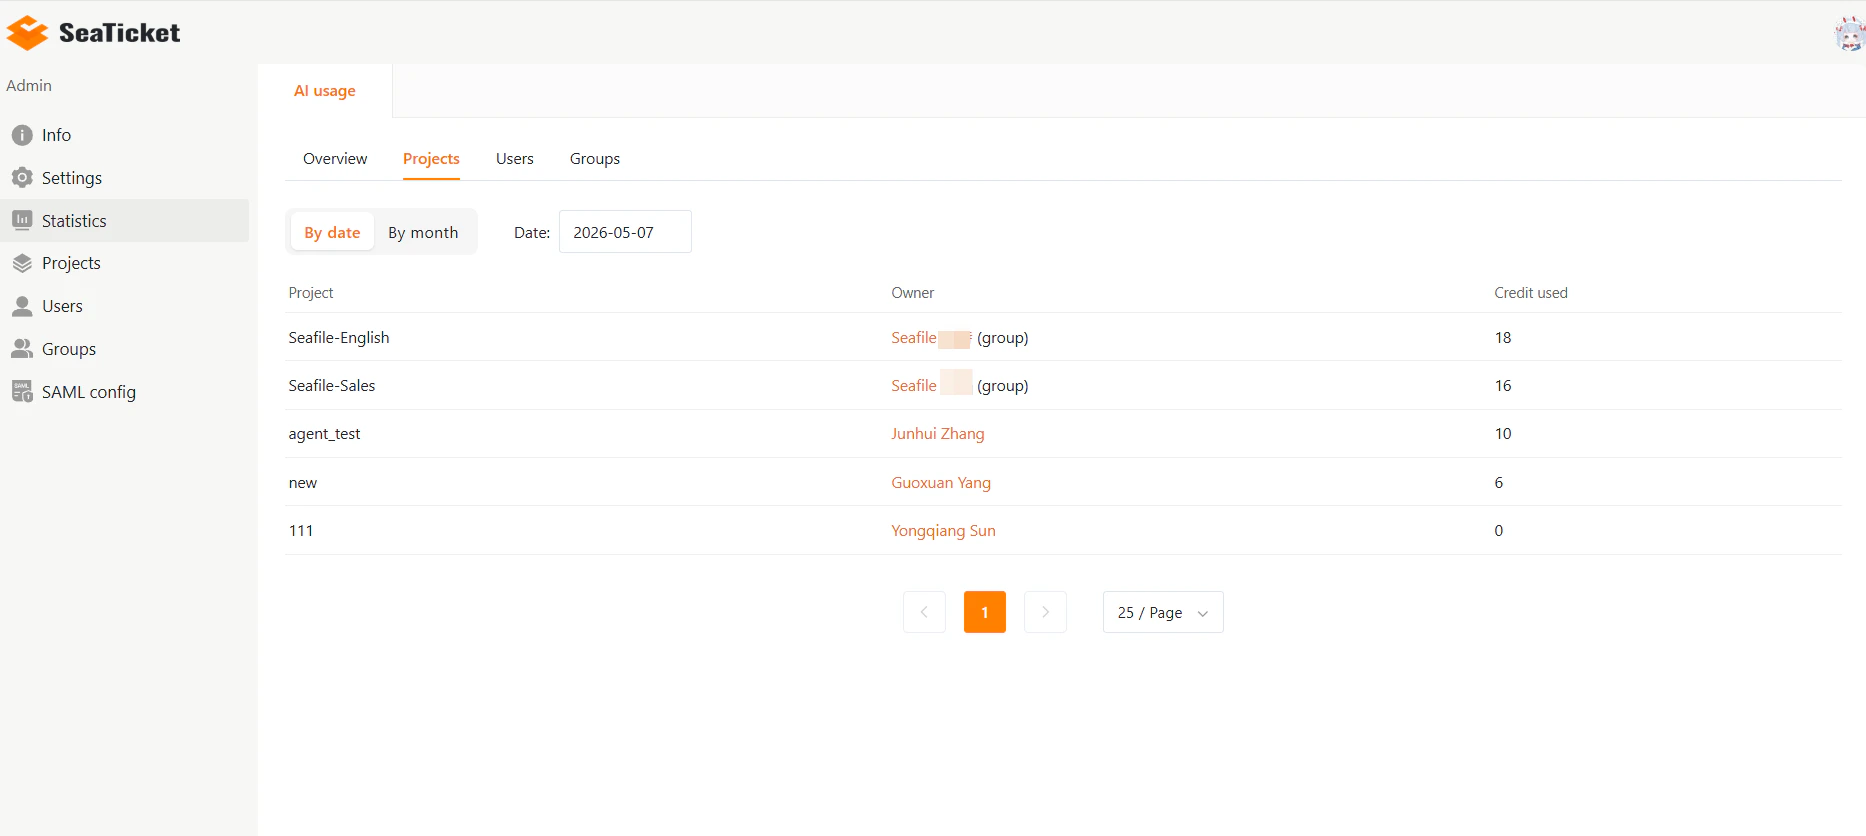
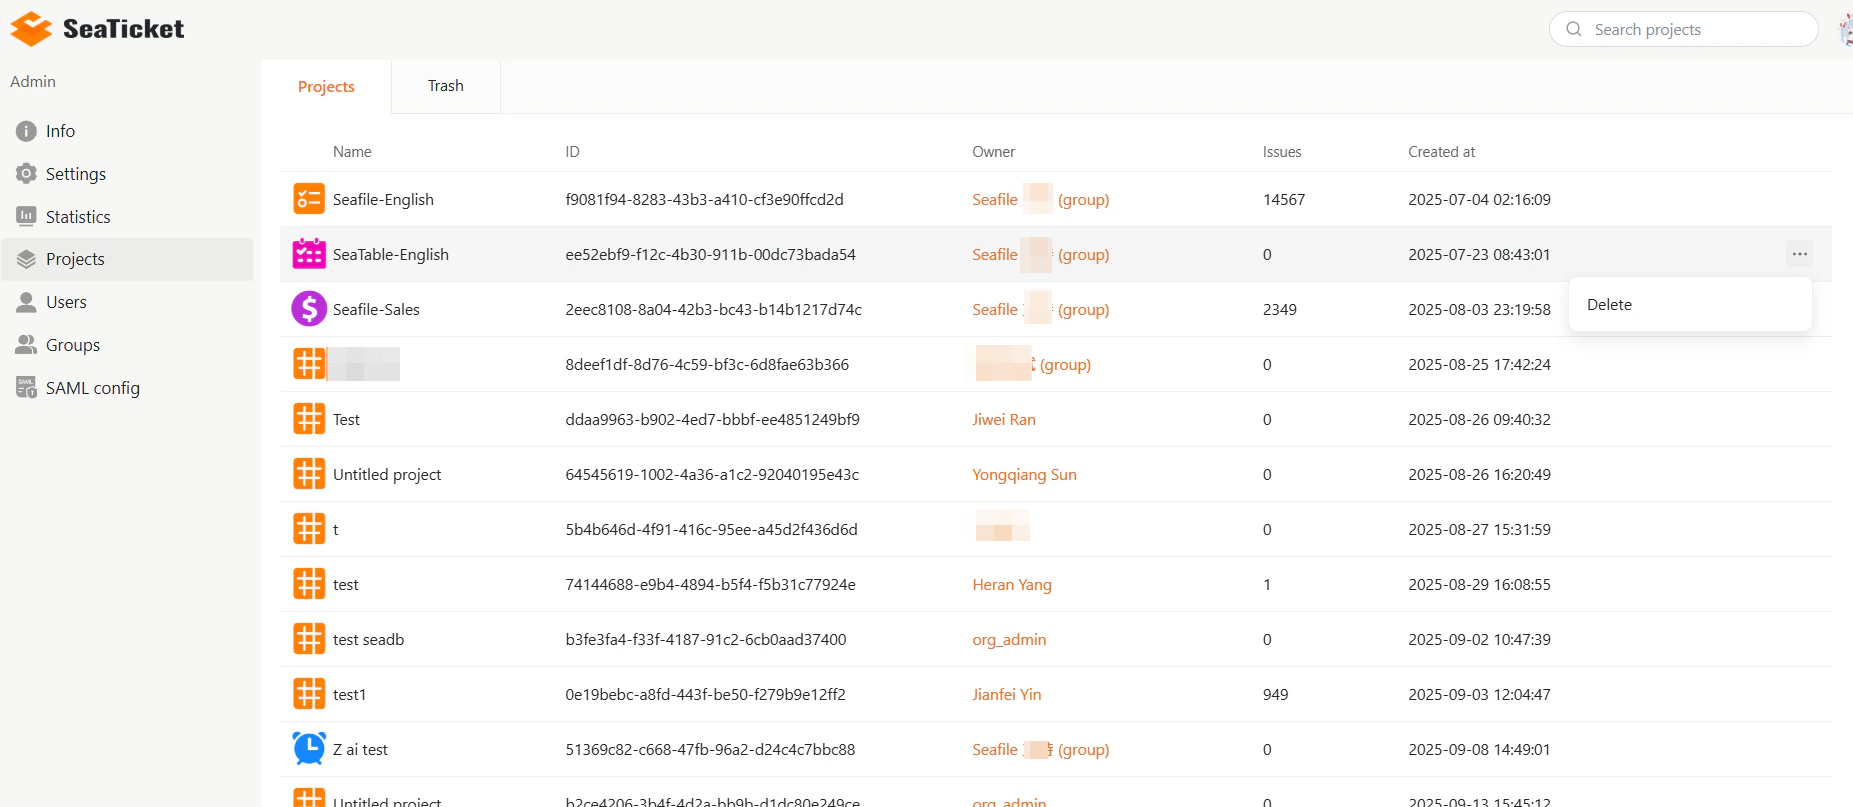
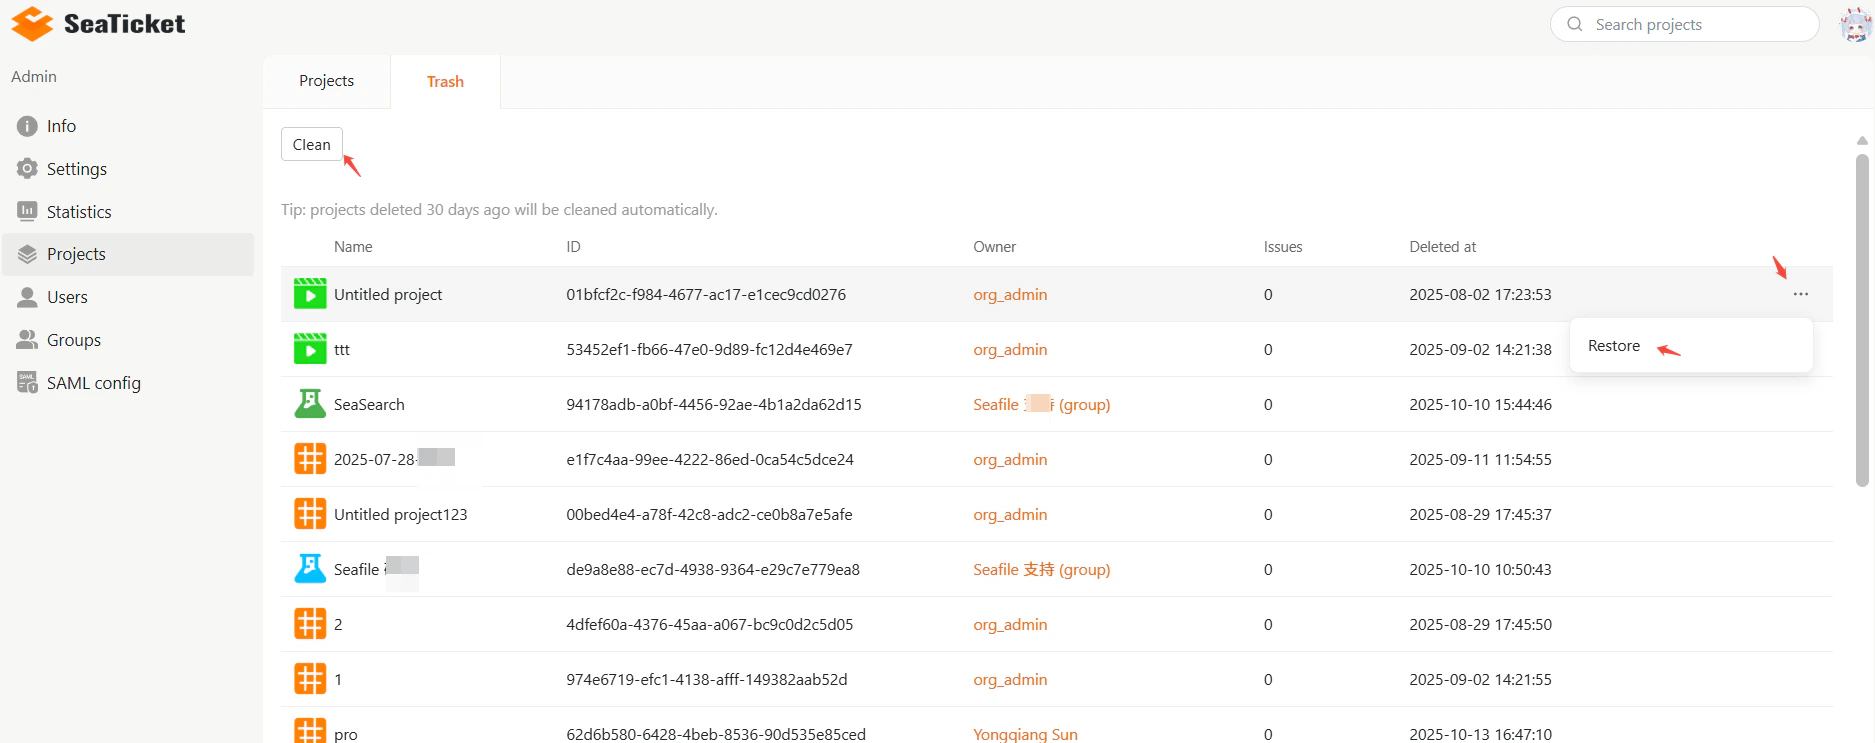
Projects
Projects Contains two tabs:- Projects — Lists all projects within the team, along with their details. Admins can delete projects directly from this tab.
- Trash — lists deleted projects. Use Restore to recover a project. Use the Clean button to permanently delete them. Projects deleted more than 30 days ago are cleaned automatically.
Users
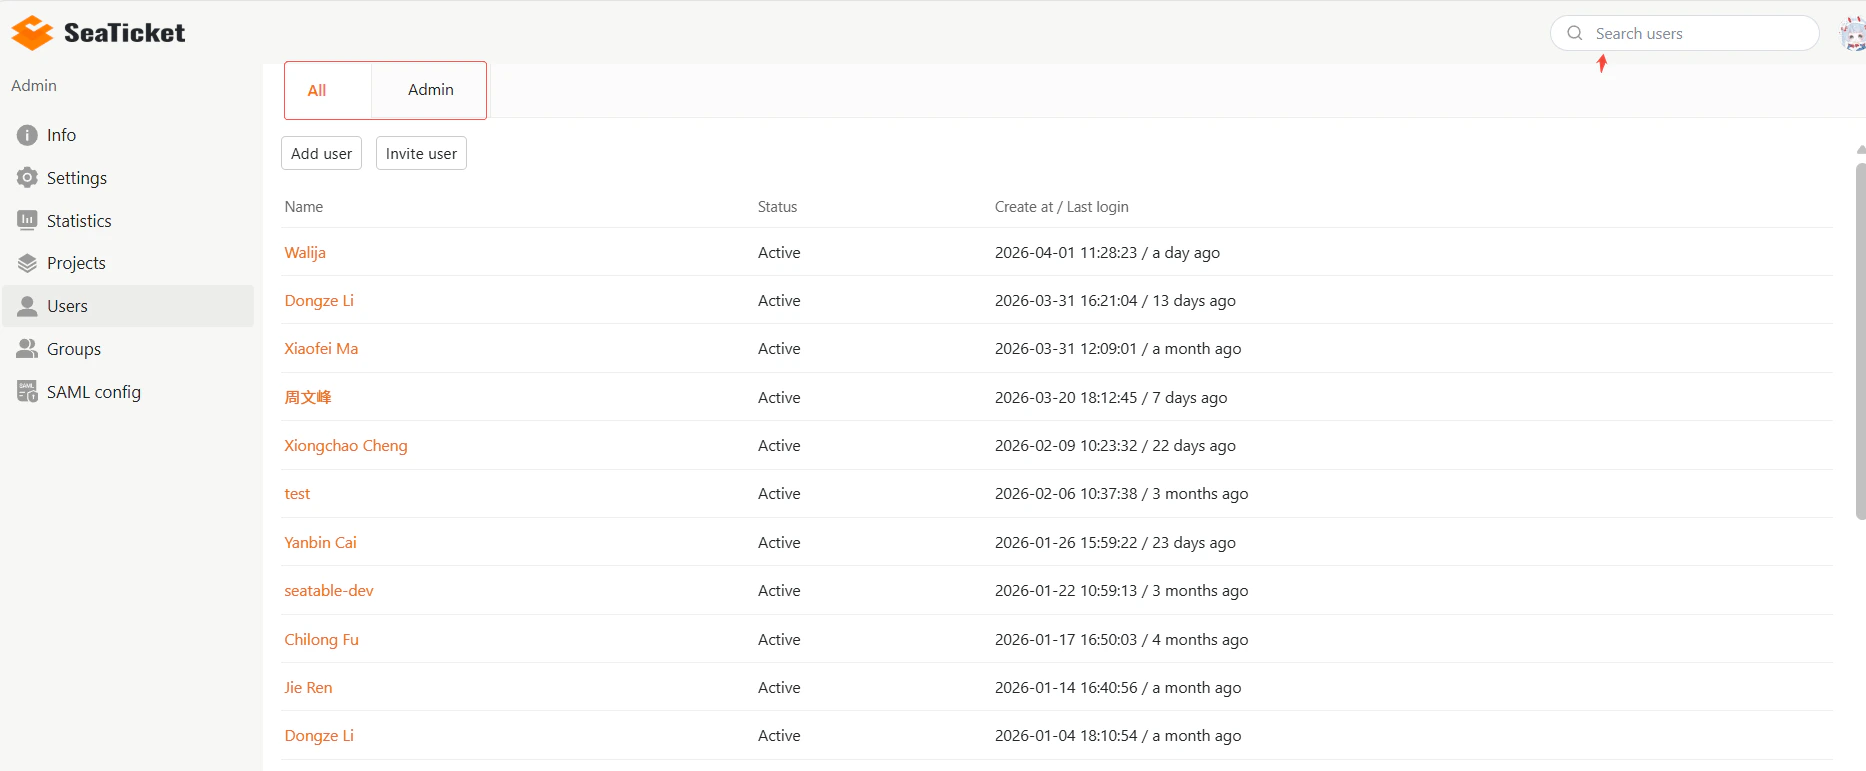
The Users page is used to manage team members and admins access. It contains two tabs: All——Displays all members with their name, status, and created / last login time.Admin——Displays all admins in the team You can also use the search bar in the top-right corner to quickly find users by name
Manage Team Members
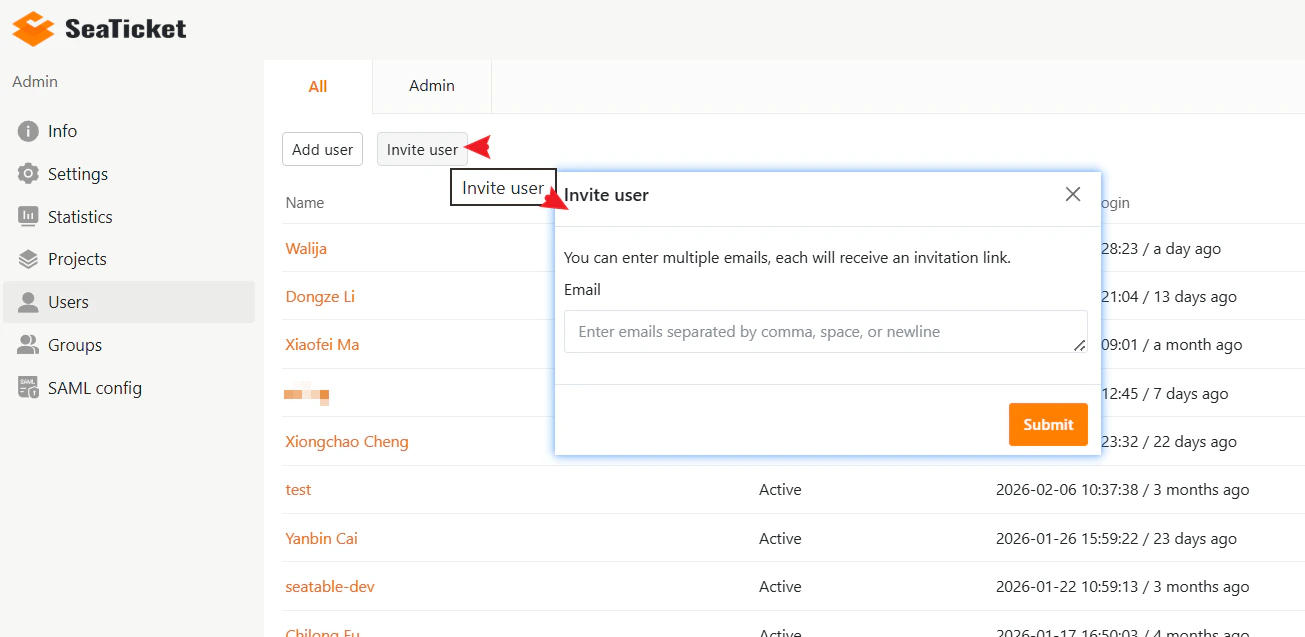
In the All tab, you can add, invite, manage, or remove users. Add a Member Manually Click Add user to create a new member account directly. In the dialog, enter the following information::- Username
- Password
- Confirm password

Multiple emails can be separated by:
- Commas
- Spaces
- New lines
···) that provides additional management options.
Available actions include:
- Reset password — Reset the member’s password
- Delete — Remove the member from the team.

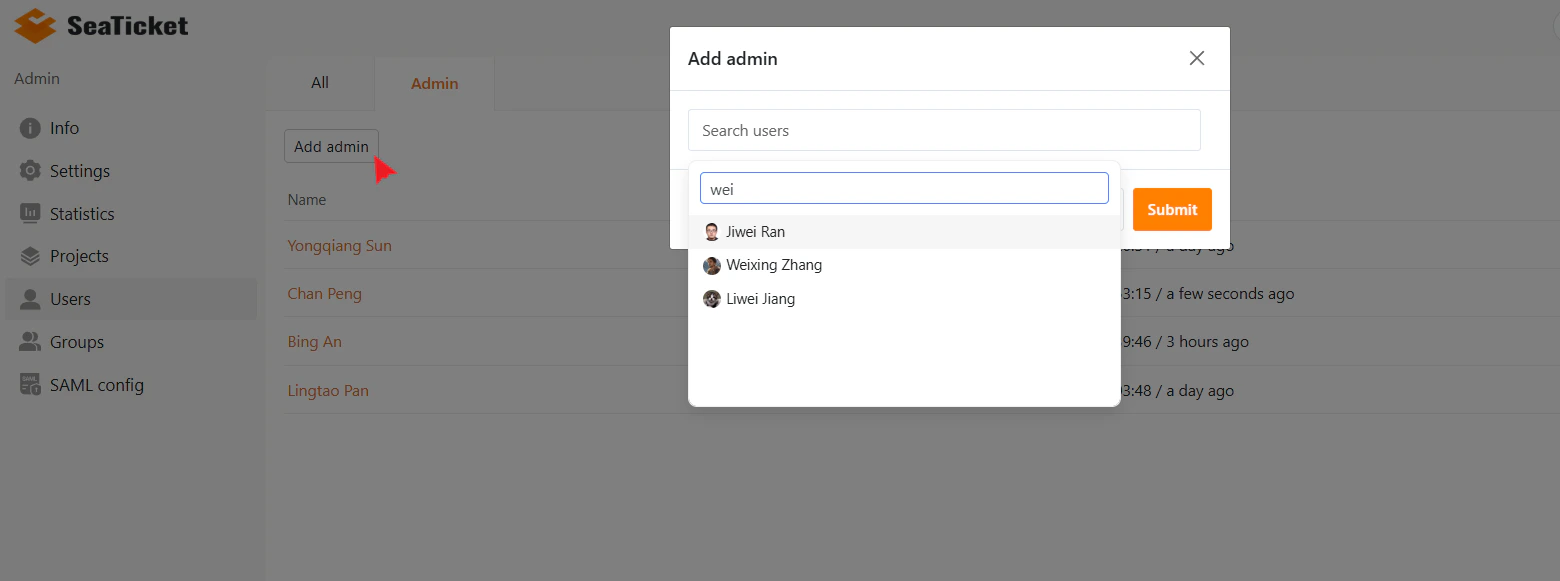
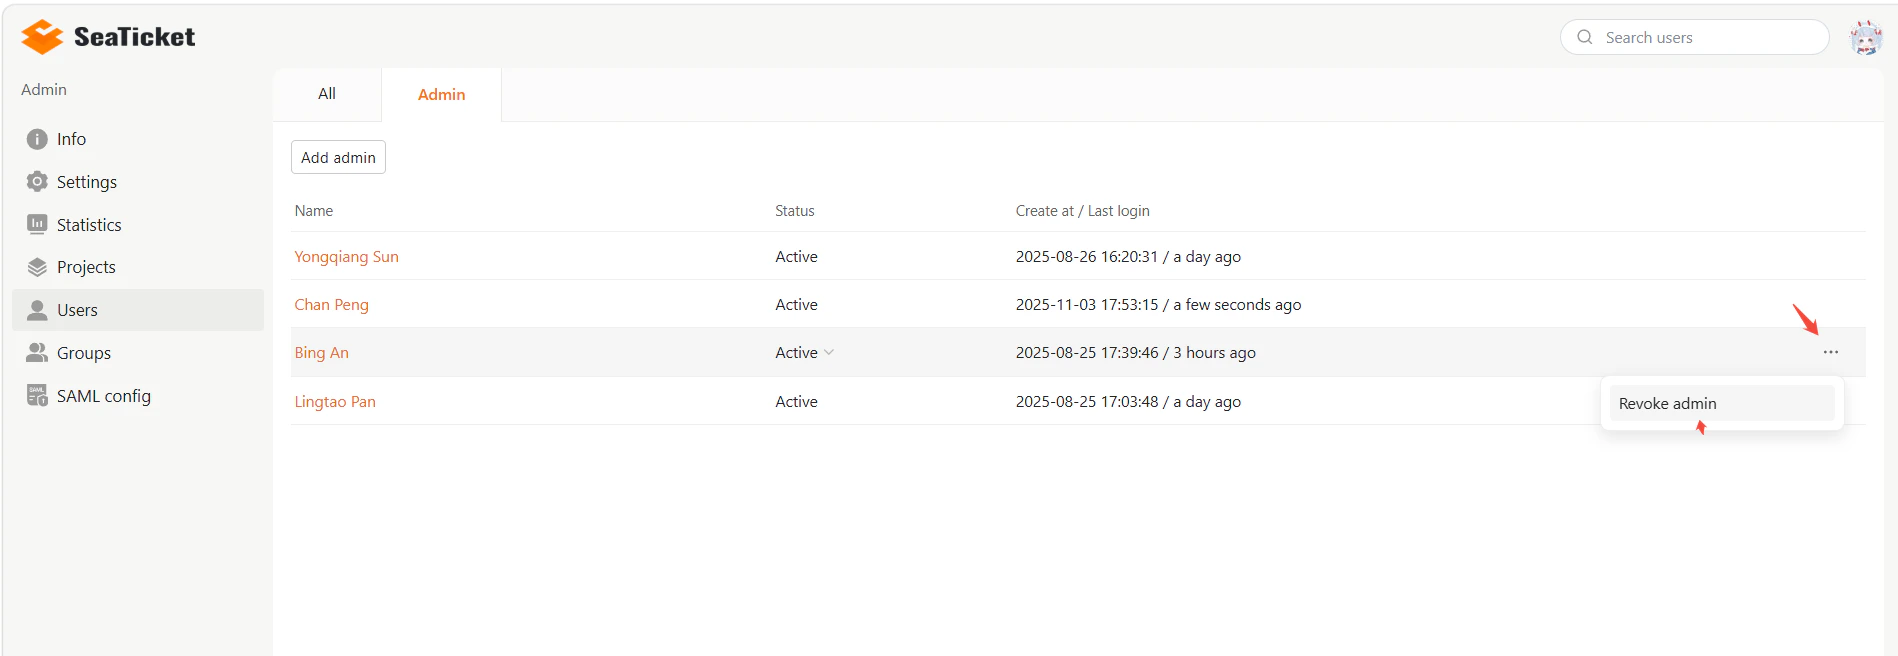
Manage Administrators
The Admins tab is used to manage team administrators. Grant Administrator Permissions To grant administrator access to an existing member:- Click Add admin.
- In the search dialog that appears, find and select the member by name.
- Click Submit
- Locate the target admin
- Open the More actions menu (···) in their row.
- Select Revoke admin from the menu.
Manage Member Status
On this page, you can manage each member’s account status. The status directly controls whether a member can log in and access the system. Status Definitions:- Active: The member can log in and access the workspace normally.
- Inactive: The member account is disabled and cannot access the system.
- Locate the target member in the list.
- Click the status indicator in the Status column.
- Select one of the following options from the dropdown menus:
- Active: Enable member access.
- Inactive: Disable member access.
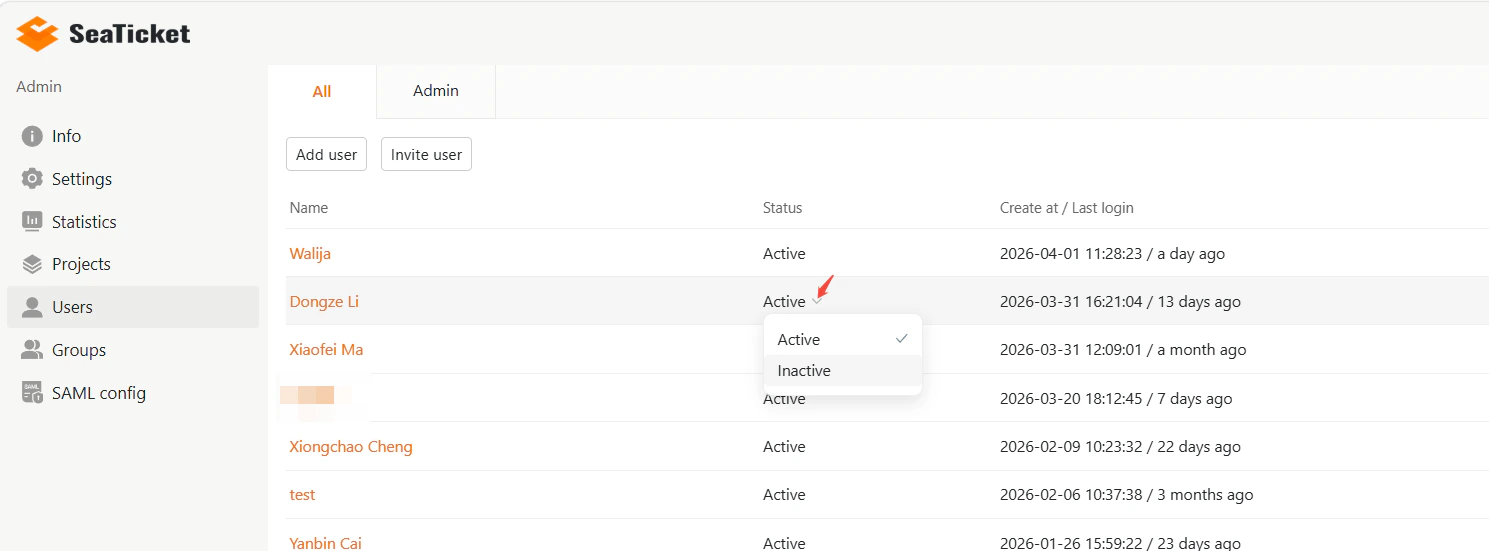
Setting a member to Inactive does not remove them from the team. The member will remain in the list but will not be able to sign in until reactivated.This is useful for temporarily disabling accounts without deleting user data or history.
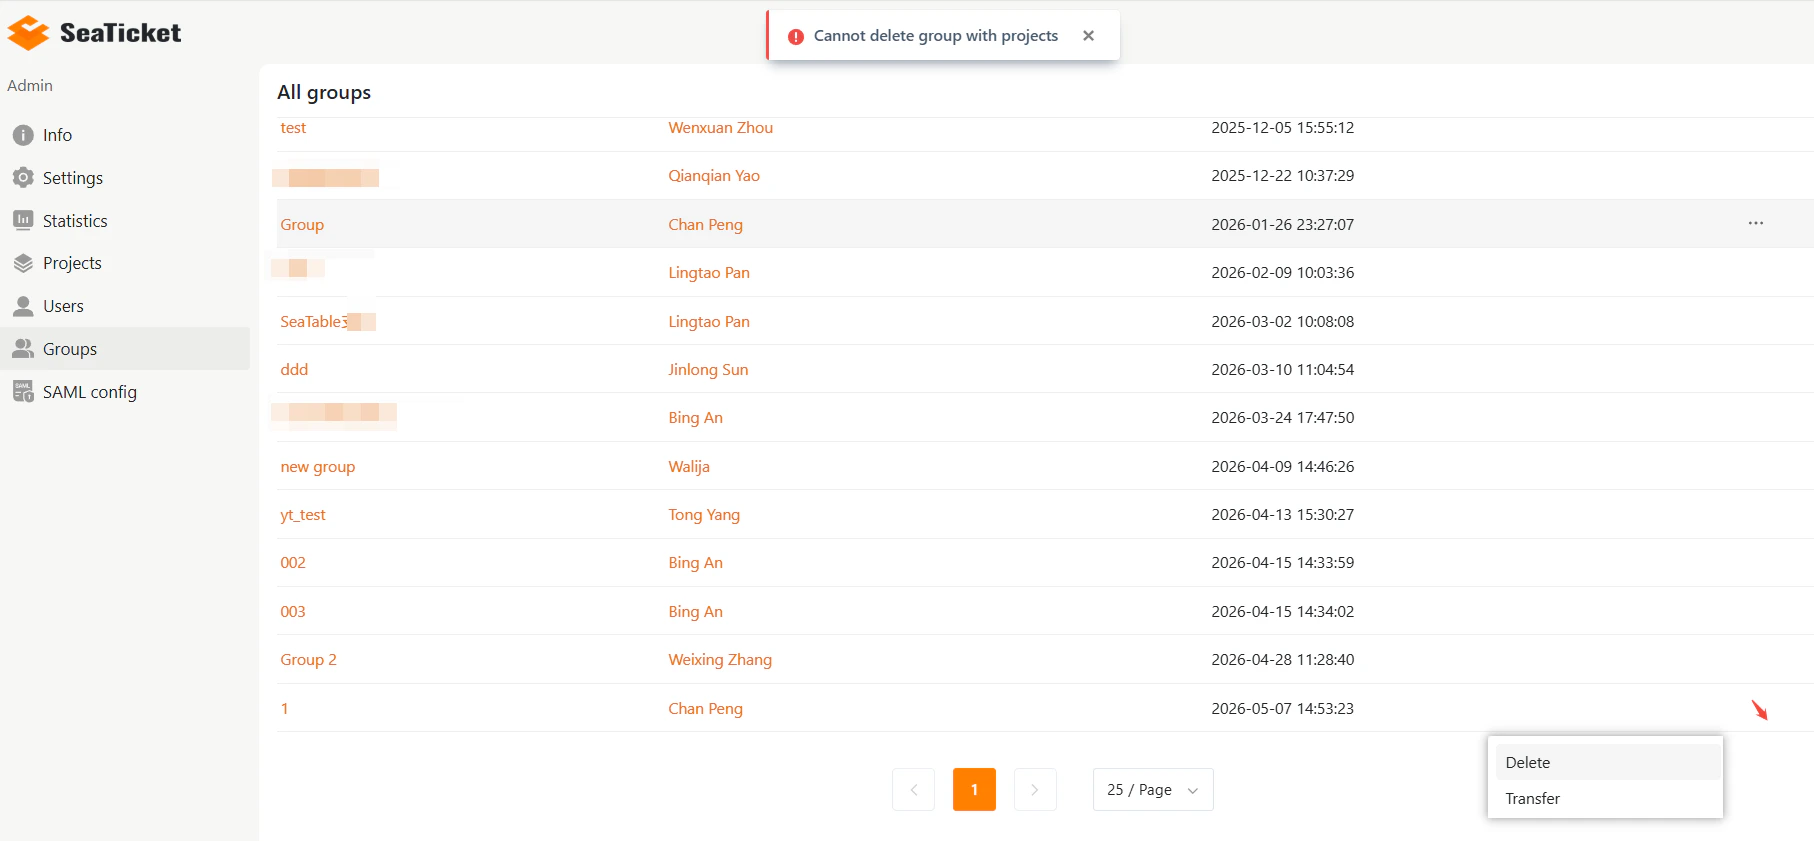
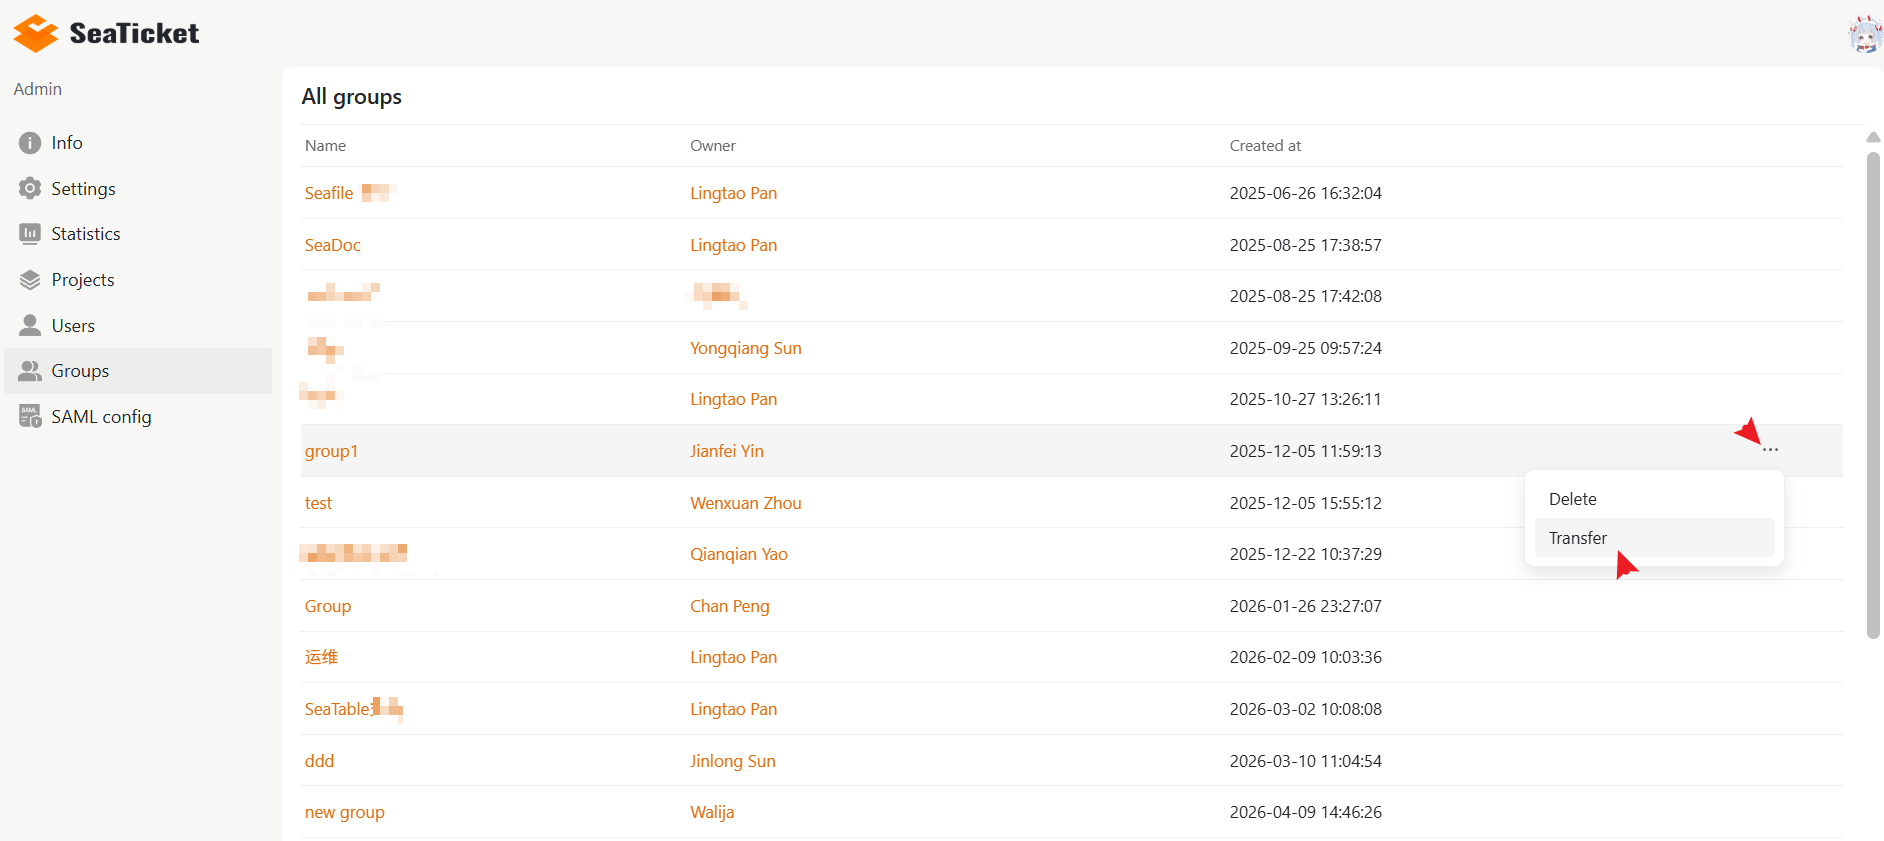
Groups
The Groups page allows admins to manage all team groups in one place.Groups help organize members and share projects across teams more efficiently. The page displays all existing groups in a table, including:
- Name — Group name
- Owner — Group owner or administrator
- Creation Time — The date and time the group was created.
Group Actions
Click the ⋯ menu on the right side of a group row to access additional actions. Delete Deletes the selected group. Groups that still contain projects cannot be deleted.