

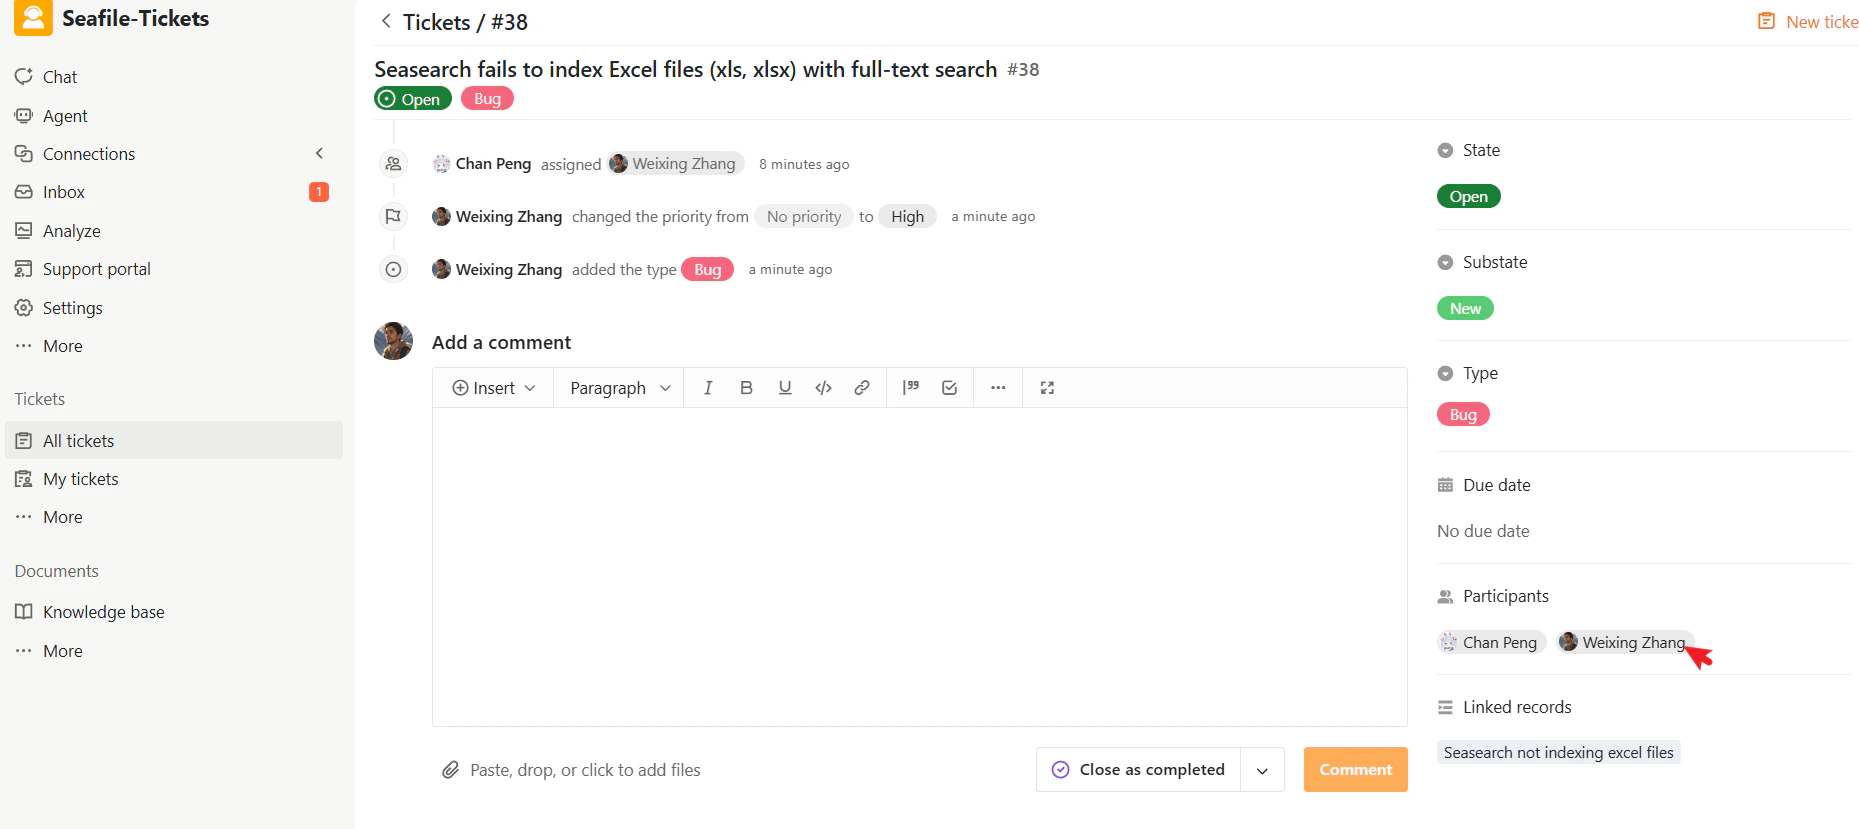
Manually assigning a ticket
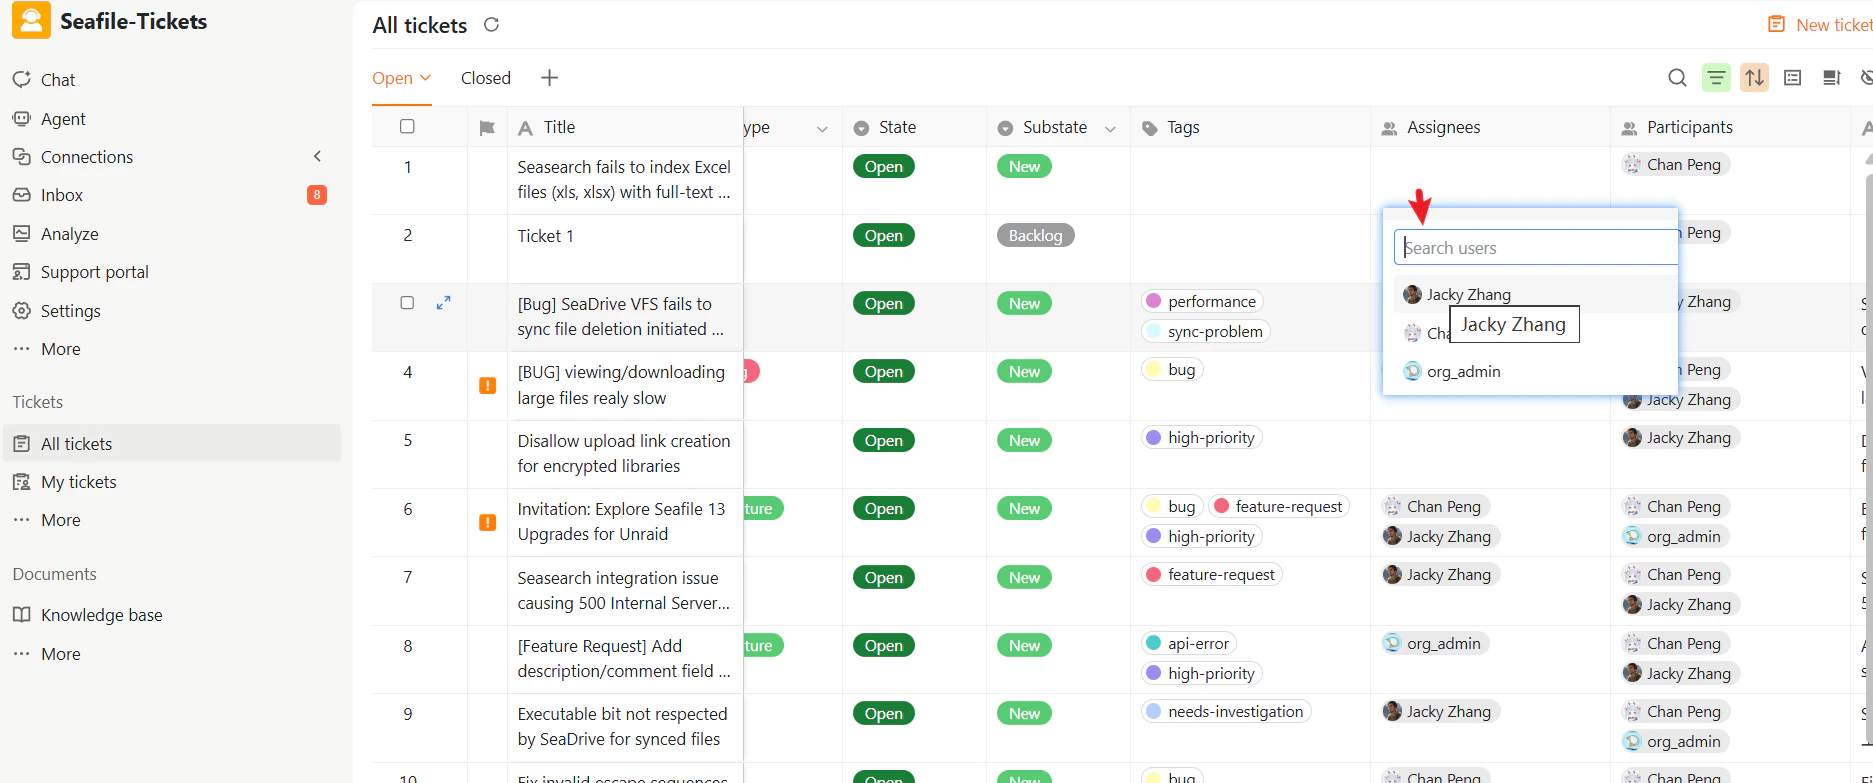
Tickets are assigned using the Assignees field. To assign a ticket- Open the ticket from any ticket view.
- Click the Assignees field.
- Search for a user by name and select them from the list.
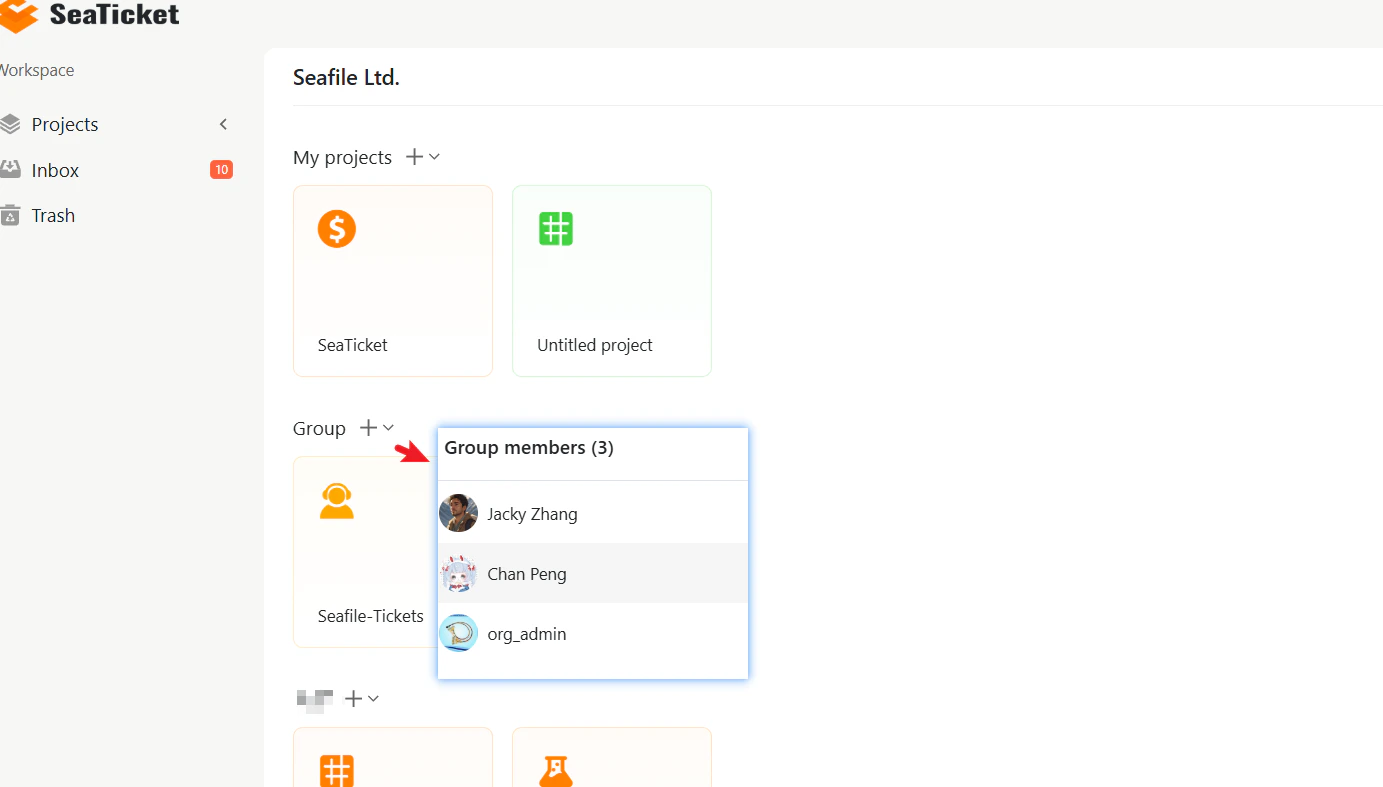
Only members of the project’s group appear in the Assignees list. For example, if a group has three members, only those three users will be available to assign.
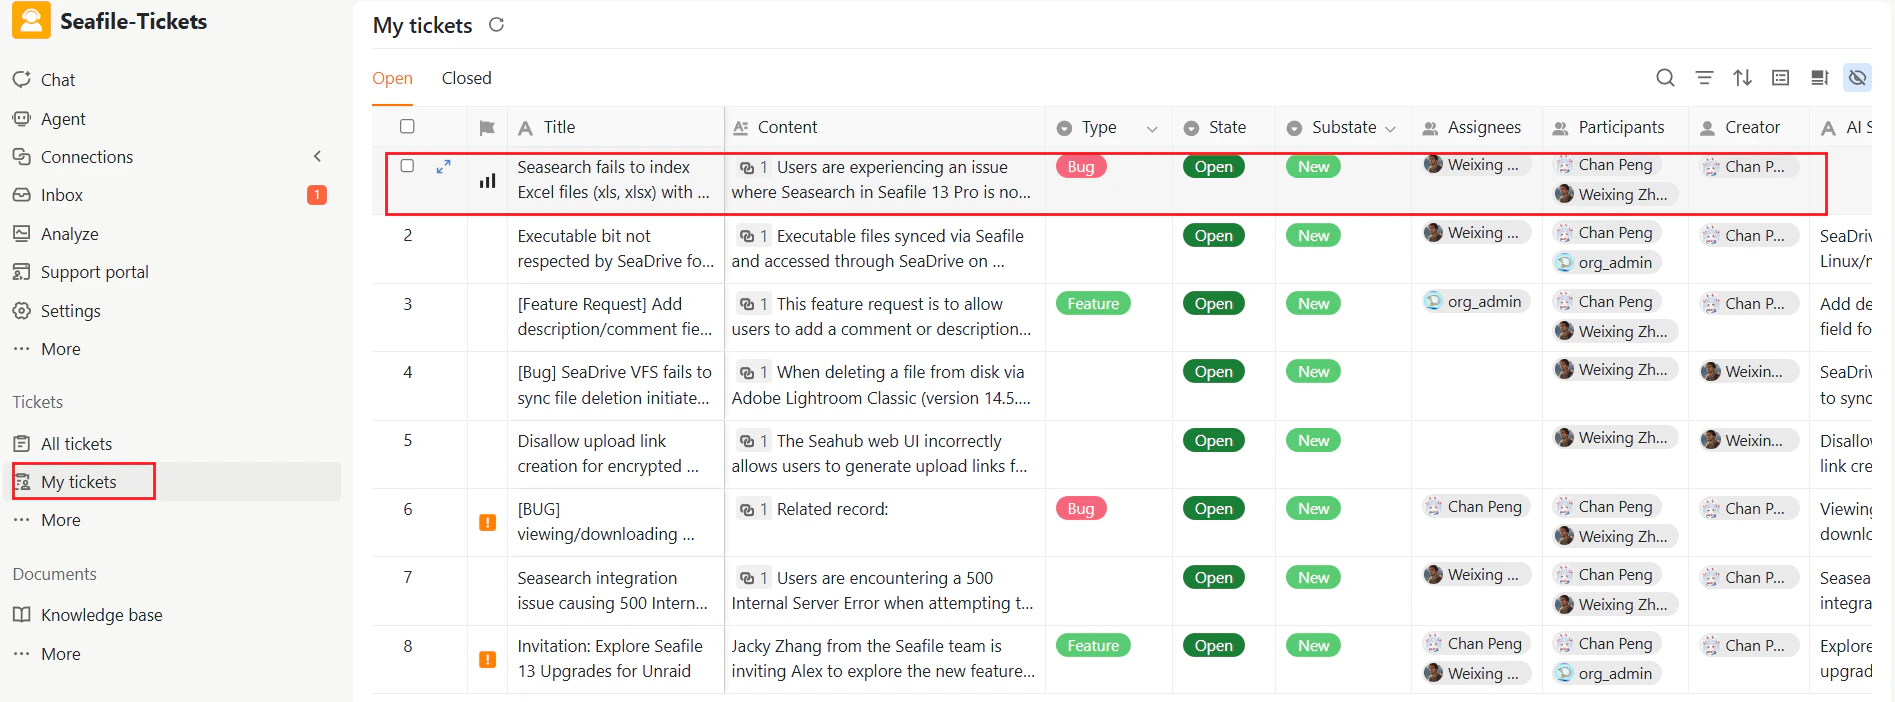
Updating Priority and Other Fields
In the ticket list view, you can update fields such as Priority, Type, and Tags at any time by clicking directly on those fields. You can also open a ticket and update fields in the Ticket Properties panel on the right side.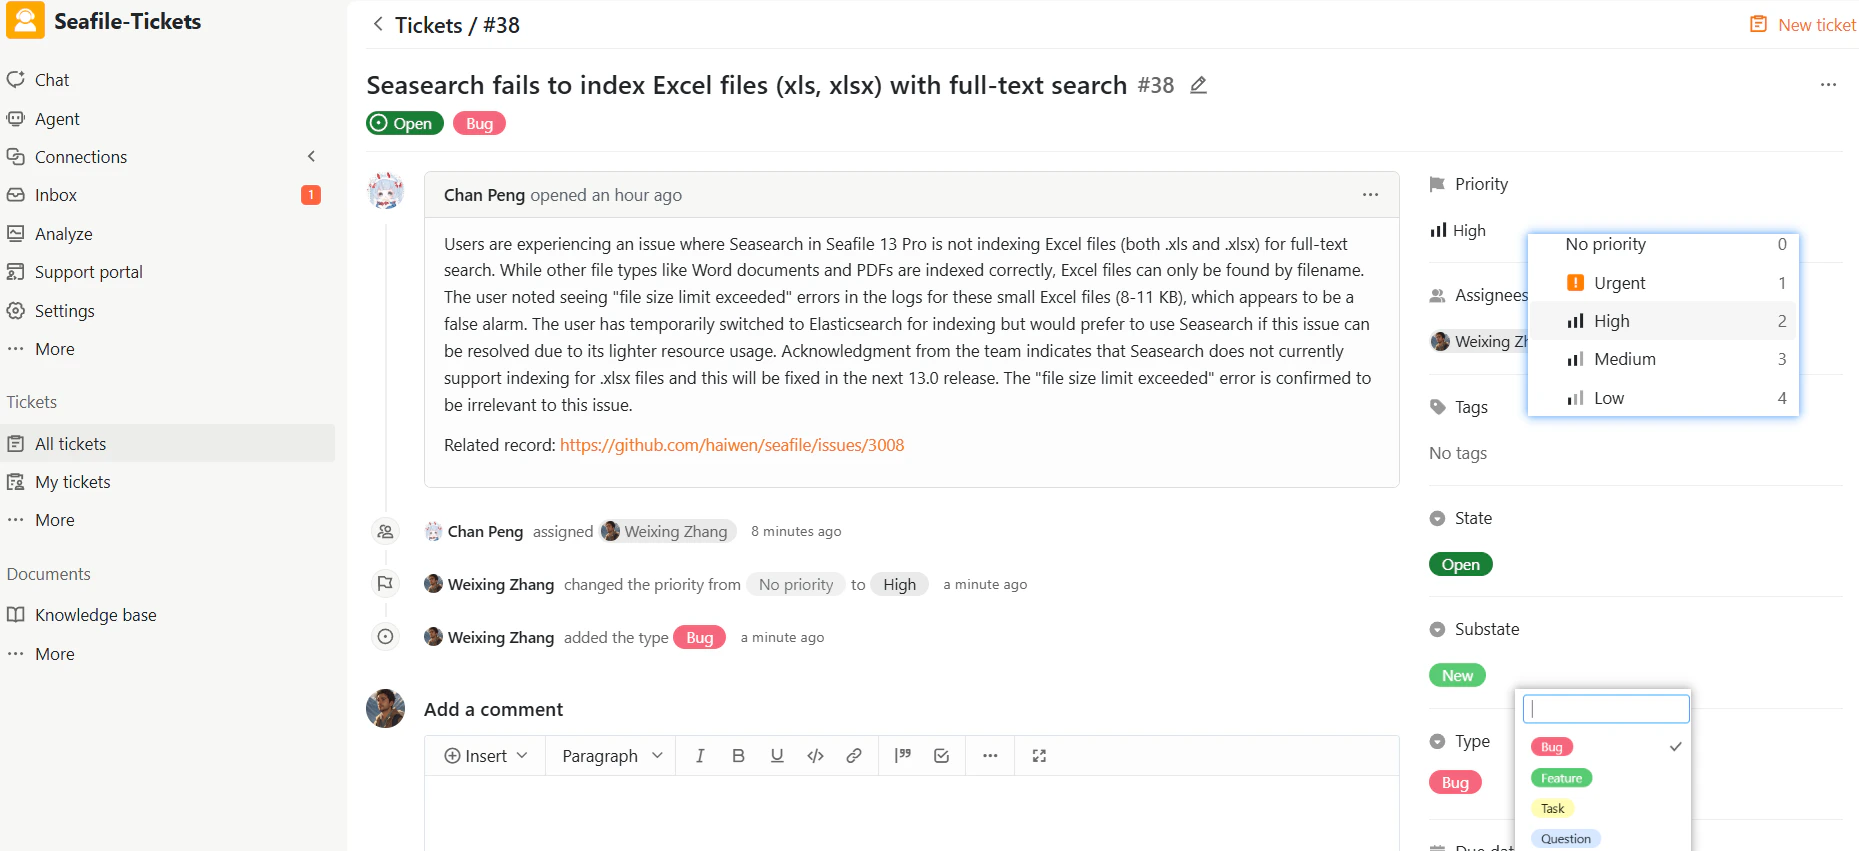
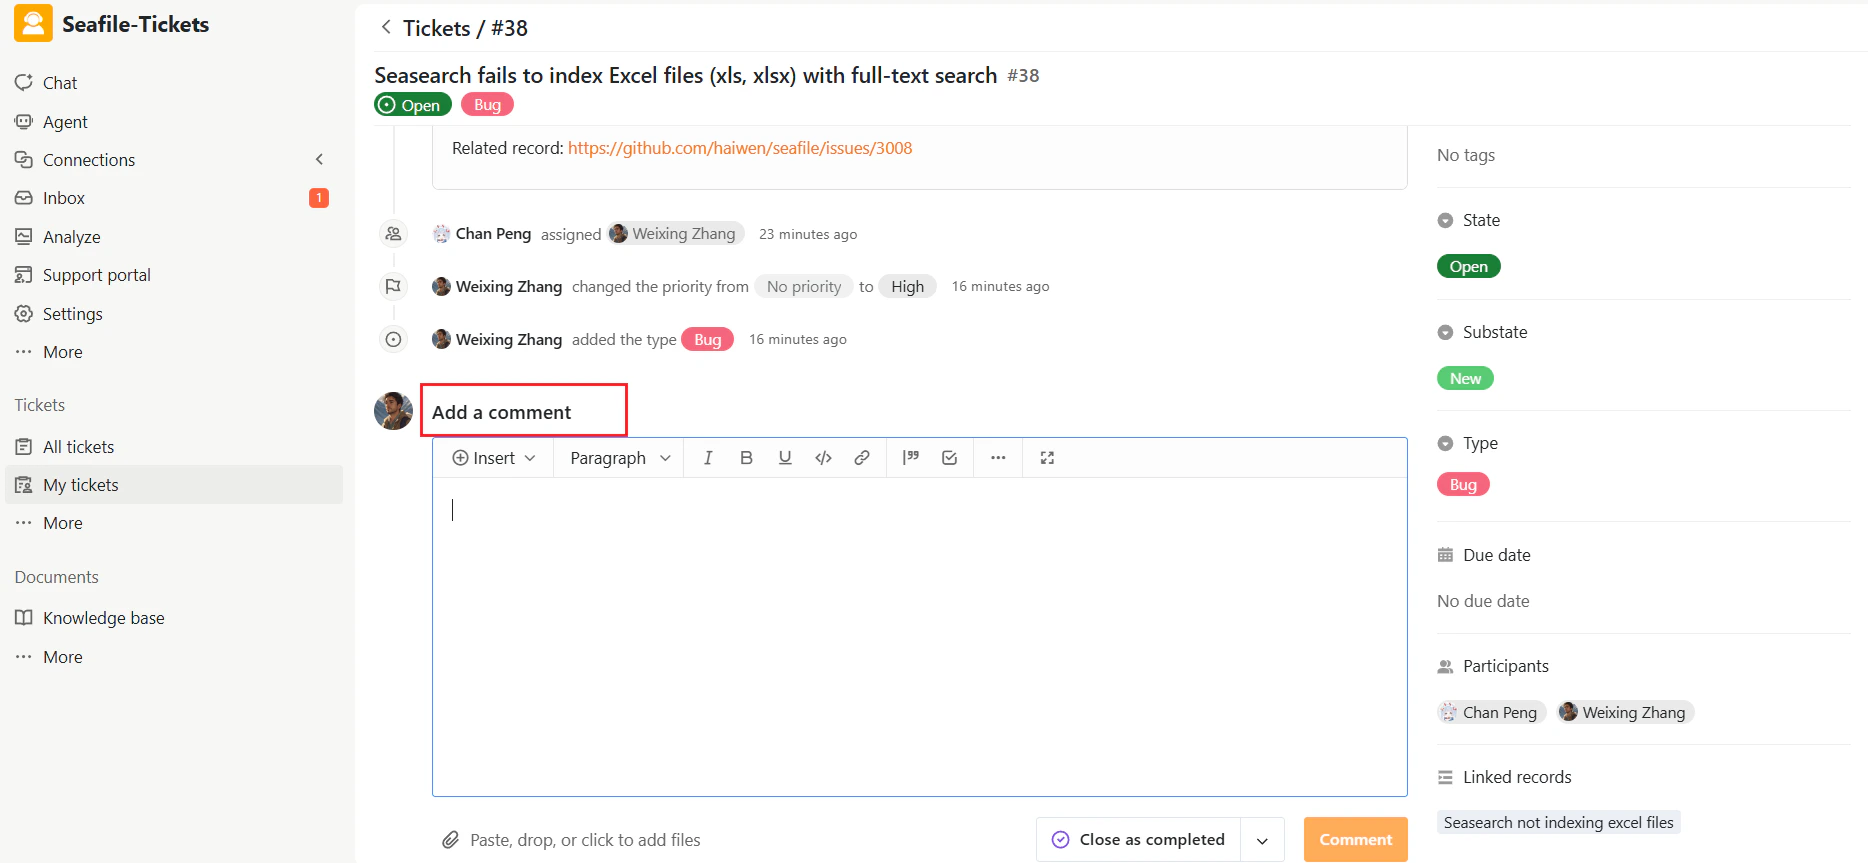
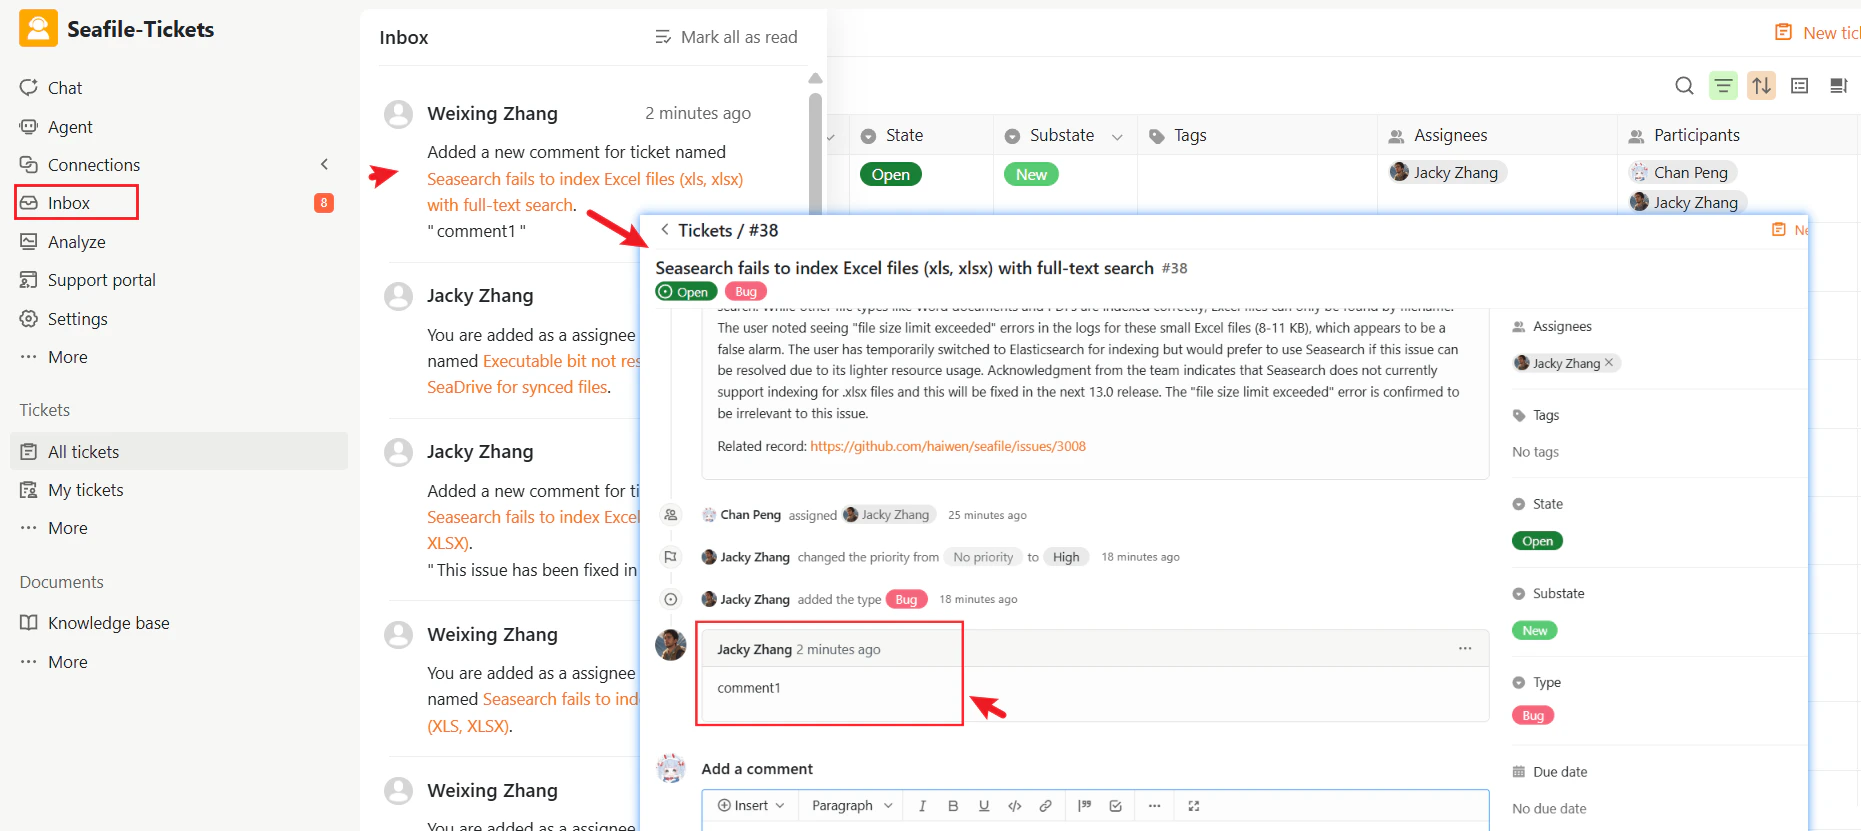
Adding comments
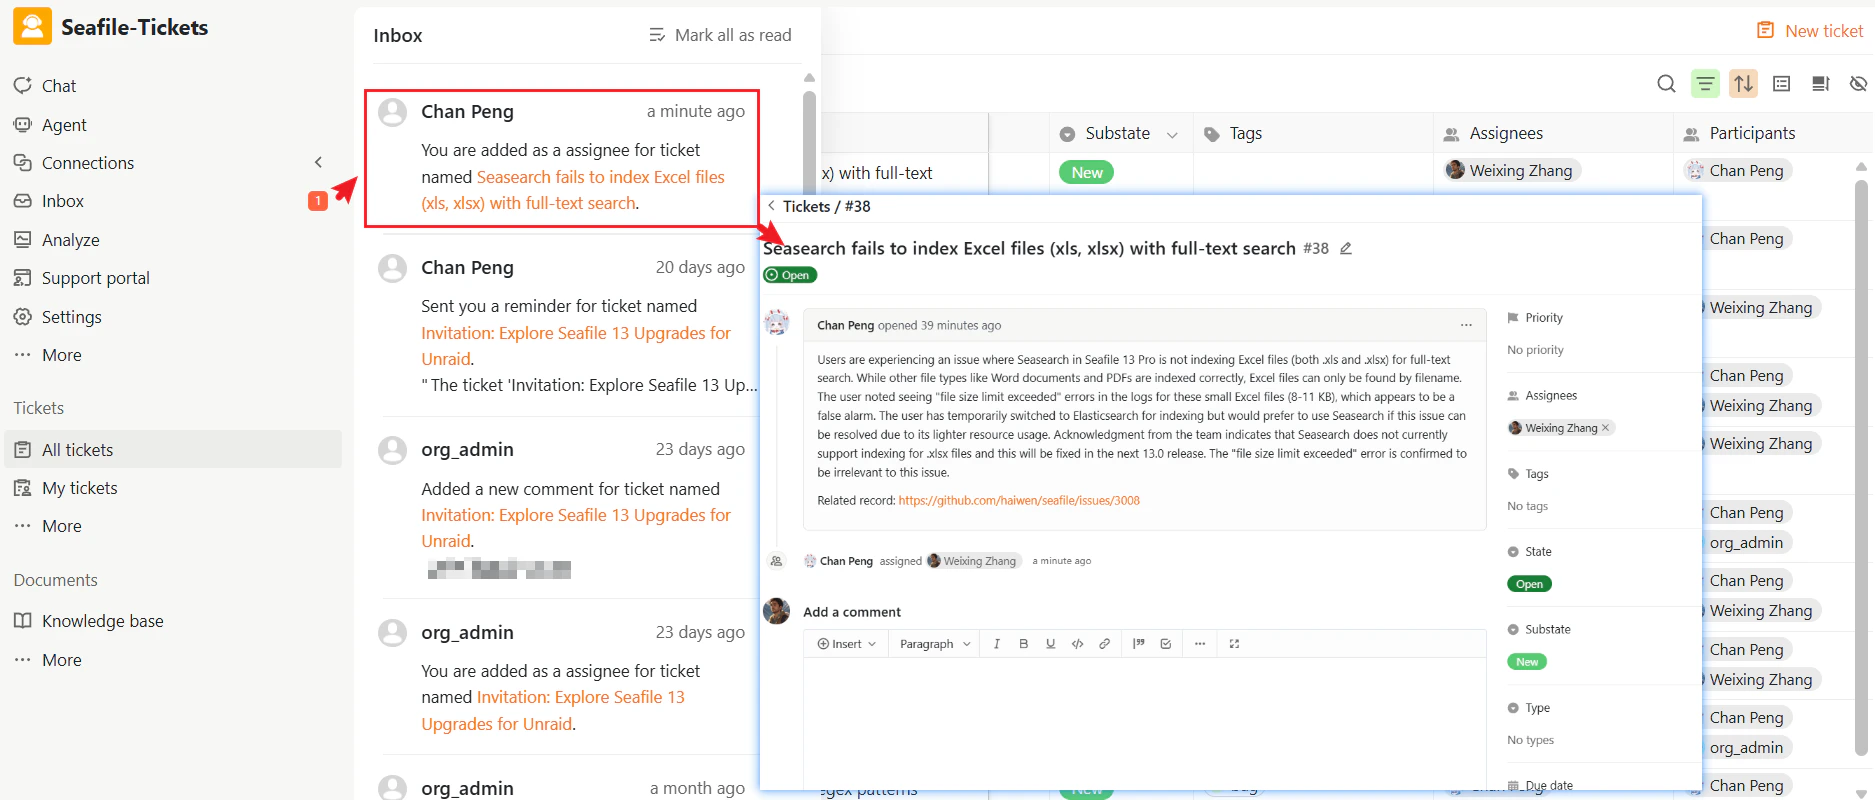
Comments are where communication, collaboration, and status updates happen during ticket handling. To add a comment:- Click the ticket title to open the ticket details page.
- Scroll to the Add a comment section.
- Enter your comment and submit.
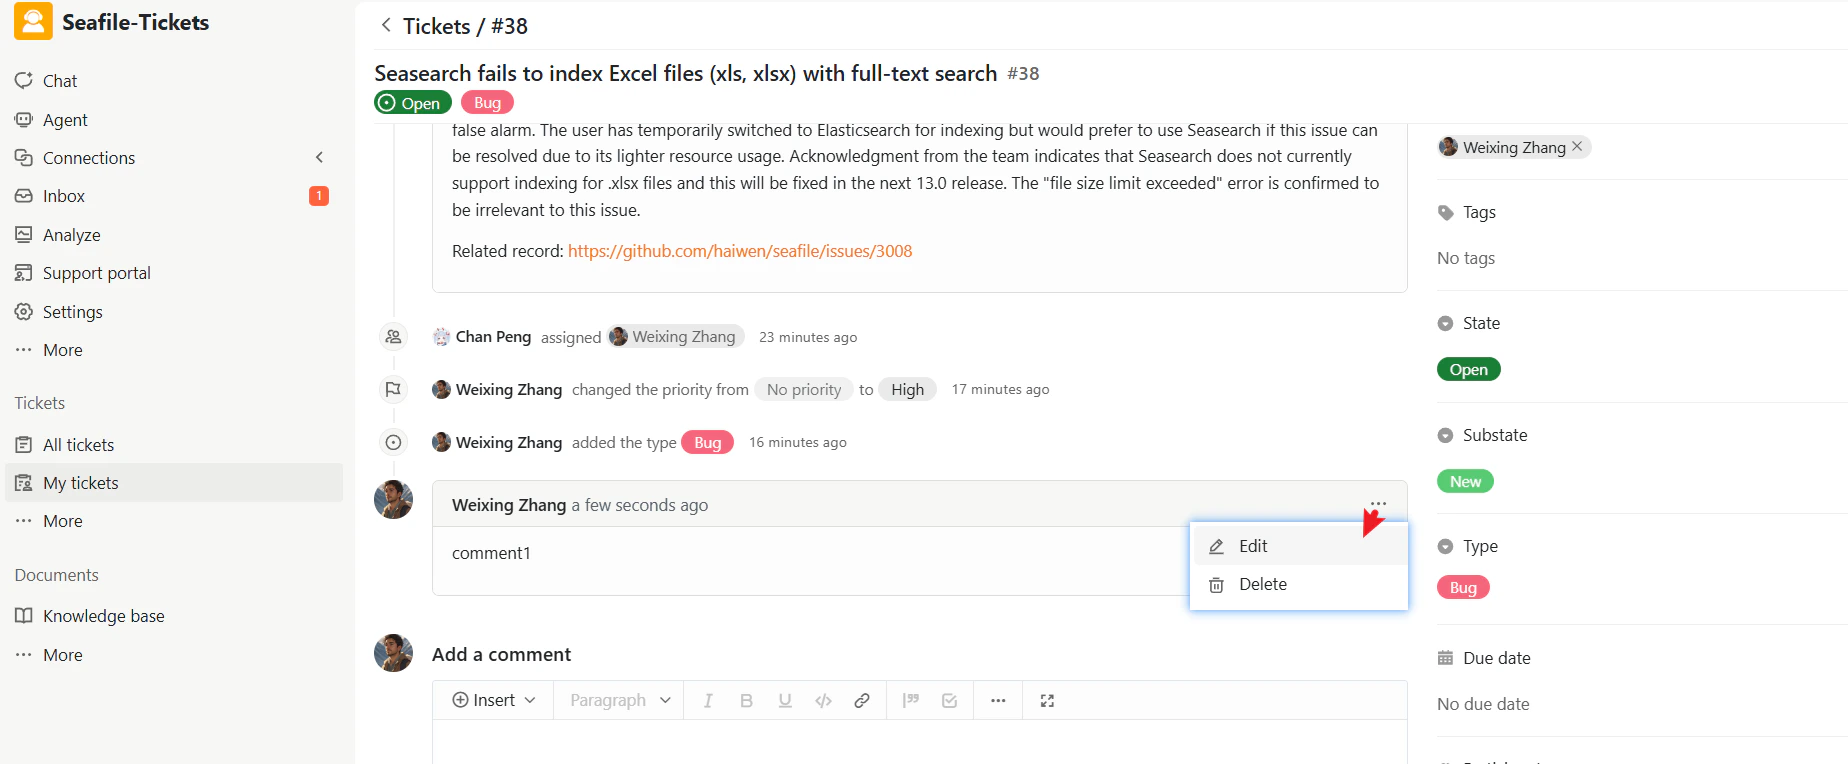
Editing or deleting comments
To edit or delete a comment you posted:- Find the comment.
- Click … next to the comment.
- Select Edit or Delete.
Formatting Comments
Comments support rich text formatting including links, inline images, tables, bold, italics, and bulleted lists. Formatting tools are available at the top of the comment editor. Markdown syntax is also supported.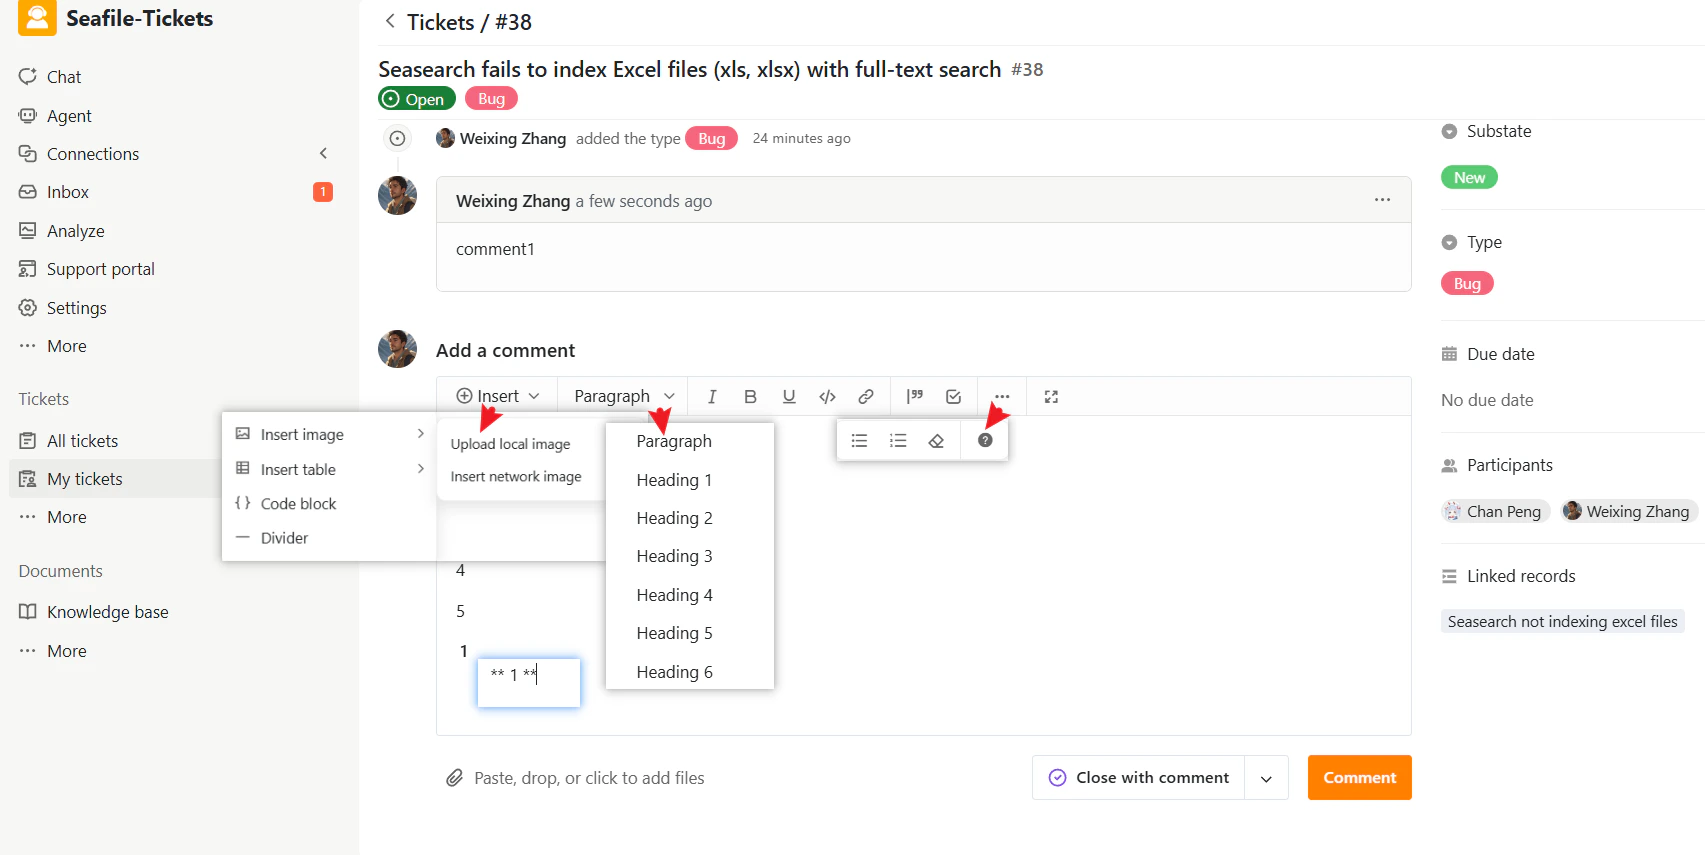
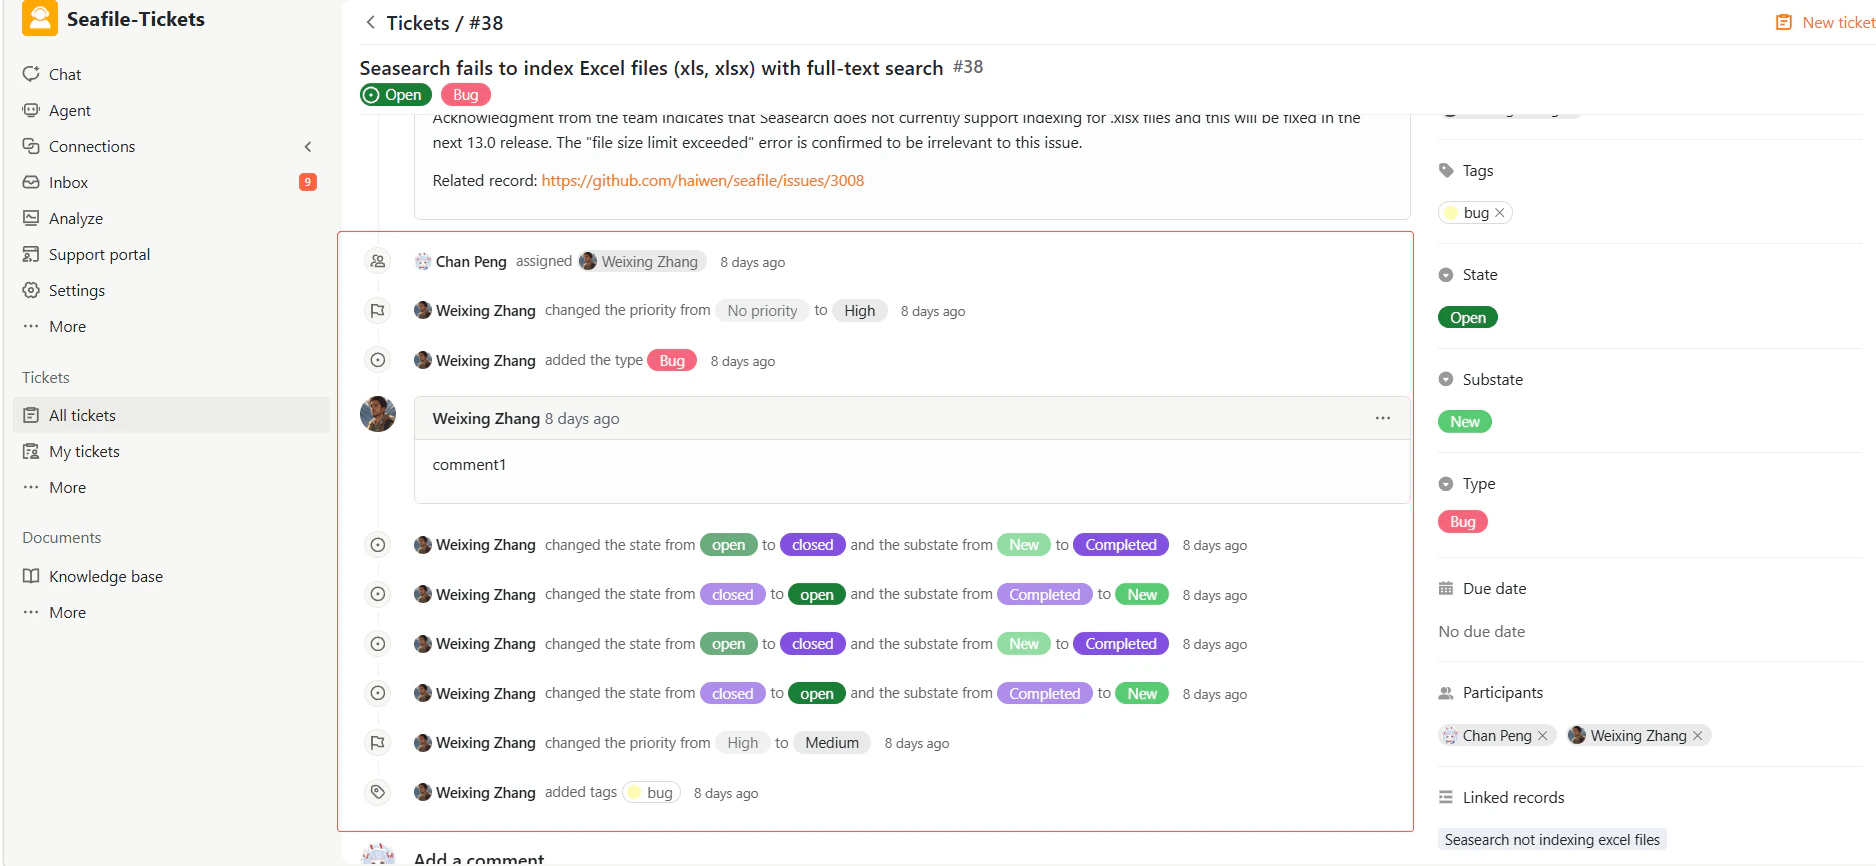
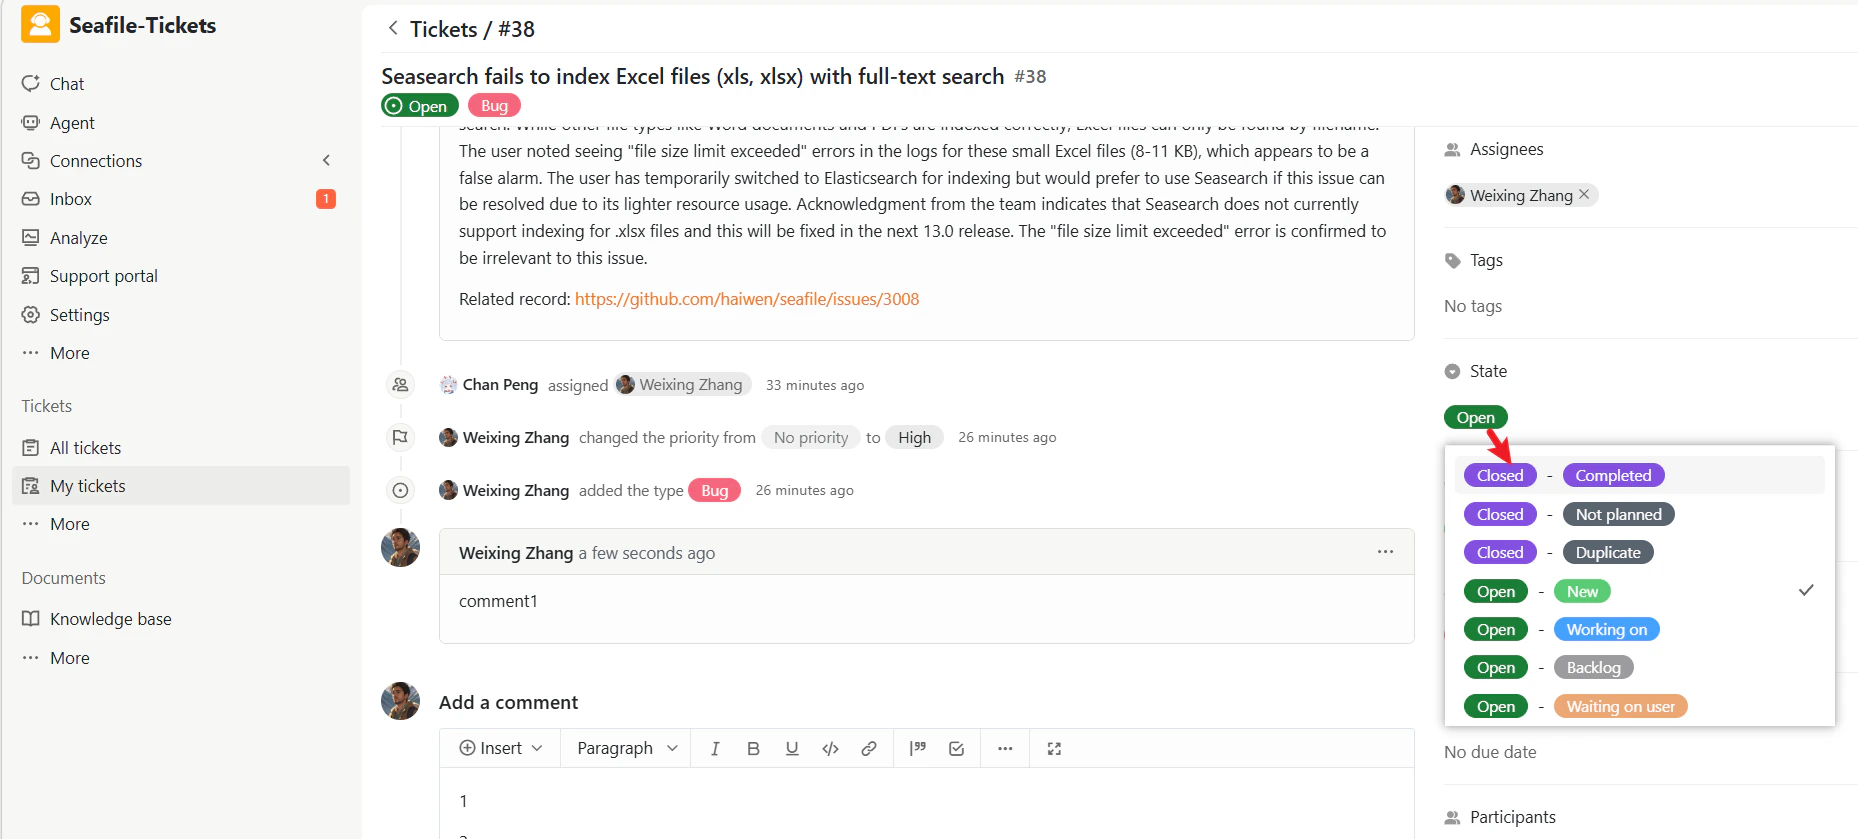
Updating Ticket State
Tickets in SeaTicket move through different states as work progresses. For an overview of ticket states and lifecycle transitions, see the Ticket Life Cycle Overview From the Ticket Detail Page- Open the ticket.
- Click the State button
- Select the desired state from the menu
- Go to All Tickets or My Tickets
- Click the state field directly on the ticket row.
- Choose a new State and Substate.
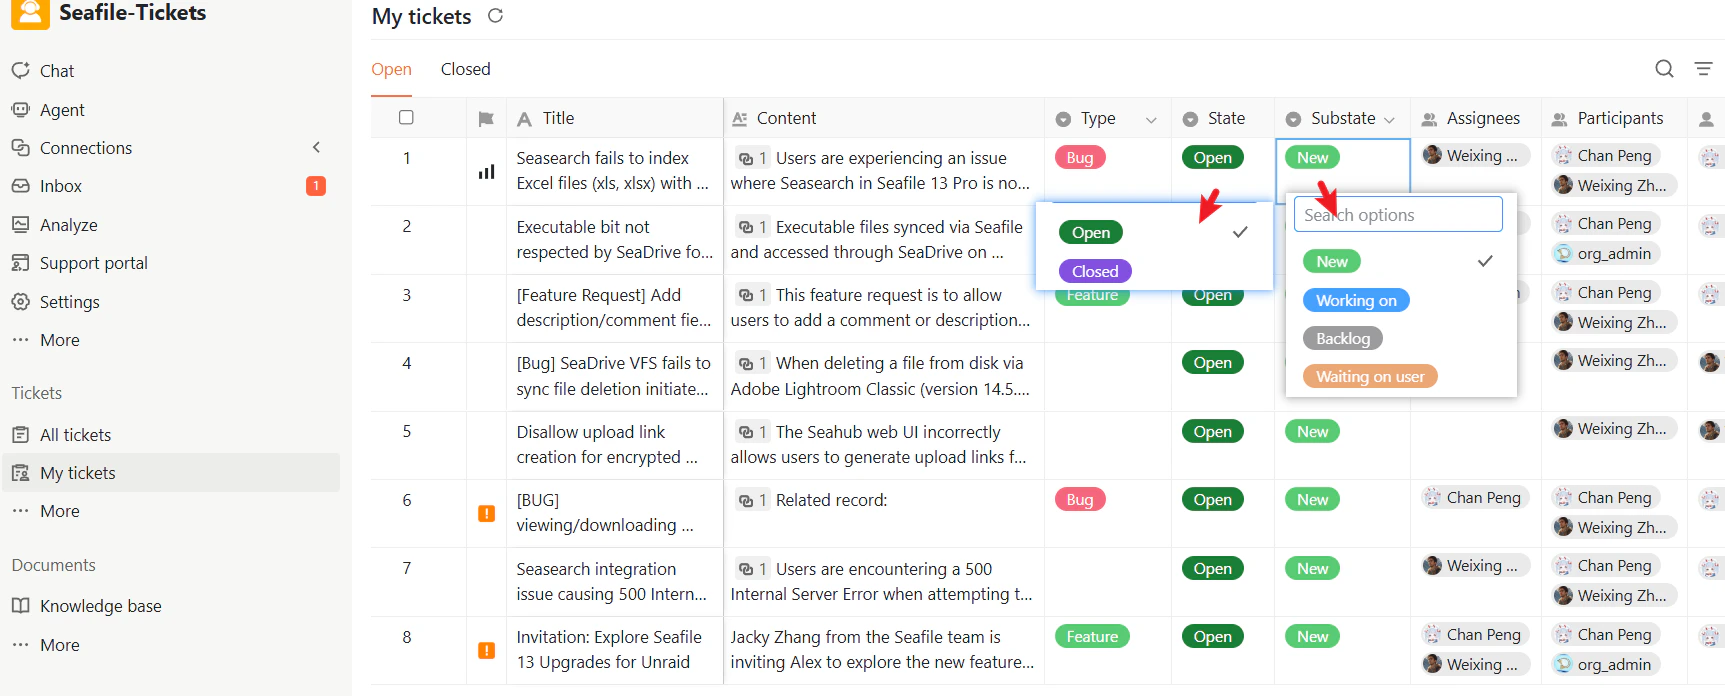
Available states depend on how an administrator has configured the project — you may see the standard states (New, working on, Backlog, waiting on user, Completed, not planned, Duplicate) or custom states configured for your team.
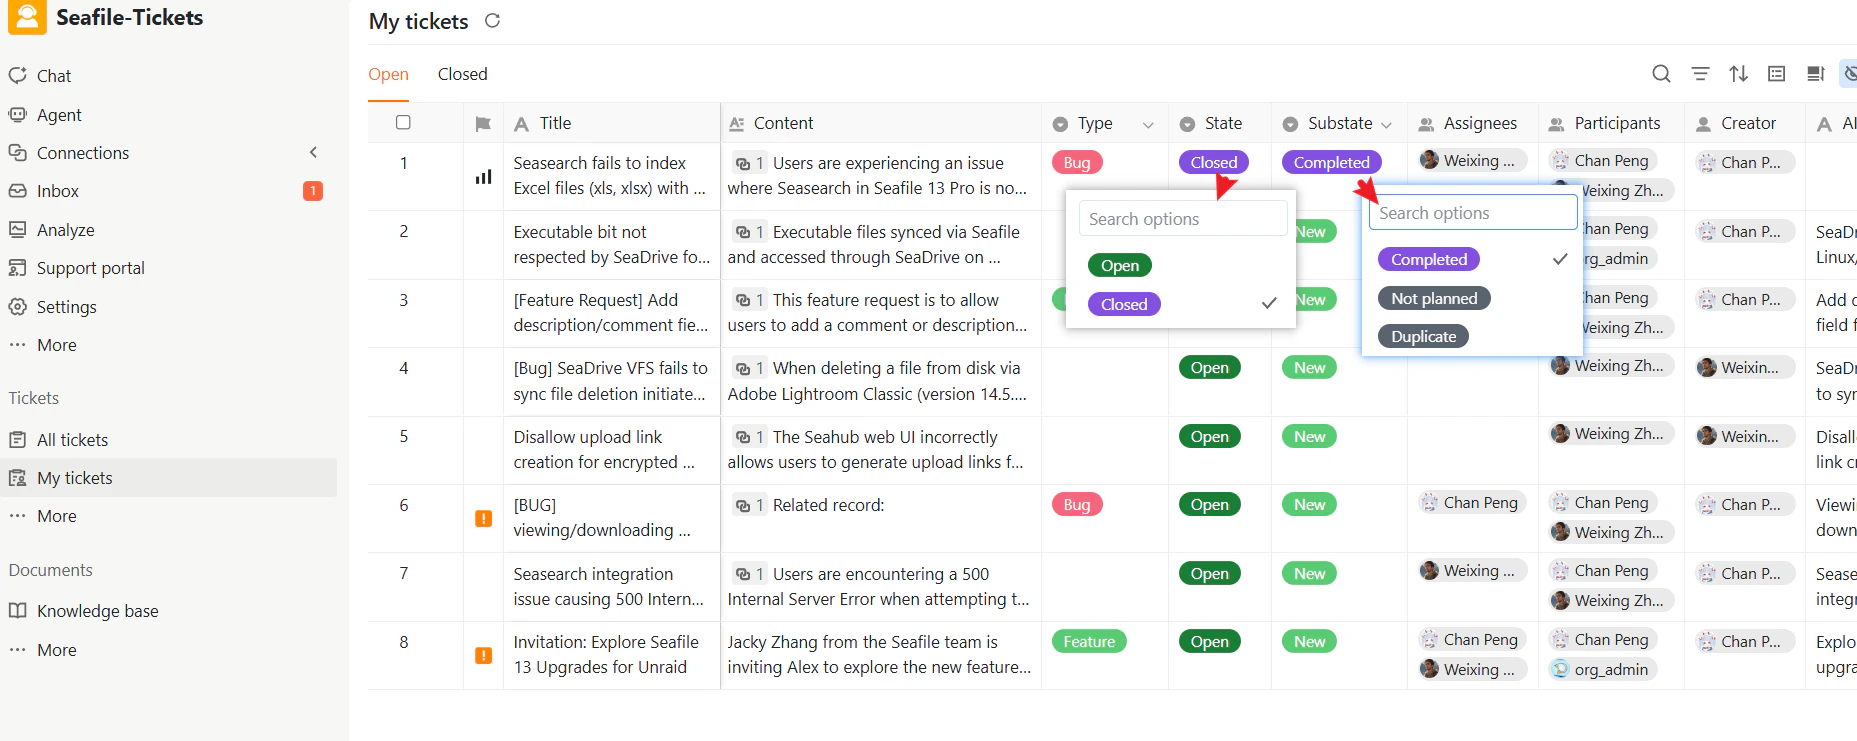
Resolving and Closing tickets
When work on a ticket is complete, you can close it to mark it as resolved.- Open the ticket.
- Click the State button
- Select Closed and choose a substate that describes the reason for closure
Reopening a Closed ticket
If an issue is not fully resolved, a responder can reopen the ticket. To reopen a ticket- Open the closed ticket.
- Click Reopen as New and choose a reopen option:
Reopen as new
Reopen as new
Resets the ticket to new status, treating it as a fresh issue.
Reopen as working on
Reopen as working on
Marks the issue as actively being worked on again.
Reopen as backlog
Reopen as backlog
Adds the issue back to the backlog for future attention.
Reopen as waiting on user
Reopen as waiting on user
Marks the ticket as waiting for additional input before proceeding.
Close as not planned
Close as not planned
Closes the ticket with the reason that it will not be fixed at this time.
Close as duplicate
Close as duplicate
Closes the ticket as a duplicate of another existing ticket.
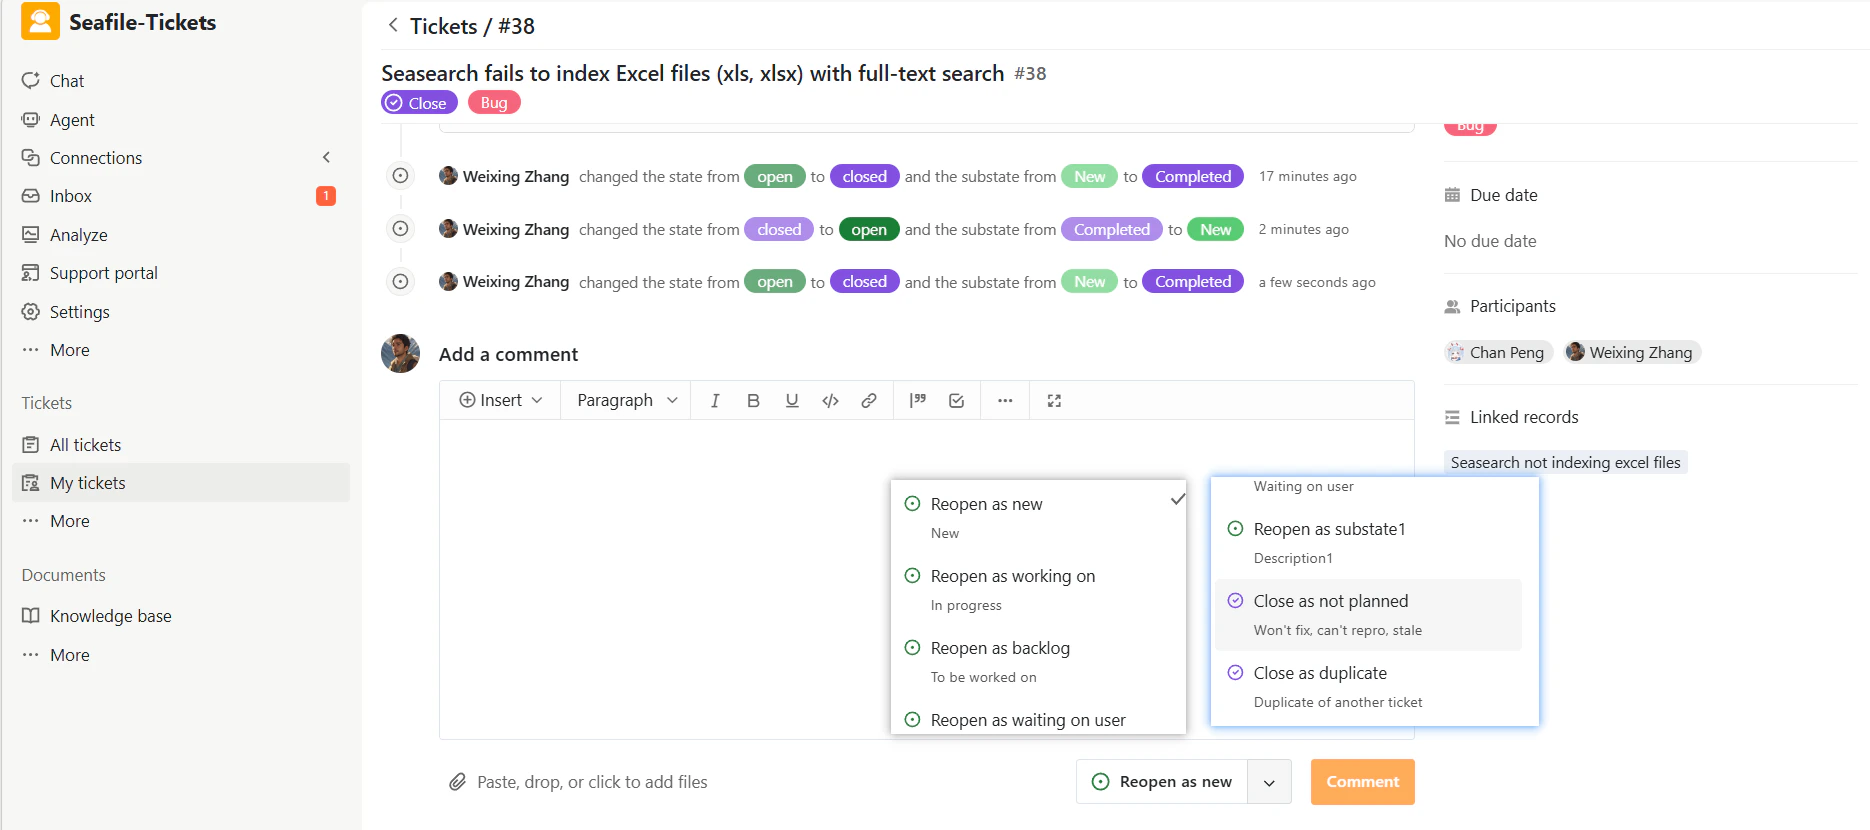
- Optionally add a comment explaining why the ticket is being reopened.